

Nice work on the seeds, your journal is coming along great.
Navigation
Install the app
How to install the app on iOS
How To Use Progressive Web App aka PWA On 420 Magazine Forum
Note: This feature may not be available in some browsers.
More options
You are using an out of date browser. It may not display this or other websites correctly.
You should upgrade or use an alternative browser.
You should upgrade or use an alternative browser.
DrCannaCanadian: MarsHydro & Seedsman, Soil & Coco, 2020
- Thread starter DrCannaCanadian
- Start date
- Thread starter
- #82
DrCannaCanadian
Well-Known Member
Nice work on the seeds, your journal is coming along great.
Thanks again for your support @Pennywise !
This site has just about everything I could imagine - sponsors, prizes, give-aways, communities for every interest, news, grow journals, and the people - especially the people!
Unfortunately, I have never had an interest in photography, and the other day I tried to take some shots of the seedlings - the shots were all blurry - it really frustrated me - but, I shrugged it off and carried on.
And today, I've had some people PM me and tell me just how important pics are here. They have encouraged me to learn how to use the camera on my phone, look up Android camera apps, and read about basic photography.
Well, for the next few weeks, I am going to take a leap into amateur photography and see if I can improve this very important part of journaling!
- Thread starter
- #83
DrCannaCanadian
Well-Known Member
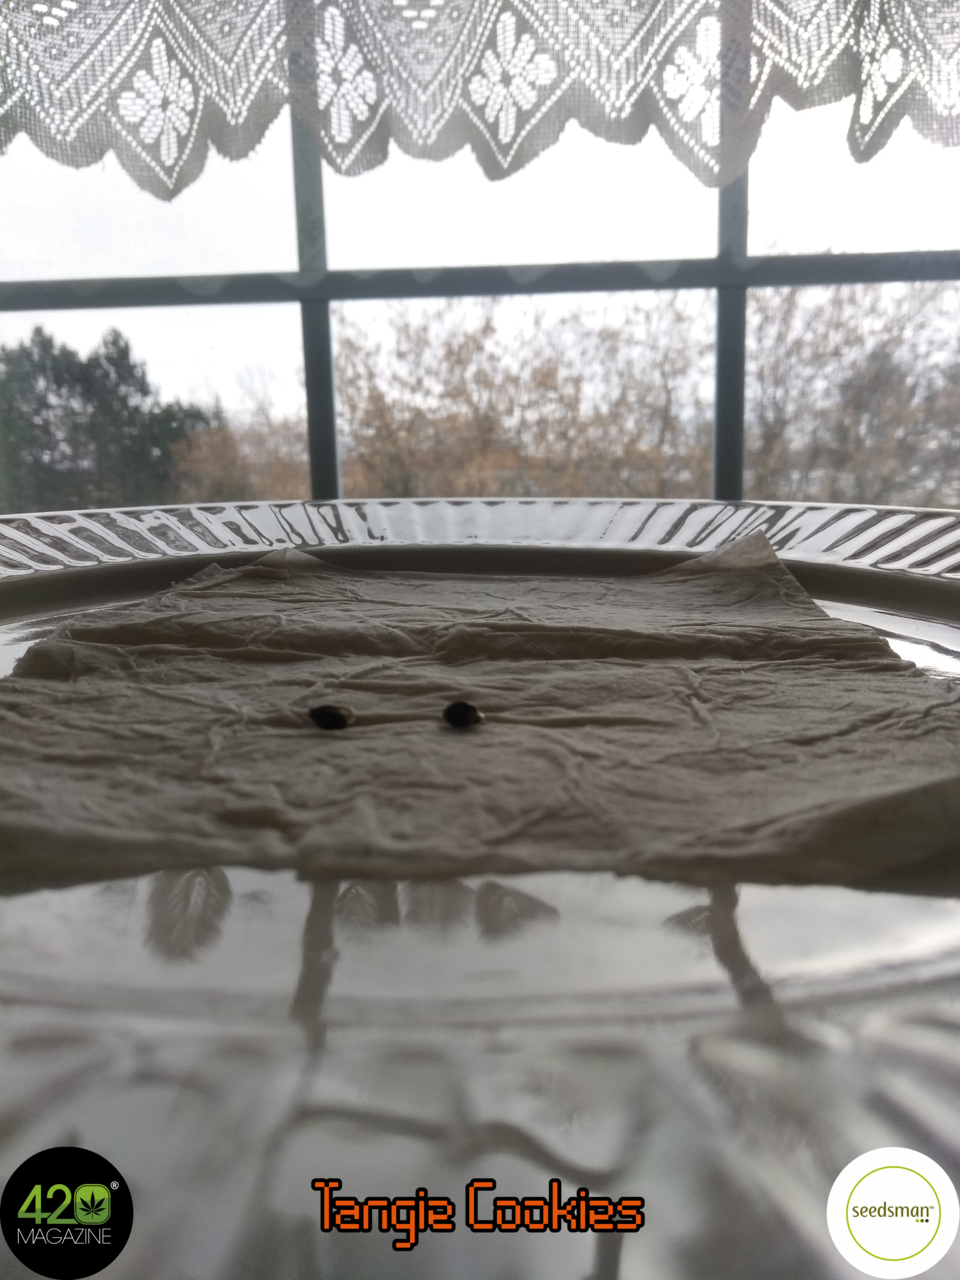
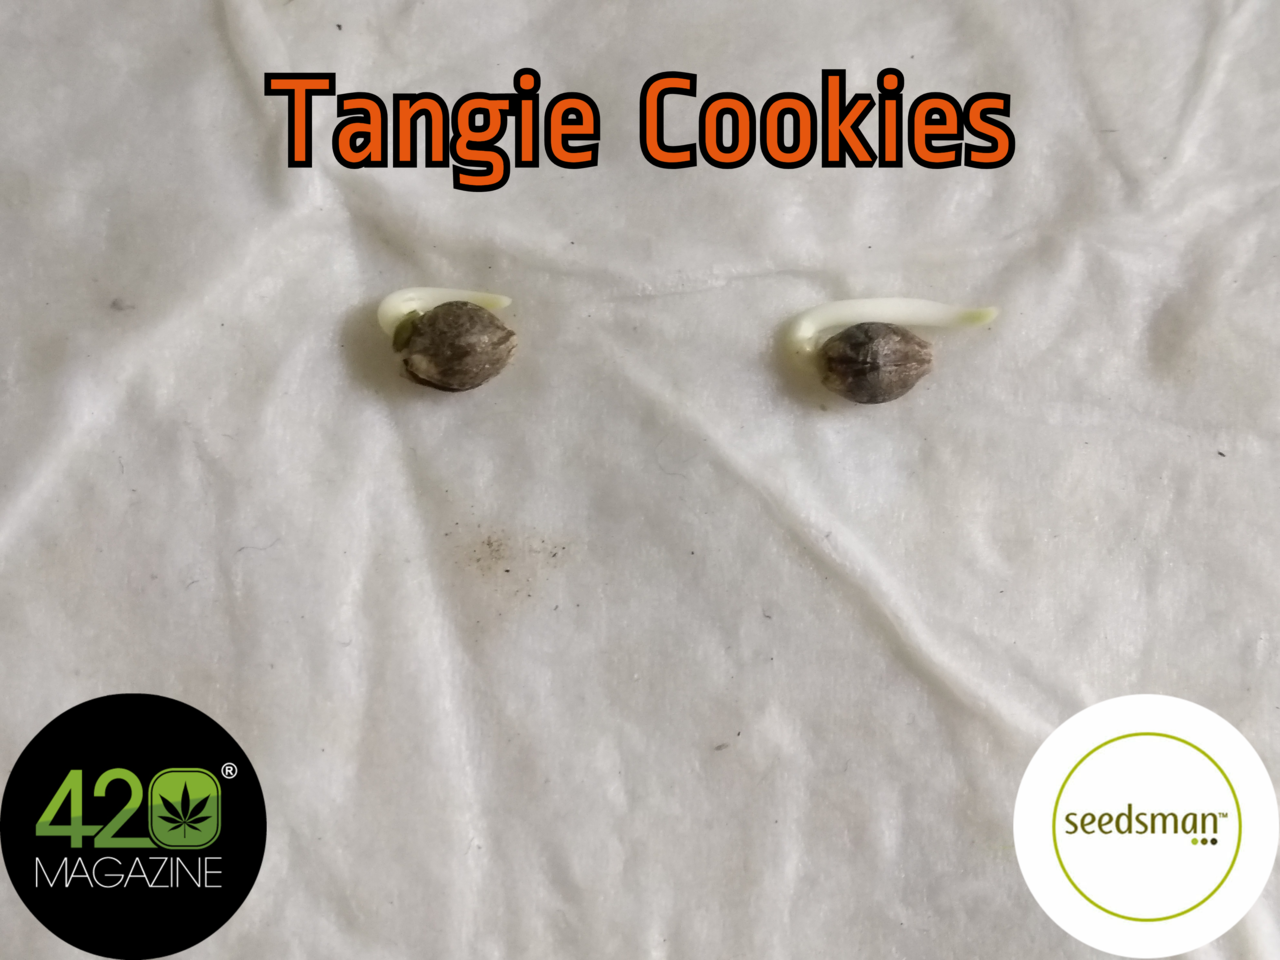
Alright, here we are about 24 hours into the BC Bud Depot Tangie Cookies seeds from Seedsman germinating in paper towel. Both seeds already have small tap roots - and at this rate, I should be able to plant them into solo cups in about 12 hours!
It's all about quality seeds folks!

On the advice of new friends here, I have decided to deviate from studying cannabis breeding, and shift my attention over to learning how to take good cannabis photos. This is going to be fun!
So, here's my artistic rendition of "Cannabis Seeds Dreaming About Growing Outside As Big As Trees":
It's all about quality seeds folks!
BC Bud Depot Tangie Cookies Seeds From Seedsman
Alright, here we are about 24 hours into the BC Bud Depot Tangie Cookies seeds from Seedsman...
On the advice of new friends here, I have decided to deviate from studying cannabis breeding, and shift my attention over to learning how to take good cannabis photos. This is going to be fun!
So, here's my artistic rendition of "Cannabis Seeds Dreaming About Growing Outside As Big As Trees":
Cannabis Seeds Dreaming About Growing Outside As Big As Trees
On the advice of new friends here, I have decided to deviate from studying cannabis breeding...
Great journal so far, I'll tag along!
I may have missed it but what setup are you running? 4x4 tent, which MH light ect?
I may have missed it but what setup are you running? 4x4 tent, which MH light ect?
i have never mastered the focus on the camera in my phone,, but i think the focus can be controlled
i have an early panasonic digital that works quite nice for me
and i like to play with it as well
.JPG")
karma sent to the wee ones friend,, be a fotog
i have an early panasonic digital that works quite nice for me
and i like to play with it as well
karma sent to the wee ones friend,, be a fotog
- Thread starter
- #86
DrCannaCanadian
Well-Known Member
Great journal so far, I'll tag along!
I may have missed it but what setup are you running? 4x4 tent, which MH light ect?
Hey @DeeCee112 , grab a chair in the front row and enjoy!
I usually like to post a lot of theory about growing cannabis from Royal Queen Seeds, but for the next little while I need to focus on learning about taking good macro pics with my phone.
And thanks for the reminder, the tent is basically set up now - so I will post an update on the environment soon.
- Thread starter
- #87
DrCannaCanadian
Well-Known Member
i have never mastered the focus on the camera in my phone,, but i think the focus can be controlled
i have an early panasonic digital that works quite nice for me
and i like to play with it as well
karma sent to the wee ones friend,, be a fotog
Hi @nivek, nice shot of the bud with the other bud blurred in the background.
So far I've been reading so much about macro photography - trying to pick up the theory.
I'm hoping there is a nice mobile app I can use to get grid lines, and change all the manual settings on my phone.
Okay amigo, a quick update - and then back to practicing taking pics with my phone!
- Thread starter
- #88
DrCannaCanadian
Well-Known Member
Alright, here we are about 36 hours into the BC Bud Depot Tangie Cookies seeds from Seedsman germinating in paper towel - and as anticipated, they were ready to go into solo cups of soil.
Darth Vader is still pretty small - but, just in case, I dropped a third Tangie Cookies seed to replace it. As much as I want the "Hippie Crippler" to live, there is just not a lot of gain trying to grow a plant that just won't bounce back and will give low yield and low quality medicine.
I appreciate the gifted seeds - but unfortunately, they are low quality - which is why we need quality seed suppliers like Seedsman!
Anyway, if Darth Vader isn't growing normally by Wednesday January 15th, 2020 - it is going to get culled!
BC Bud Depot Tangie Cookies Seeds From Seedsman
Alright, here we are about 36 hours into the BC Bud Depot Tangie Cookies seeds from Seedsman...
Darth Vader is still pretty small - but, just in case, I dropped a third Tangie Cookies seed to replace it. As much as I want the "Hippie Crippler" to live, there is just not a lot of gain trying to grow a plant that just won't bounce back and will give low yield and low quality medicine.
I appreciate the gifted seeds - but unfortunately, they are low quality - which is why we need quality seed suppliers like Seedsman!
Anyway, if Darth Vader isn't growing normally by Wednesday January 15th, 2020 - it is going to get culled!
- Thread starter
- #89
DrCannaCanadian
Well-Known Member
Why do I use a solo cup, then up-pot to a 1 Gallon, then to a 3 Gallon, then to a 5 Gallon, and so on?
Roots grow outward for stability, so they naturally collect at the edges of the container and leave much of the soil in the middle of the pot unused. This will cause slowed growth because the roots may restrict each other. Transplanting allows for a more efficient root mass, as the space in the middle of the final container will be used.
Allowing the roots to collect at the edges of your 1-gallon pot, will ensure a more efficient root mass when transplanting to a 3-gallon pot. Each time you transplant, you can also bury the plant up to the first node or branch to shorten it's overall height.
It might be worth mentioning that you can bury the plant low or high in the pot you are transplanting to as well; that way all your plants will start off being the same height. Transplanting high might be a good idea for patio growers in high rainfall conditions - this will help drainage.
When
Transplanting should be done a day after watering because moist roots and soil (not soaking wet or bone dry) will slide out of the old pot easier. The soil will hold together better, and less root damage will occur.
How
You should loosen the root bound roots from the bottom and lower sides of the root ball by teasing them out loosely and gently - this will help the transition. if there are too many hanging down after teasing, then it is okay to cut or tear a few handfuls of roots away. If the roots are wrapped around the root ball in the shape of the original pot, then it's best to cut these away to promote faster root penetration into the new pot.
Timing
The secret is the timing of the transplant; you want when the roots have filled the original pot, but before the roots have wrapped around and the plant has become root bound.
The danger of transplanting too early is that when you lift off the pot, some of the soil and young roots may become damaged due to the fact that there is insufficient amount of roots to hold all the soil together.
The danger of waiting too long before transplanting is that growth will slow, as the plant has insufficient root room to match the above ground growth — ultimately yielding less. In addition, micro deficiencies, dehydration and other problems occur more frequently with root bound plants. Root-bound plants also take awhile to become vigorous again.
My Technique
My preferred method of transplanting is to moisten the pots I'm going to transplant, moisten the new soil at the bottom of the new pots with a garden mister (the pump up models are best - misters are by far the best way to moisten the soil because they act like rain and do not compact the soil).
Mist each 3-inch layer of soil - lightly sprinkle around the old root ball in the new pot - this will create the best conditions for new growth. Roots will reach out and grow much faster into a light, airy moist soil than the compacted mud created by a hose, or watering can, to wet down the soil
I believe that many problems are caused initially by compacting the soil.
Lightly moisten your soil before and after transplanting. If a lot of water is pouring out of the holes in the bottoms of your pots when transplanting, then you are probably over wetting the soil and creating soil compaction.
Thanks Smoking Moose!
- Thread starter
- #90
DrCannaCanadian
Well-Known Member
Daily Tips & Tricks

By Royal Queen Seeds
How And When To Transplant Your Weed

Knowing how and when to transplant your babies can add days of resin production in the final weeks of maturation. Little to no transplant shock means minimal time wasted by your plants recovering from broken roots, collapsed root balls or pot binding.By Royal Queen Seeds
How And When To Transplant Your Weed
Expansive healthy roots mean strong turgid plants and fat resin jewelled buds on your mature marijuana plants. Type big into a thesaurus. All those words are what you want for your cannabis plants in every way. You have already decided what grow method you are going to use to make the most of your space. Indoor or outdoor. You will have space for a larger number of small pots as in SOGing or a smaller number of large pots as for ScrOGing or a standard tipped and mainlined grow. You may even be going for broke and have one large pot for a single large space filling marijuana plant. No matter what, you will be transplanting into bigger pots at least twice.
Terms
Pot On: transplanting to a larger pot from a smaller pot.
Re-potting (root trimming): transplanting the plant back into a pot of the same size with a fresh growing medium.
Here we only discuss the appropriate double entendre, potting on.
Knowing how and when to transplant your babies can add days of resin production in the final weeks of maturation. Little to no transplant shock means minimal time wasted by your plants recovering from broken roots, collapsed root balls or pot binding. Unlike hydroponics or deep water culture, growing in a solid medium like soil or coco makes potting on necessary as your plants grow. The goal is for the roots to keep seeking out from the stem and delay coiling in the pot for as long as possible. When roots start to fill the volume of the pot too much, vegetative growth will slow.
HOW DOES POT SIZE AFFECT CANNABIS GROWTH?
In nature, the spacing of plants affects their habit. When cannabis is planted for industrial purposes it is planted very close together. The resulting root tangling releases hormones that encourage a tall plant with no true side branching. This characteristic has been exploited by humans for millennia to obtain perfect long fibers uninterrupted by branch nodes. Close planting also results in only one large main cola where a phenomenal amount of seed is easily accessed and processed. Similarly, when a plant is in too small a pot the same hormones are released fooling it into believing it is close to other plants making it want to grow tall with minimal side branching. This phenomenon is exploited in SOGing where only a main cola is grown on plants with little to no side branching.
When growing marijuana for recreational buds or therapeutically strong flowers the further plants are apart the better. Five square metres is the recommended minimum outdoor area per plant. The spacious root room encourages the plant to fulfill more of its potential. It establishes more vigorous side branches which have multiple sites for flower production. Correspondingly, a big pot makes the plant think it is at a distance from its neighbours so it will have a much bushier aspect. This growth pattern is ideal for modern manipulation techniques like mainlining and SCROGing. The extreme outdoor example, of course, is ten pound plants grown in 4,000 litre grow bags. Mmmmmm ... ten pound plants.
There is no real formula used to gauge ideal pot sizes for your ganga apart from the biggest possible for your particular situation. Things vary indoors and outdoors. You have already considered how much space you have. What type of growing you are going to do. How much personal time you have available for maintenance etcetera. You already know the maximum pot size in which you will finish your cannabis plants, getting the highest yields of buds possible for your personal situation. If you are growing outdoors, ease of maintenance in the early vegetative stage should be considered before planting into your garden, giant pots or grow bags.
WHEN TO FIRST POT ON
Your cannabis clones have taken or your seeds are thriving and have a healthy white root ball. You can see roots emerging from your rock wool starter blocks or jiffy pots. They may be starting to snake their way out of the bottom of your cloning trays or are in plain sight in your quick rooting or atomizing box. If the roots have already started to feather then be swift and gentle, you are running late. The feathering is very delicate and will break off easily. You want glossy white seeker roots. These roots are quite strong and they will easily penetrate the new medium before divaricating on their search for moisture and nutrients. At this point potting on is as simple as filling your chosen pot with growing medium. Make a hole with your finger in the centre and plant your seedling or clone. Back fill gently and water into place.
A clone or seedling potted into a four litre pot will easily be ready for its final indoor location after three weeks. For this whole stage your marijuana plants will be easy to manage with no risk of water logging. There would be no need for an intermediary pot size. Outdoors roots will expand rapidly when given more volume. A four litre pot when potted on with minimal root damage will fill a nineteen litre pot within three weeks. For this whole time they are easily maintained with minimal effort after which they are ready to be potted on again to their final outdoor location. You will need a trusted friend to do a good job of transplanting from a larger pot. They are heavy and struggling on your own is a guaranteed way to do some kind of root damage.
HOW TO POT ON
The mantra here is " Transplant shock is bad. The less root damage the better."
First, water your plants thoroughly and leave to drain well for a few hours. This way the medium will be less likely to collapse when the pot is upended. Overly dry or saturated root balls collapse easily.
Gently squeeze the pot with both hands. Apply even pressure to each point of the compass.
With fingers placed either side of the stalk, palm flat on the surface of the grow medium, turn the pot completely upside down and make sure you have it balanced well.
Lift pot away to reveal the root ball. Timed to perfection a well-formed root mass will hold all the medium in place in the shape of the pot and not sag or break and fall apart. The roots will be bright white and not have feathered too much or have knotted at the bottom. If the roots are slightly yellowed and the root mass is very dense then you are a bit late but richer in experience. If the grow medium slumps away exposing seeker roots to the air then you are too early, but again, richer for the experience. In this instance delay your potting on for a few days so the rest of your weed crop can develop more roots and avoid being traumatized.
Fill your target pot close to full with moistened medium. Make a divot for the transplant to stand up in while you gently back fill around.
Water with the same amount used for the smaller pot for at least two days to avoid water logging the soil while the roots grow. Slowly increase the amount as the root ball and plant get larger.
This is up to you. The only issue is the risk of water logging soil that is yet to be invaded by roots. Use care when watering so as to not water log the bottom of the pot. Roots will recoil from saturated soil and be prone to rot. Leaves will curl under and growth will slow. Cannabis likes dry feet, so err on the side of caution. Water sparingly in the first week after potting on if you choose to go to the biggest pot immediately. You must consider though that in the early weeks of vegetation smaller pots are easier to look after. During those initial weeks well maintained marijuana plants have a substantial amount of attention paid to them. Small pots are easier to move about when tending and can be easily rotated to give 360 degree light coverage.
WHEN NOT TO POT ON
If you are growing autos put your sprout straight into the finishing pot and carefully increase water levels. Days are precious with autos. Four days recovering from unintentional root damage can be 6% of the grow time. That's 6% less dry yield at the end of the cycle.
A very reasonable plant can be grown in a thirty centimetre (12") pot and an exceptional plant in a sixty one centimetre (24") pot. All standard pots are alike in that their diameter at the rim is equal to their depth. A healthy cannabis plant can easily have a canopy three times the diameter of the pot.
- Thread starter
- #91
DrCannaCanadian
Well-Known Member
Daily Tips & Tricks
By Royal Queen Seeds
How And When To Transplant Cannabis Seedlings

The seedling phase is arguably the most important of the entire cannabis life cycle. Whether you grow from seed or clone, the hands-on part of cultivation begins with seedlings. Transplanting is all important. Get it wrong, and the crop could be lost. Get it right, and grow great ganja with this guide.By Royal Queen Seeds
How And When To Transplant Cannabis Seedlings
THE IMPORTANCE OF CARING FOR CANNABIS SEEDLINGS
Post-germination or post-cutting, your bean or sprout needs a place to take root. The prime objective for the cannabis plant during the seedling stage is the development of a healthy root zone. If your seedlings struggle now, it’s likely they may never completely recover, and even more likely they won’t reach their full potential. Worst case scenario, seedlings die off and the grow is over before it’s even started.
THE OPTIMAL CONDITIONS FOR SEEDLINGS
Cannabis seedlings need to be treated delicately. Mind your marijuana like babies. If seedlings need support, prop them up with a toothpick or a cocktail stick and some soft gardening wire.
An 18-6 light schedule is considered the sweet spot by most growers. White light is preferred. The source of light should be CFL, MH, or LED. If you have a sunny windowsill, it can work in a pinch.
Roots grow in the dark. That’s why we advocate 18-6 or 20-4 over a nonstop 24-hour light cycle. High humidity, ideally around 70% RH, and temperatures in the 20°C (68°F) to 24°C (75°F) range make for a perfect seedling habitat. A propagator, thermo-hygrometer, and a spray bottle of water are the tools to help you dial it in.
Stretchy or floppy seedling growth can be due to genetics. Often, it’s an indication the grow lamp is positioned too far away from the canopy. A cool white 250W CFL can comfortably hang 15cm (6") above a dozen or more seedlings without scorching leaves.
WHAT’S THE BEST STARTER SUBSTRATE?
The medium must be wet, not waterlogged. An effective wet-dry cycle is the goal. Remember to resist the temptation to overwater. Better to mist plants with a sprayer if you are not sure. Touch the medium to feel how dry it is and keep RH high.
Before we go into the specifics, we need to be clear that starting in one medium and switching to another can be hazardous. Keep it simple and keep it consistent. You can’t start seedlings in soil and transplant later into a DWC bucket.
CUBES, CUPS, AND SMALL CONTAINERSRockwool cubes and blocks are made for hydroponic growers. Start your seedling in a small cube and it couldn’t be easier to transplant later. Simply cut a cube-sized chunk out of a larger block and insert. The process can be repeated with minimal stress to plants.
Unfortunately, rockwool is a really bad idea for soil growers, even the smaller sized blocks. Invariably, the block retains more water than the surrounding soil. Green, sludge-like algae growth soon becomes a problem. Sure, sometimes you can get away with the tiny cubes, but why take the risk?
An oxygen-rich medium that drains well is the ideal mix for soil and/or coco growers. Between these two growing styles, there is the most overlap during the seedling stage. Peat or coco cubes are easy to use and relatively inexpensive. Similar to a rockwool block, you can visually monitor root development as the white spaghetti strands protrude from the cube. Growers, both organic and hydro, working with clones report the highest success rates using the cube-sized starter mediums.
Many soil and coco growers use cups or small plastic pots as starter containers, typically, anywhere in size from 0.5 l (0.5 qt) to 5 l (5 qt). Lightly fertilised soil mixed with perlite or coco coir mixed with 30–50% perlite are the most common blended media for seedlings. So long as the base of the container has plenty of drainage holes and the interior can hold the volume of medium required, it can serve as a starter pot. Don’t be afraid to improvise. Poke a few holes in the base of a paper coffee cup with a pin and it becomes a pot.
The right time to transplant your seedlings is just before they outgrow their current container. With cubes, you can see roots poking out telling you it’s time to pot up. When you start with a cup or small pot, you are relying on above-ground cues. Typically, when the set or sets of true leaves of the seedling have spread out to cover the circumference of the container, it’s time. Also, vertical growth will be an obvious indicator.
Don’t wait too long to transplant. Rootbound plants will take time to recover and may be permanently stunted. In general, it takes 7–10 days for a seedling to take root and outgrow small starter pots of 1 l (1 qt) or less.
HOW TO TRANSPLANT SEEDLINGS
Cubes are the easiest to work with. Either cut a hole to size in a bigger block, or burrow a hole into the medium with your fingers and insert for a snug fit. Potting up takes a little more finesse. First, don’t fill your large container all the way to the top. Leave room so you can water properly later. If you pack the pot all the way to the top, water will mostly run off and not reach the roots.
Next, make an impression in your large container with another small pot, or the one with the plant in it if you don’t have any others. Make this impression in the medium after you have watered it. This creates a perfect imprint for the transplant.
It’s best to wait until the medium in the small pot is dry before going for a transplant. Wet soil can fall apart in chunks as you fumble with the sopping mud. Now, turn the dry plant upside down, and firmly pat the bottom. Grasp the plant stem from the base and ease the compacted medium out of the container in one piece. Some topsoil will spill, but don’t worry.
Finally, gently slide the plant, roots first, into the large container. Replace the lost topsoil or coco with a handful or two over the top and add a little more water. That’s the secret to stress-free transplanting.
If your final container size is up to 11 litres (3 gallons), you have the option to sow seeds directly. This is only a viable option when growing from seed. Clones will not take root in such a large container. Initially, seedlings in large pots will grow more slowly than those in smaller containers. After a few weeks of vegetative growth, the difference is negligible.
If you don’t transplant, then you eliminate the risk of transplant shock. But you also limit the potential of your cannabis plants. That being said, a first and final transplant is sometimes the best option for autoflowering strains with a short life cycle.
Unless smaller plants are advantageous due to limited grow space, bigger is always better. Transplanting is not something beginner growers should avoid. The only way to learn is by doing. If you ever want to grow marijuana monsters, you need to master transplanting seedlings.
- Thread starter
- #92
DrCannaCanadian
Well-Known Member
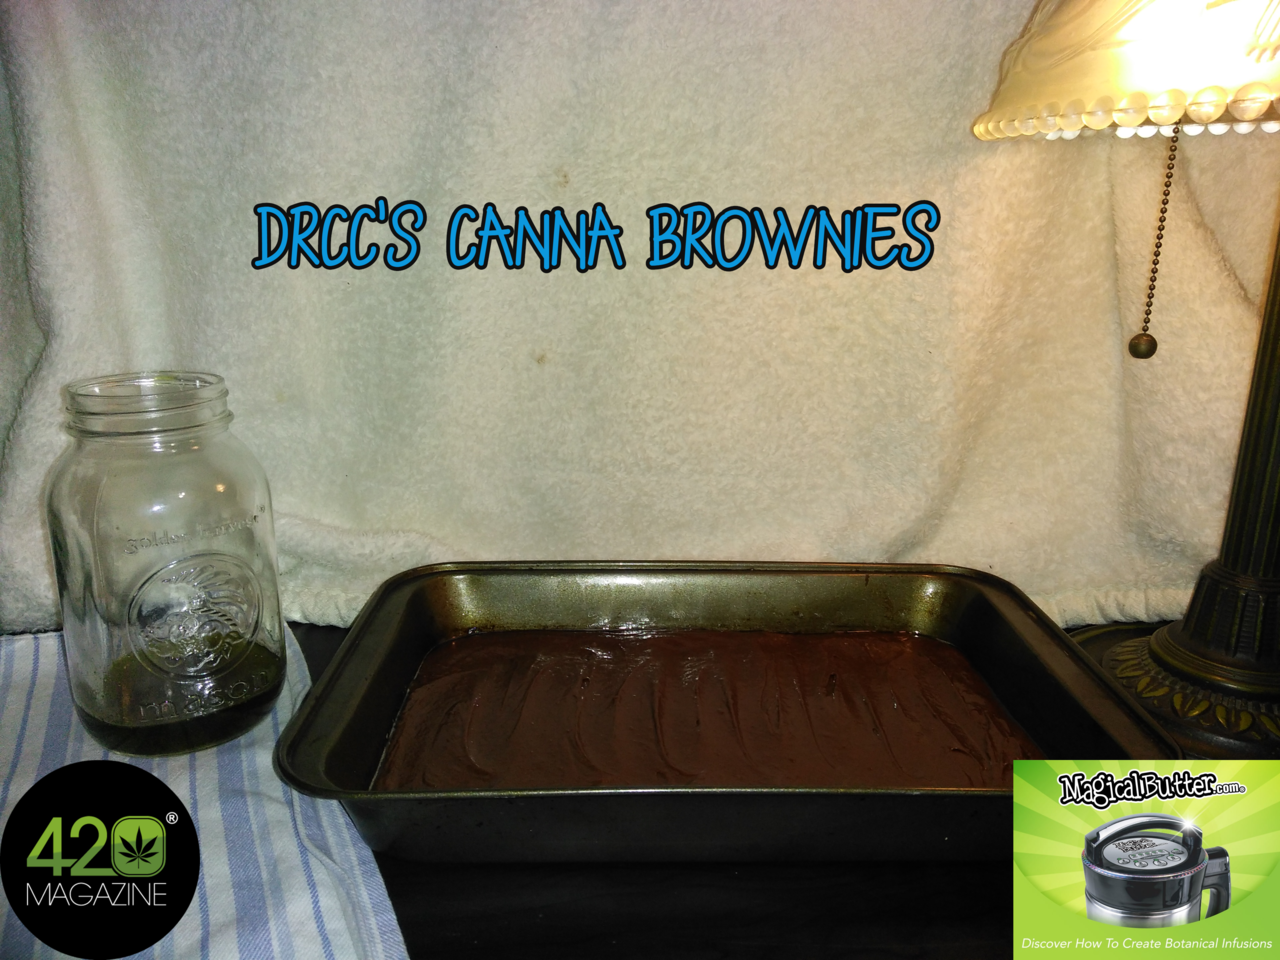
We decided to make some Canna Brownies tonight - and we're glad we did - Yum!
We kept it simple this time and just used a pre-mix instead of doing it from scratch.
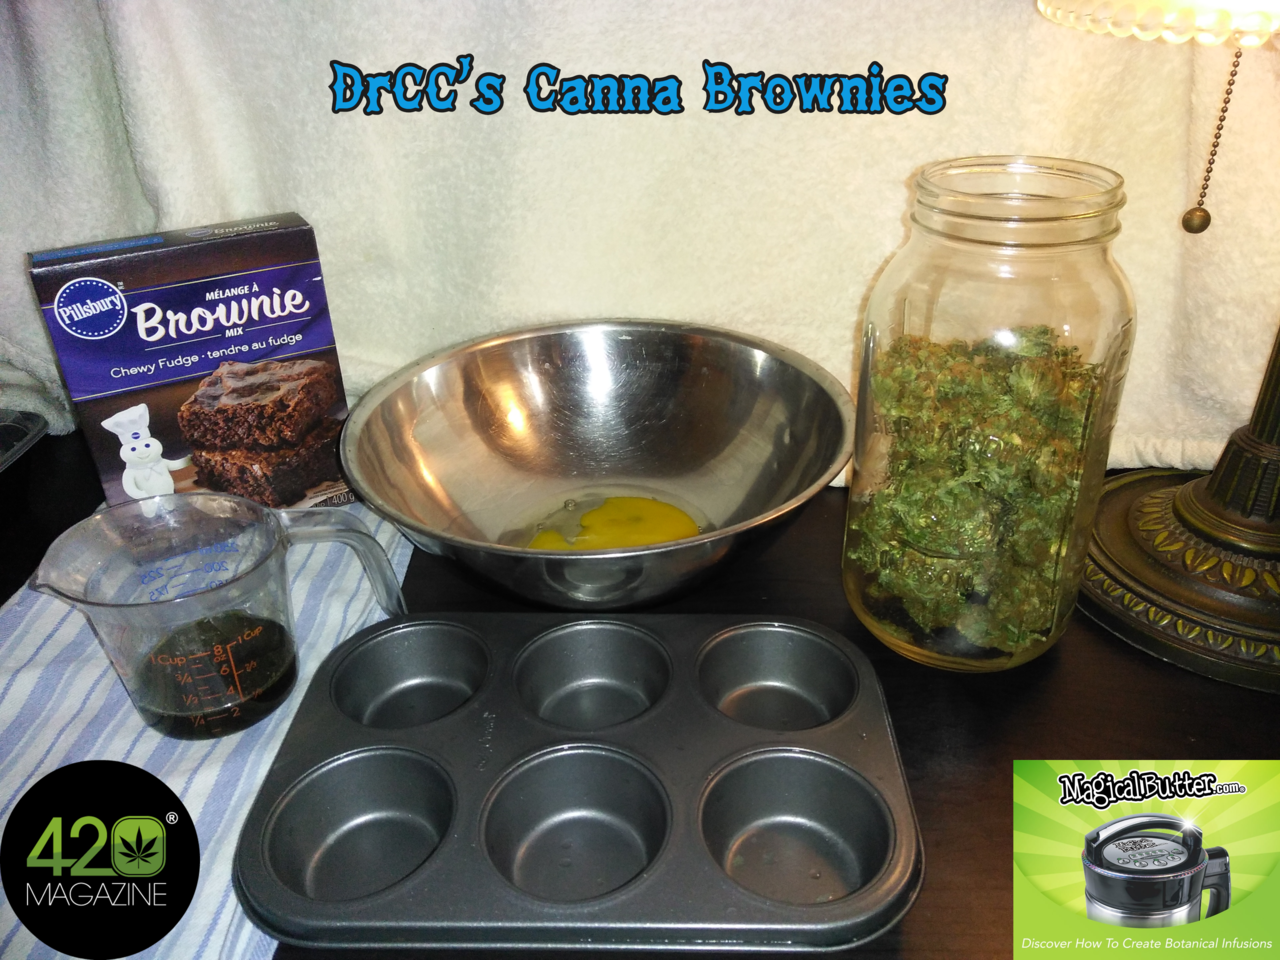
As you can see we are almost out of Canna Butter - so we'll be making more this weekend!
We just saw that one of our Sponsors here at 420 Magazine is MagicalButter! And the Mrs wants to get one now. Just gotta check and see if they have a discount code somewhere")
We kept it simple this time and just used a pre-mix instead of doing it from scratch.
DrCC's Canna Brownies
We kept it simple this time and just used a pre-mix instead of doing it from scratch.
As you can see we are almost out of Canna Butter - so we'll be making more this weekend!
We just saw that one of our Sponsors here at 420 Magazine is MagicalButter! And the Mrs wants to get one now. Just gotta check and see if they have a discount code somewhere
DrCC's Canna Brownies
We just saw that one of our Sponsors here at 420 Magazine is MagicalButter! And the Mrs want to...
- Thread starter
- #93
DrCannaCanadian
Well-Known Member
Saving The Hippie Crippler Seedling - aka Darth Vader

This morning we are going to start the day off by trying to save the Hippie Crippler Seedling - aka Darth Vader.
Darth Vader is not doing well in the coco - so, we are going to see if he does better in the magic of soil.
Yep - there is definitely something natural and magical about soil. That's why we sometimes move a seed who won't start to germinate in paper towel, into rich healthy soil.
Overall, to save Darth Vader, we are going to need to sterilize the seedling and then transplant the seedling into a soil medium.
Step #1: We make coffee.
Step #2: Saving The Hippie Crippler Seedling - aka Darth Vader
We gather up our surgical instruments and sterilize the environment.
Step #3: We gently remove the patient from the coco - being very careful with the roots.
Step #3: Saving The Hippie Crippler Seedling - aka Darth Vader
We gently remove the patient from the coco - being very gentle with the roots.
Step #4: We gently spray the roots with water to get rid of the excess coco.
Step #4: Saving The Hippie Crippler Seedling - aka Darth Vader
We gently spray the roots with water to get rid of the excess coco.
Step #5: We soak and submerge the patient in 1:10 solution of 3% hydrogen peroxide:water for 30 seconds.
Step #5: Saving The Hippie Crippler Seedling - aka Darth Vader
We soak and submerge the patient in 1:10 solution of 3 % hydrogen peroxide for 30 seconds.
Step #6: We dig a hole in the soil, lightly spray the hole with water, then sprinkle in mycorrhizae.
Step #6: Saving The Hippie Crippler Seedling - aka Darth Vader
We dig a hole in the soil, spray the hole with water, then sprinkle in mycorrhizae.
Step #7: Put the patient into the hole and backfill with soil. Leave the soil relatively loose - do not tamp too hard!
Step #7: Saving The Hippie Crippler Seedling - aka Darth Vader
Put the patient into the hole and backfill with soil. Leave the soil relatively loose - do not...
Step #8: Let the seedling heal under the soothing rays of a Mars Hydro light.
Step #8: Saving The Hippie Crippler Seedling - aka Darth Vader
Let the seedling heal under the soothing rays of a Mars Hydro light.
- Thread starter
- #94
DrCannaCanadian
Well-Known Member
Dagobah Frost Forest
Update

Veg - Day 07
I spent the morning trying to save Darth Vader, and the rest of the day learning about photography and videos. Update
Veg - Day 07
There was a free video editor I chose called "HitFilm Express" - it has a quick learning curve.
I hosted the finished video on YouTube - and then embedded it in my 420 Magazine gallery media.
Honestly, I had no idea there was so much to learn about photography, videos and journaling!
But hey - It's all for the benefit of learning and teaching everything cannabis!
Alright, here's my first journaling video on the 4x4 tent environment - Enjoy!
Great video! 
- Thread starter
- #96
DrCannaCanadian
Well-Known Member
Exploratory Data Analysis
of
Green Leaf Nutrients & Fox Farm Nutrients

At this point, I am simply going to try to compile some data, crunch some numbers, and then see where that leads me. That is, I am going to try to deepen my understanding a bit by doing some basic pattern matching.of
Green Leaf Nutrients & Fox Farm Nutrients
I am going to start with trying to understand the nutrients in a popular Fox Farm feeding schedule.
The reason for this analysis, is because I want to replace my Advanced Nutrients vegetative nutes and my Fox Farm flowering nutes with the more cost effective Green Leaf Nutrients line of products.
Some basics:
A cation is positively charged.
An anion is negatively charged.

N is an anion. Nitrate Nitrogen NO3(-).
P is an anion. Phosphate P2O5.
K+ is a cation. Potash K2O.
Ca+2 is a cation.
Mg+2 is a cation.
S-2 is an anion.
The first table lays out the nutrients I am interested in and their NPK values.
| Name [Version] | Acr | N-P-K | Description |
|---|---|---|---|
| Mega Crop [V2] | MC | 09 - 06 - 17 | base nute ++ |
| Cal+Mag Pro | CMP | 13 - 00 - 00 | 11% Ca - 3.5% Mg - 13% N |
| Sweet Candy | SC | 00 - 00 - 16 | carbs , amino acids, vitamins and minerals - 5.5% Mg - 13% S |
| Sea-Kelp | SK | 00 - 00 - 15 | 70 minerals, growth hormones, cytokinin, auxins |
| Bud Explosion | BE | 00 - 19 - 39 | blooming enhancer at later stages of flowering - 1.0% Mg - 10% S |
| Lickety Split | LS | 02 - 01 - 06 | vegtative base nute |
| Super Sonic Plant Tonic | SSPT | 05 - 00 - 01 | micronutrient package + N |
| Funky Broadway | FB | 00 - 05 - 04 | bloom base nute |
| Cal Mag | CM | 01 - 00 - 00 | 3% Ca - 0.9% Mg - 1% N |
| Open Sesame | OS | 05 - 45 - 19 | Early Flowering Formula (Weeks 3, 4, 5) |
| Beastie Bloomz | BB | 00 - 50 - 30 | Mid Flowering Formula (Weeks 6, 7, 8) |
| Cha Ching | CC | 09 - 50 - 10 | Late Flowering Formula (Weeks 9, 10, 11, 12) |
Table 1: A list of nutrients and their NPK values.
The CMP if used at 1/4 strength would have an NPK of 3.3-0-0 and 0.9% Mg and 2.8% Ca.
The SC if used at 1/6 strength would have an NPK of 2.7-0-0 and 0.9% Mg and 2.2 % S.
The SK has an NPK of 0-0-15.
The BE has an NPK of 0-19-39 and 1.0% Mg and 10% S.
The BE flowering booster has a PK of 1:2.
Fox Farm flowering boosters have a PK of about 2:1 or 5:1 - two with N.
The Green Leaf Nutrient products are high in Potassium (K).
The Fox Farm products are high in Phosphorous (P).
Green Leaf Nutrients does not have a tried-test-and-proven feeding chart.
Fox Farm has a tried-test-and-proven feeding chart.
I have chosen to investigate this popular 13 week Fox Farm USA Three Part feeding table:
My second table below digs deeper into the NPK values and Ca Mg values presented by Fox Farm above.
If necessary, I will loop back and do the EC and PPM value at a later date.
The table assumes feeding a product by ml/4 litres - eg 2.5 ml/4 litres LS for Seedlings and Cuttings.
| Time | Seedlings | 01 | 02 | 03 | 04 | 05 | 06 | 07 | 08 | 09 | 10 | 11 | 12 |
| Light | 18 | 18 | 18 | 18 | 18 | 12 | 12 | 12 | 12 | 12 | 12 | 12 | 12 |
| LS | 2.5 | 5.0 | 5.0 | 10.0 | 10.0 | 10.0 | 5.0 | 5.0 | 5.0 | ||||
| SSPT | 2.5 | 5.0 | 5.0 | 5.0 | 5.0 | 5.0 | 5.0 | 5.0 | 5.0 | ||||
| FB | 5.0 | 5.0 | 5.0 | 5.0 | 10.0 | 10.0 | 10.0 | 10.0 | 10.0 | ||||
| CM | 2.5 | 5.0 | 5.0 | 5.0 | 5.0 | 5.0 | 5.0 | 2.5 | 2.5 | 2.5 | |||
| OS | 1.25 | 2.5 | 2.5 | ||||||||||
| BB | 2.5 | 2.5 | 2.5 | ||||||||||
| CC | 2.5 | 2.5 | 2.5 | 2.5 | |||||||||
| N P K Ca Mg | 5+0+0+0+0 2.5+0+0+0+0 15+0+0+0+0 0+0+0+0+0 0+0+0+0+0 | 10+0+0+0+0 5+0+0+0+0 30+0+0+0+0 0+0+0+0+0 0+0+0+0+0 | 10+12.5+0+2.5+0 5+0+0+0+0 30+2.5+0+0+0 0+0+0+7.5+0 0+0+0+2.25+0 | 20+25+0+5+6.25 10+0+0+0+56.25 60+5+0+0+23.75 0+0+0+15+0 0+0+0+4.5+0 | 20+25+0+5+12.5 10+0+25+0+112.5 60+5+20+0+47.5 0+0+0+15+0 0+0+0+4.5+0 | 20+25+0+5+12.5 10+0+25+0+112.5 60+5+20+0+47.5 0+0+0+15+0 0+0+0+4.5+0 | 10+25+0+5+0 5+0+25+0+125 30+5+20+0+75 0+0+0+15+0 0+0+0+4.5+0 | 10+25+0+5+0 5+0+25+0+125 30+5+20+0+75 0+0+0+15+0 0+0+0+4.5+0 | 10+25+0+5+0 5+0+50+0+125 30+5+40+0+75 0+0+0+15+0 0+0+0+4.5+0 | 0+25+0+2.5+22.5 0+0+50+0+125 0+5+40+0+25 0+0+0+7.5+0 0+0+0+2.25+0 | 0+25+0+2.5+22.5 0+0+50+0+125 0+5+40+0+25 0+0+0+7.5+0 0+0+0+2.25+0 | 0+0+0+2.5+22.5 0+0+50+0+125 0+0+40+0+25 0+0+0+7.5+0 0+0+0+2.25+0 | 0+0+0+0+22.5 0+0+50+0+125 0+0+40+0+25 0+0+0+0+0 0+0+0+0+0 |
N P K Ca Mg | 5 2.5 15 0 0 | 10 5 30 0 0 | 25 5 32.5 7.5 2.25 | 56.25 66.25 88.25 15 4.5 | 62.5 147.5 132.5 15 4.5 | 62.5 147.5 132.5 15 4.5 | 40 155 130 15 4.5 | 40 155 130 15 4.5 | 40 180 150 15 4.5 | 50 175 70 7.5 2.25 | 50 175 70 7.5 2.25 | 25 175 65 7.5 2.25 | 22.5 175 65 0 0 |
| Normalized N P K | 2.0 1.0 6.0 | 2.0 1.0 6.0 | 5.0 1.0 6.5 | 0.84 1.00 1.33 | 0.42 1.00 0.90 | 0.42 1.00 0.90 | 0.26 1.00 0.84 | 0.26 1.00 0.84 | 0.22 1.00 0.83 | 0.29 1.00 0.40 | 0.29 1.00 0.40 | 0.14 1.00 0.37 | 0.13 1.00 0.37 |
Table 2: A closer look into Fox Farm's NPK values.
The following three statements are by @MrSauga (I'm just giving you credit and not trying to pull you into this yet):
MC version 2 (9-6-17) has all the flowering booster it needs and will give you plenty of flowers.
MC version 2 (9-6-17) covers SC.
CMP is very heavy in Nitrogen (N) - healthy plants look for N loads between 90-150ppm.
* I need to verify these at some point.
The BE flowering booster has a PK of 1:2.
Fox Farm flowering boosters have a PK of about 1:0.5 or 1:0.2 - two products having significant Nitrogen.
This means BE can have anywhere from 4x to 10x the amount of K that FF products do.
The recommendation by the MC crew at 420 magazine recommends an overall NPK ratio of about 2-1-3.
When I look at the normalized NPK values by Fox Farm, nowhere do I see normalized NPK ratios of 2-1-3.
This is unexpected, and I will need to double check my numbers tomorrow - and possibly my logic and assumptions.
Anyway, with the Fox Farm normalized NPK ratios far off the expected 2-1-3 value I was looking for, I am going to have to do a lot more research and analysis into using up my Fox Farm flowering nutes with MC and also into using CMP and BE with MC too.
I'm tired, so that's enough for today - let's see what tomorrow brings.
- Thread starter
- #97
DrCannaCanadian
Well-Known Member
Daily Tips & Tricks
By Royal Queen Seeds
Healthy Roots For Healthy Cannabis Plants

A healthy root base is important if cannabis plants are going to thrive. Here is a guide to keeping them as healthy as possible. By Royal Queen Seeds
Healthy Roots For Healthy Cannabis Plants
Cannabis cultivation in modern society has become something of an art form. While it is easy to plant some cannabis seeds and grow a couple of plants on your balcony, the ease with which we can spread knowledge now allows cannabis cultivation to get quite technical. One such specific area of knowledge that all cannabis growers should consider vital is learning about root health. It is no understatement when we say healthy roots make for a healthy cannabis plant, so we take a look at some of the common problems growers encounter, and how to deal with them.
THE IMPORTANCE OF ROOT NETWORK IN CANNABIS PLANT
From seed to bud, there is one part of the cannabis plant that plays a vital role in the plant’s health, and its importance cannot be emphasized enough – the roots. Roots are literally the foundation on which your cannabis grows, and are instrumental in the health of the entire plant. The main function of the roots is to uptake nutrients and water, and the rate at which they do it is directly linked to how large and healthy a cannabis plant becomes. Therefore, maintaining good root health is critical for a successful grow.
It may sound dramatic, but without healthy roots the rest of the cannabis plant will suffer – increasing the odds of reduced growth, wilting and yellowing of stems and leaves, disease, and death. To avoid that from happening, it is important to know how to maintain a healthy root system and to deal with common problems effectively.
Overwatering:
One of the most common problems among beginner growers is overwatering. As much as the roots need water, they also need oxygen to perform their functions efficiently. Oxygen is involved in many plant processes, as well as nutrient uptake. Without it, the roots will suffocate and become weak making them susceptible to pathogens. Being constantly soaked without any dry period also severely increases the risk of root rot.
In most cases, overwatering is the result of poor drainage, leaving roots to soak in water that they cannot drink up fast enough. This is particularly a risk in young plants, when the root base is still small. Always ensure your growing medium is well drained.
The initial signs of overwatering are leaves becoming firm and curled downwards. This is the plant taking in as much water as it possibly can – the leaves are literally bursting with water. This is an indication that you are watering too often and not allowing the growing medium enough time to dry. It is also means your roots are likely to be swimming in water. This later develops to root rot if not quickly resolved, causing numerous problems, including stunted growth, wilting, deformity, discolouring, and death. Basically, the roots become unable to function efficiently, starving the rest of the plant.
Preventing overwatering can easily be achieved. Learning how much water your plant is drinking and how soil feels when it’s in need of more water is fairly straightforward. A common test is to stick a finger in the soil up to the first knuckle. If it feels dry, it is about time to add more water. You can also determine when your plant needs water by checking the weight of the container. Carefully pick up a container after watering to get a feel for the weight. Repeat this when you are certain more water is needed, and make a mental comparison of the differences in weight. If it feels heavy, it’s probably too early to water.
Excessive Nutrient Feed:
Another common mistake when tending to cannabis plant is excessive nutrient feed. This does not damage roots directly, but excessive feeding in, especially with chemical feeds, can cause salts to build up in the growing medium, which in turn lockout nutrients from the roots, preventing them from being absorbed. This, in turn, damages the plant as a whole, and causes it to suffer from a feed deficiency – even though plenty is being but in the soil. For roots to do their job efficiently, levels of feed need to be controlled, and growing medium flushed if things get too salty.
When growing in soil, another thing is frequently overlooked - the size of the pot or container where the seed is planted. Marijuana is a fast growing plant with roots developing even faster than foliage and stems above the ground. If not enough space is provided for roots to expand the plant will suffer from root binding. The root mass overcomes capacity of the growing medium itself making water retention and nutrient uptake impossible. Root-bound cannabis plant will experience stunted growth, dehydration, and yellowing of the leaves.
To avoid root-bound make sure you transplant your fast growing, young plants into a properly sized container. People often make a mistake by transplanting the young plant into the oversized container. It will eliminate root bound problem for sure, but there is a high risk of overwatering. The big sized container can take plenty of water, but a young plant with undeveloped root system can take just a fraction, leaving roots drowning in water – unless properly drained.
High or Cold Root Zone:
Keeping a steady temperature in the root zone is essential for happy roots. Cannabis doesn’t like big temperature oscillations and will most likely develop problems when faced with ones. Too much heat often becomes an issue when growing in hydroponic setups where heat decreases the ability of water to hold oxygen. Roots need oxygen to thrive, and they can easily get suffocated when exposed to high temperatures in hydro setups. Cold temperatures can also shock plants causing wilting and slowed growth.
Maintaining comfortable 22°C in the root zone will make your plants grow with no undesired side effects of temperature fluctuations. If struggling to do so, introduce additional air conditioning to your growing setup. It can be costly, but it can be a crop saver.
All of the previously mentioned stressors to the plant will weaken its natural defences, making it susceptible to pathogen attacks. There are two most common root zone pathogen bacteria that can wreak havoc to the plant if left unattended.
Rhizoctonia is a soil-born fungus whose attacks are more common in seedlings and young plants. The fungus causes root and collar root rot, cutting off supply from roots to the main stem. The fungus is visible in the soil producing thin white threads. The infected plant can develop red or brown spots on stems and leaves. Rhizoctonia thrives in overwatered mediums and high temperatures.
Pythium is the pathogen that is more dreaded between the two, and it’s certainly more aggressive. It thrives in hydro and aero setups where no soil based medium is present, but it can be found virtually anywhere. Pythium attacks weakened plants, causing root rot or “damping off”. The affected plants will experience stunted growth and yellowing of the leaves that will eventually die and fall off. The roots will become slimy and show unhealthy brown colour.
Keeping your growing room clean is the most effective way to prevent infestation, but even the tidiest grow rooms can’t repel some of the airborne attackers like Pythium. Introducing good bacteria to growing medium is a well-rounded way to fight off pests and can make a world difference in cultivating cannabis. They will not only eliminate the invaders but will form a symbiotic connection with your delicate roots increasing their absorbing capacity and making them stronger.
One of the more popular beneficial bacteria is Mycorrhiza. It is a root fungus that inhabits the root zone of the plant. These fungi assist plants by feeding on nutrients, breaking them into more readily absorbed elements. The process allows roots to absorb nutrients at increased speed and capacity resulting in quicker growth and a more active development of the plant. Mycorrhiza can be bought in most of the hydroponic shops and adding them to growing medium is safe and extremely beneficial.
Another root helper is a fungus called Trichoderma. It is a very common fungus, present in most types of natural soil. It acts as root bodyguard by invading root zones aggressively, eliminating invaders competing for space. Besides the effect of killing bad fungi, it also penetrates a few layers of the roots, provoking the plant’s self-defence mechanism making the plant stronger and more resilient to any kind of stress.
- Thread starter
- #98
DrCannaCanadian
Well-Known Member
Daily Tips & Tricks
By Royal Queen Seeds
How To Prevent And Fix Root Bound Cannabis

When cannabis is grown outdoors in garden beds, plants can normally spread their roots without restriction. However, when we grow cannabis in containers, plants becoming “root bound” can become a problem. Find out what root bound means; how to recognize it, and what you can do if it happens to you.By Royal Queen Seeds
How To Prevent And Fix Root Bound Cannabis
Most cannabis cultivars, at least in colder climates, grow indoors in a tent or in a dedicated grow room. Growing indoors in containers means there is the risk of your plants becoming root bound. When this happens, it can lead to all sorts of growing problems. Let us take a closer look at what “root bound” means. Learn how to recognise the signs, so you can fix the issue and prevent it from happening in the future.
WHAT IS ROOT BOUND?
When your plants are root bound, it means that the roots have outgrown their container and don’t have any more room to grow. This of course happens when your containers are too small for any given reason. Outdoors in garden beds, plants becoming root bound is less likely, although it can happen when roots hit restricting barriers such as pipes or large rocks underground.
A healthy root system plays a vital part for your plants’ growth. After all, it is with their roots that plants take in water and nutrients.
Plants becoming root bound can lead to all sorts of issues. Here are some of the most common signs and symptoms that your plants may be root bound:
Nutrient Deficiencies
Your plants may show symptoms of nutrient deficiencies. Among these signs could be yellowing, spots, or crumbling and wilting leaves. If you can exclude other issues such as incorrect pH, nutrient issues, and overwatering, your plants may indeed be root bound.
Containers Drying Out Too Quickly
When you find that the soil dries out after only a day or two and you need to water very often, it means that your plant needs more water than the container can hold.
Plants Get Way Too Big And Unsturdy
When your plants have grown too tall for their container size, they may easily tip over. This is usually a sign that your plants have become root bound, and that you should transplant them into bigger pots.
Other potential symptoms include:
- Nutrient Burn without excess nutrients: If you spot the signs of nutrient burn, but you are feeding your plants only lightly.
- Smaller buds with stunted growth: If your buds grow smaller, or your plants’ overall growth is slower than usual.
- Sick plants, wilting, drooping: If your plants have a sick appearance or start to wilt or droop unexpectedly.
If your plants show one or more of these symptoms, you need to look at their roots to see whether they have become root bound. To do this, you will need to remove them from their containers. Sometimes, it may be quite obvious that your plants have outgrown their containers, say when you see the roots through the holes at the bottom. Time to give your plants a new and bigger home!
HOW TO SAFELY REMOVE PLANTS FROM THEIR CONTAINER
You want to be careful when you remove plants from their containers in order to not damage the roots.
Get a good grip on your plant’s stem, right above the soil line. Rest your hand on top of the soil so that the stem is between your fingers. Carefully flip over the whole plant and then try to pull off the container. Most of the time, the container should come right off.
If you have troubles pulling off the container, carefully squeeze the container a few times around the side. This helps to loosen up the soil inside.
If your plant is still refusing to come out, take a long knife and use the back edge to slide around the inner edge of the container. If your plant is so severely root bound that nothing will help to remove it, consider breaking open the container as your last option.
FREE THE ROOTS: HOW TO LOOSEN THE ROOT BALL
When you have managed to pull out your root bound plant from the container, the roots will be running in a tight circle in the shape of the container. The roots are trapped and unable to grow freely any longer. Before you replant into a bigger container, you should try loosening the compact mess of roots so they can spread out again. You can carefully do so with your fingers.
In severe cases of root bound plants, you may not be able to loosen the root ball with your fingers alone. You will then have to prune the roots to free them. By using a sharp knife, cut a few top-to-bottom incisions into the outer layer of the tightly-packed root ball. But be very careful and only cut thin roots. Do not cut any thick tap roots! 2-3 incisions evenly spaced out around the root ball should be all that you need to free the roots so that they can grow outwards again.
REPLANTING YOUR CANNABIS PLANT INTO A NEW CONTAINER
Take a new container with enough room so that your plant’s roots have plenty of space to expand. Fill the container with some soil, make a hole, and then align your plant in the middle. Make sure that your plant is at about the same soil level as you had it before. Likewise, ensure that you do not pack the soil too tight; the roots should be able to grow freely without trouble. After you have placed your plant in its new container, water the soil. At this point, you can also add root stimulant to help with things.
Your previously root bound plant is now happily sitting in its new and big container, but it is going to be quite sensitive for some time. To help it to recover from the transplant shock, you should keep stress levels low for a few days. Feed it only lightly and if you can, turn down your lights a notch or two as well. You will know that your plants have fully recovered once you see new, healthy growth. When this happens, which can take between a few days to a couple of weeks, you can return to your normal lighting and feeding schedule.
HOW TO PREVENT YOUR CANNABIS PLANTS FROM BECOMING ROOT BOUND
Preventing your plants from outgrowing their pots and becoming root bound is not difficult. Simply choose large enough containers from the start so this won’t ever happen. If you plan to replant during a grow, up-pot into bigger containers before it’s too late. Don’t wait until your plants have outgrown their current containers.
- Thread starter
- #99
DrCannaCanadian
Well-Known Member
Dagobah Frost Forest
Update
Vegetation - Day 02
Update
Vegetation - Day 02
Hey 420!
When I was reviewing the Fox Farm feeding schedule yesterday, I noticed, for an 8 week photoperiod, there are several predefined growth stages to help us track the life of a cannabis plant:
- 1 week of Germination
- 1 week of Seedling/Cutting
- 4 weeks of Vegetation
- 1 week or more of Extended Vegetation
- 1 week of Transition
- 2 weeks of Early Flowering
- 3 weeks of Mid Flowering
- 2 or more weeks of Late Flowering
- 1 week or more of Extended Flowering
Since I couldn't sleep I decided to try and do a photo shoot with the things I have been learning about photography.
First, wear my glasses. Second, take my time. Third, I need to get a tripod for macro shots.
For these pictures I tried using Composition for an interesting photo and gave myself only two takes with each plant using auto focus.
Today, I will review the manual focus settings and try using them in tomorrows photo shoot.
We were actually thinking - if we take pictures of the plants everyday, then I should be able to put together a timeline of the plants entire growth from germination to harvest.
Here are the Jedis basking under the lure of a Mars Hydro light:
Dagobah Frost Forest - Darth Vader
Hippie Crippler - Fox Farm Ocean Forest Soil - Veg Day 02
Dagobah Frost Forest - Darth Vader
Hippie Crippler - Fox Farm Ocean Forest Soil - Veg Day 02
Dagobah Frost Forest - Darth Sidious
Hippie Crippler - Coco/Perlite - Veg Day 02
Dagobah Frost Forest - Darth Sidious
Hippie Crippler - Coco/Perlite - Veg Day 02
Dagobah Frost Forest - Luke Skywalker
Peyote WiFi - Coco/Perlite - Veg Day 02
Dagobah Frost Forest - Luke Skywalker
Peyote WiFi - Coco/Perlite - Veg Day 02
Dagobah Frost Forest - Obi-Wan Kenobi
Peyote WiFi - Coco/Perlite - Veg Day 02
Dagobah Frost Forest - Obi-Wan Kenobi
Peyote WiFi - Coco/Perlite - Veg Day 02
Dagobah Frost Forest - Master Yoda
Peyote WiFi - Fox Farm Ocean Forest Soil - Veg Day 02
Dagobah Frost Forest - Master Yoda
Peyote WiFi - Fox Farm Ocean Forest Soil - Veg Day 02
Dagobah Frost Forest - Princess Leia
Peyote WiFi - Fox Farm Ocean Forest Soil - Veg Day 02
Dagobah Frost Forest - Princess Leia
Peyote WiFi - Fox Farm Ocean Forest Soil - Veg Day 02
Dagobah Frost Forest - Qui-Gon Jinn
Tangie Cookies - Fox Farm Ocean Forest Soil - Veg Day 02
Dagobah Frost Forest - Qui-Gon Jinn
Tangie Cookies - Fox Farm Ocean Forest Soil - Veg Day 02
Dagobah Frost Forest - Mace Windu
Tangie Cookies - Fox Farm Ocean Forest Soil - Veg Day 02
Dagobah Frost Forest - Mace Windu
Tangie Cookies - Fox Farm Ocean Forest Soil - Veg Day 02
Dagobah Frost Forest - Darth Maul
Tangie Cookies - Coco/Perlite - Veg Day 02
Dagobah Frost Forest - Darth Maul
Tangie Cookies - Coco/Perlite - Veg Day 02
- Thread starter
- #100
DrCannaCanadian
Well-Known Member
Daily Tips & Tricks
By Royal Queen Seeds
The following question came up for me when I was trying to figure out pot sizes and plant spacing in our new 4x4 grow tent. Ultimately, I want to grow the plants as tall as possible while still filling out the tent laterally.By Royal Queen Seeds
How Many Plants To Grow Per Square Meter

Congratulations on committing to cannabis cultivation. Now you need to settle upon the right number of cannabis plants to grow. We’ve got practical advice you can use whether you plan on growing just one plant, or as many as you possibly can fit in the grow space.
HOW MANY PLANTS CAN I GROW PER SQUARE METER?
Before you get your grow on, you need to have a plan and a timetable. First, you need to establish the size of the available grow space. Grow tents come with exact dimensions on the box. However, if you are building your own grow box, or converting a whole room into a grow-op, you need to first take measurements. Next, you must decide how much light you can put down while still maintaining optimal environmental conditions. We will breakdown the key factors to consider when choosing grow lights a little later.
The genetics you choose and your preferred grow style will ultimately determine how long it takes to bring your crop to harvest. Precisely how many plants to grow is a personal choice. But the following will help you discover your indoor marijuana magic number.
It’s not as simple as purchasing as many of the most powerful grow lamps you can get your hands on. Every grow space is different. But two factors always need to be tightly controlled and constantly monitored. Temperature and relative humidity (RH) are the key environmental conditions the indoor grower regulates. You need the right tools. Invest in intake fans, extractor fans, and if available, air-con or heating.
HID - HIGH INTENSITY DISCHARGE
HID lamps are a great source of illumination for the grow room and still favoured by most professionals. Unfortunately, MH and HPS lamps run hot and will significantly increase your power bills, too. One 400-600W bulb per m² is a good rule of thumb. Although, you may need to scale down to a 250W bulb. Consider improving side reflection with Mylar sheeting if you can’t keep temperature and RH dialled-in. Using high-powered old-school lighting necessitates the use of more powerful fans and possibly air-con, or else the grow-op may run too hot.
LED - LIGHT EMITTING DIODE
Modern LED grow lights run much cooler and more efficiently than HID. The main drawback with next-gen LED is the substantial investment required for a decent high-quality kit. Over the long-term, you can recoup with the savings you make on the power bill. Choose your LED kit carefully as not all LED’s are created equal. At present, 3W diodes and COB appear to be the most promising technologies. Less heat and more usable light per watt can also save you some money when it comes to selecting fans to regulate airflow.
CFL - COMPACT FLUORESCENT LIGHT
CFL can only take you so far. Sure, they are economic and efficient, but only to a point. In this writer’s opinion, cool white CFL is fine for vegetative growth and rooting clones, but nothing more. Using CFL’s alone for the bloom phase is not recommended. However, adding CFL as a supplement to HPS during bloom can be a winning combination.
HIGH VOLUME CULTIVATION: (SOG) SEA OF GREEN
The sea of green method (as the name implies) is all about packing all of the available floor space in the grow-op with plants. Typically, photoperiod clones or autoflowering strains are used to achieve a consistent, controlled outcome. This technique is fast and very high-yielding. Rooted cuttings get from 1-2 weeks of vegetative growth before the switch to standard 12/12 flowering of 8-10 weeks. On the other hand, autos can be kept on a consistent 18/6, 20/4, or 24/0 schedule and be ready for harvest in 8-10 weeks from seed. There is no time for pruning or training, nor is it needed.
As plants are not given time to branch out, many short plants with chunky main colas are the objective. Approximately 4-16 plants per m² can be cultivated under 400W HPS, sown in 5-12l containers. Watering by hand can be very time-consuming with such large numbers. Many growers prefer hydroponics kits with automated feeding systems when cultivating many plants. A well-run SOG grow-op can deliver 4-6 500g/m² harvests per year.
If you want to keep the number of cannabis plants to a minimum and still get maximum yield from your grow space, then you need to apply yield-boosting techniques. You have two choices; pruning and training. Of course, you can do both. In fact, we highly recommend combining methods for best results.
TOPPING & FIMMING
The most common pruning-for-yield methods are topping and fimming. By pruning the main stem and breaking the apical dominance, bigger yields can be achieved. This is done either with a clean cut by “topping,” or a pinch leaving 25% of the main tip via the “fimming” method. Plants will bush out and develop multiple main colas instead of just one. Both methods can be applied repeatedly depending on how much lateral space you wish to fill.
Remember, each time you prune marijuana, you must allow recovery time. The cost of these pruning-for-yield methods is indeed time itself. Expect an extended vegetative growth cycle. 6-8 weeks will be required for two well-pruned bushes to fill out 1m².
LST or low stress training is a beginner-friendly training technique that, like the two aforementioned pruning methods, works well with a ScrOG or screen of green technique. By bending or tying stems during vegetative growth, the grower can manipulate the plant to grow more like a bush. 2-4 plants can effectively fill 1m². Recovery time is just a few days and this method even works with autoflowering strains.
SCROG - SCREEN OF GREEN
If you consider yourself to be an experienced grower, having mastered the other techniques we've mentioned, you can optimise your yield further by bringing “screen of green” into the picture. But what is a ScrOG, exactly? Basically, it's a grid-like screen made of chicken wire (or similar mesh material) through which the shoots of developing cannabis plants are woven to control growth. You'll want to start this weaving process during the vegetative phase, ending it before the third week of bloom. This keeps exclusively the main colas under the light, focusing the plants' efforts on bud production. You'll also want to top your plants early so their branches grow as long as possible, then proceed to train them in multiple directions through the screen. As a result, you can utilise the full surface area of your growing space.
As far as spacing is concerned, if you're growing one plant per square metre, you'll want to use 20I pots at least. Those who want to cut down on harvest time, however, can fit four plants, each in a 10I pot, in the same square metre. There's no strict rule with these limits. However, we've found that sticking within these general parameters is the safest approach.
Similar threads
- Replies
- 9K
- Views
- 309K
- Replies
- 1K
- Views
- 37K
- Replies
- 165
- Views
- 11K
- Replies
- 9
- Views
- 847
- Replies
- 153
- Views
- 4K