420's Sherlock Holmes' FFOF Soil, Bakerstreet C.R.E.A.M. Cheese Autoflower, Grow Journal 2019

August 02 2019 - Update

Images:


IMG_20190802_175744.jpg

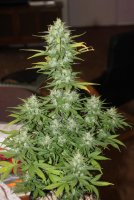
Bakerstreet #1 - Hanna Hemp - Looks healthy so far - growth nodes are exposed to light and air.


IMG_20190802_175755.jpg

Bakerstreet #2 - Henna Hemp - Looks healthy so far - growth nodes are exposed to light and air.


IMG_20190802_180256.jpg

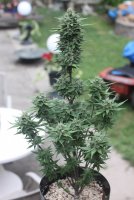
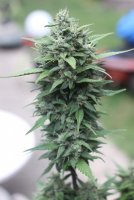
C.R.E.A.M. #1 - Cowgirl Hemp - Looks healthy so far - budlets are exposed to light and air.


IMG_20190802_180308.jpg

Cheese #1 - Gouda Hemp - Looks healthy so far - budlets are exposed to light and air.


Growth Stage:

2 Bakerstreets: Day 5/ Week 10 ... Day 68 ... week 2 flower.

*** Should get pixels between August 03, 2019 and August 10, 2019.

*** Photoperiod Stages: 5 days Germination, 1 week seedling, 2-8 weeks veg, 6-12 weeks flower, 4-12 weeks cure
*** Allow 1 day to 3 days of dark before switching to 12-12
*** Pistels show up about 14 days (2 weeks) after switching to 12-12


1 C.R.E.A.M.: Day 5/ Week 9 ... Day 61 ... mid flower.
1 Cheese: Day 5/ Week 9 ... Day 61 ... mid flower.

*** Should be ready for full flush between August 04, 2019 and August 11, 2019.
*** Should be ready to harvest between August 18, 2019 and August 25, 2019.

*** Autoflower Stages: 5 days Germination, 1 week seedling, 3 weeks veg, 3 weeks pre-flower, 3-6 weeks flower, 4-12 weeks cure
*** Pistels show up about 35 days (5 weeks) after Germination
*** Flowering takes about 42 days to 56 days (6 weeks to 8 weeks) after Pistels show up


Environment #1 - Autoflower Veg/Flower:

*** The VPD is now automatically dialed-in to High Transpiration: Mid Flower/Late Flower.

RH is running between 50% and 55% - lights-on.

Canopy temperature is running between 25°C (77°F) and 28°C (82°F) - lights-on.

VPD is between 1.23 and 1.30 - High Transpiration: Mid Flower/Late Flower - lights-on.

*** How The VPD For Environment # 1 Is Automatically Dialed-In

*** The VPD Values I am Using For This Grow (Version 1)

CO2 is refreshed frequently when the exhaust fan turns on.

The light is running 1 cycle of uninterrupted "24 hours lights-on and 0 hours lights-off".

The light is 53 cm (21") above the canopy centered over the 2 plants.


Environment #2 - Photoperiod Flower:

RH is running between 45% and 60% - lights-on.
RH is running between 60% and 60% - lights-off.

Canopy temperature is running between 26°C (79°F) and 28°C (82°F) - lights-on.
Canopy temperature is running between 23°C (73°F) and 23°C (73°F) - lights-off.

VPD is between 1.03 and 1.57 - High Transpiration: Mid Flower/Late Flower - lights-on.
VPD is between 0.80 and 0.80 - Healthy Transpiration: Late Veg/Early Flower - lights-off.

*** The VPD Values I am Using For This Grow (Version 1)

CO2 is refreshed frequently when the exhaust fan turns on.

The light is running 1 cycle of uninterrupted "12 hours lights-on and 12 hours lights-off".

The light is 53 cm (21") above the canopy centered over the 2 plants.

*** Once the photoperiods are harvested, then Environment #2 can become a Veg tent.


Watering and Feeding:

Bakerstreets:

*** Next feed ... 6 litres (1.6 gallons) - water only on August 05, 2019.


C.R.E.A.M.:

*** Next feed ... 4 litres (1.0 gallon) - water only on August 05, 2019.


Cheese's Feed:

*** Next feed ... 4 litres (1.0 gallon) - water only on August 05, 2019.


*** For details on my feeding schedule refer to here: The Different Feeds I need For This Grow (Version 4)


Activities:

LST on all plants.
I am checking the plants twice each day and adjusting the LST because the plants are growing quicker now.
My priority is to expose the growth nodes to light and air because they are going to become colas.

Refilled the humidifier with water.


Notes:

The priority has to be to expose the growth nodes/buds and to keep the canopy even and flat.

I will try to keep the Bakerstreets' canopy height below 30 cm (12"). For detailed calculations on how I determined the canopy height, please refer to the ... June 30, 2019 - Update ... Lessons Learned section here: How long to Veg Photoperiods

*** The VPD for Environment #1 is now automatically dialed-in.

*** I have ordered an Inkbird IBS-TH1 Wireless Thermometer Hygrometer to simplify collecting VPD data points for Environment #2.

*** I evened out the canopy on the C.R.E.A.M. today using LST wires.

*** How the VPD for Environment # 1 is automatically dialed-in:

The light is running 1 cycle of "24 hours lights-on and 0 hours lights-off" ... and is a constant heat source.

The light is 53 cm (21") above canopy centered over the plants.

The TaoTronics humidifier is set to 50% RH.

The Inkbird ITC-308 temperature controller is set to:

T: 25°C (77°F)
dC: 2°C (4°F)

When the temperature rises up to ... T + dC ... [25°C (77°F) + 2°C (4°F)] = 27°C (81°F) ... the exhaust fan turns on.

The CO2 is refreshed frequently when the exhaust fan turns on, ... expels the hot air and simultaneously draws in fresh air.

When the temperature drops back down to 25°C (77°F) ... the exhaust fan turns off.

This gives us the High Transpiration: Mid Flower/Late Flower VPD values we need for the C.R.E.A.M. and Cheese to flower.

*** The VPD Values I am Using For This Grow (Version 1)

*** Once the photoperiods are harvested, then Environment #2 can become a Veg tent.


Lessons Learned:

Complete Guide to Trimming Cannabis

By Nebula Haze

*** Continued from yesterday.

Here are some examples of buds from plants where I trimmed half the buds before, and half after. I wanted to help you see what difference it made. It’s really kind of different depending on each plant.


0_dry-trim-vs-wet-trim-cinderella-jack-1-450x285.jpg

Notes on test of dry trim vs wet trim
  • The untrimmed buds took 0.5 to 3 days longer to dry. The leafier the plant, the longer it added to the dry time.
  • The biggest difference is I noticed the “dry trim” buds seem noticeably more dense/uniform.
  • The dry vs wet trim buds smell a bit differently, but all smell good. Neither seems particularly stronger or better as far as smell.
  • I noticed that the “dry trim” buds often seem more brown as if they’ve been curing for months. The effect was most pronounced on the leafiest plants, which may have taken a little too long to dry.
  • As far as comparing taste/smoothness/potency. In blind tests with cannabis enthusiasts, I’ve gotten mixed results. Some people prefer the smell or smoothness of the buds one way, while others like the exact opposite. It doesn’t seem to follow any particular pattern that I can tell. I truly think it’s a matter of personal preference, and also varies from strain to strain.
In practice, I’ve seen a huge variation between growers as far as when they trim. Some growers trim plants immediately after harvest, some trim partway through drying, some trim after buds are totally dry, and some never trim at all. It can also vary with the local weather and even the particular plant. For example, if I had an extremely leafy plant and the humidity was high right as I was harvesting, I may opt to trim the plant before drying to prevent the chance of mold, even though I might normally prefer to trim after.

If sugar leaves are healthy and covered in trichomes, it’s more common for growers to leave them on.

This is what that might look like after the buds have been dried:


0_sparkle-bud-nugget-sm.jpg

Sugar leaves are healthy and covered in trichomes.


Although these cannabis buds are beautiful and the sugar leaves are absolutely covered in trichomes (so you know they have significant amounts of THC), the buds may possibly be slightly more “harsh” than if all the sugar leaves had been trimmed away.

On the flip side, there are many people who prefer seeing trichome-encrusted sugar leaves on their buds, so in the end, it’s a matter of personal preference. There’s no right or wrong way about it!

How to trim your buds like a pro!

Sharp scissors (for trimming buds) – Fiskars shears are our weapon of choice. They are very sharp and have a pointy end, which makes it a lot easier to get your bud looking perfectly manicured!

Big pruning shears, or tough scissors you don’t mind destroying (for cutting off branches) .
These will be used to actually cut down single branches as you harvest colas to be trimmed.

If possible, try to use a separate pair, and not the same sharp scissors you plan to use for trimming buds. Some branches are tough enough to destroy a pair of nice scissors in a single harvest. You want sharp scissors for trimming your buds; it will save you so much time!

Disposable rubber gloves - Rubber gloves are actually meant to protect your hands from your bud! Handling bud without gloves will make your hands sticky to the point where it becomes a constant problem. Plus, hands covered in resin are difficult to clean!

3 Trays or Cookie Sheets - You need a tray to hold your untrimmed buds, one to hold your newly trimmed buds, and the last one to hold your ‘trim’ (the plant matter you cut off the buds).

Of course, you can use anything to keep your separate piles in, but cookie sheets have worked really well for me! Baking sheets work nicely and are cheap, but honestly, any non-absorbent flat surface will work. I like cookie sheets and other wide cooking pans because they have a lip around the edges to help keep everything contained!

Once you have all of your gear assembled, move onto the steps below when you feel ready. Keep in mind that this can be a lengthy process depending on how much bud you’ve grown. However, any negative feelings you get from the labor of trimming will be far outweighed by all the bud you’ll be drying soon!

One last thing… Don’t forget to save all your leaves and other trim! You can use the extra leaves you cut off to make edibles or hash. If you can see trichomes (“glitter”) on the leaves, that means they have good stuff to extract! If a bud is very small or wispy, sometimes I’ll throw that in the trim pile as well.

You can turn your trim into …

  • Best Weed Butter Recipe
  • Canna Caps
  • Rick Simpson Oil (RSO)
  • Dry Ice Hash
1.) Set Up Your Trimming Area

Before you start trimming your plants, you should set up a nice, comfortable place to trim your bud-laden branches. Trimming can take a lot longer than it might seem at first, and it’s a good idea to dedicate at least an afternoon to trimming. I usually try to start trimming in the morning on a day I have off with no other plans in case it goes on longer than expected.

As far as where to do your trimming, a large, clean and cleared table on a non-carpeted floor works great! You will be getting little pieces of leaves everywhere, even if you’re careful, so try to trim in a spot that’s easy to clean. If you have to trim on carpeting, put down a sheet or tarp so spare your poor carpet from trichome stickiness.

I like to get set up in front of a TV, so I can watch movies or shows in the background while I’m trimming. Music or radio can be nice too. In order to stay as comfortable as possible while trimming, I believe it’s important to make sure you get up at least once an hour, even if just to walk around the house or move to a different chair. Take a second to stretch your arms, shoulders and neck. Sometimes you can get in the zone while trimming and not move for a while, so making a point to make breaks will help keep your back, neck and hands from getting cramped up.

Put out your trays as you’ll be using them in just a moment. You’ll be using one tray to hold your untrimmed buds, one to hold your trimmed buds, and one to hold your leaves/trim. You want to keep it all separate if you can, though some spillover is inevitable.

Important Note: The trimming of buds creates a great deal of odor, especially if they’re fresh! The room that you trim in (and any adjoining rooms) will smell like a cannabis farm; it’s actually far worse than when they’re just flowering! Make sure to contain the smell and try to mitigate the odor if you can. I like to run an exhaust fan on a carbon scrubber (the same one I use in my tent) while I trim. While it doesn’t completely cancel out the smell, it does get pretty close.

Now that you’ve set up your space, it’s time to start harvesting!

2.) Wash your hands and put on a pair of gloves

I prefer latex gloves as they’re sturdy and it feels easier for me to change into a new pair. But any gloves you like will do the trick!


0_sticky-resin-fingers-trimming-sm.jpg

These gloves will soon be sticky with resin!

If you don’t use gloves, get some rubbing alcohol ready, because you’ll need it to get all the resin off your fingers once you’re done trimming! Soap and water won’t cut it! You can also save the resin – it’s basically hash!

3.) Using your tough scissors, cut a branch off your cannabis plant


You may want to cut just one branch down the first time so you can get a feel for trimming, instead of cutting everything down at once. That way you can get an idea of how big of a branch you want to work with at a time.

If trimming immediately after harvest, this also allows you to harvest the plant in stages. If you have to stop halfway through for whatever reason, the buds will be fine for an extra day or two as long as they’re still attached to the plant (even if the rest of the plant is completely hacked up).

When cutting off branches to trim, remember to cut them to a comfortable working size.


0_cut-off-branch-during-harvest-to-be-trimmed-sm.jpg

No larger than these two or you’ll probably have a hard time handling them!

4.) Remove Large Fan Leaves with Your Fingers

These are the leaves that are easily pulled off by their long stem. Put these fan leaves in a pile to be disposed of later.

Most fan leaves do not have a usable amount of trichomes on them. If you plan to save your trimmings to make hash you may want to put these bigger fan leaves in a separate pile so you can throw them directly away, instead of mixing them in with your trim pile. The big fan leaves add a lot of plant matter that you have to process, but without adding much THC.

5.) Trim Off the Sugar Leaves

Make a note of the small leaves that stick out of the buds; you will be able to see the leaf tips, but usually not the stems. These are typically referred to as “sugar leaves” and don’t need to be removed, only trimmed with your scissors if they stick out.


0_trimming-cola-during-harvest-sm.jpg

Trimming Sugar Leaves


If the sugar leaves are covered in a lot of trichomes, some growers will leave them on instead of trimming them. I personally don’t recommend doing that because any extra leaf matter tends to make buds harsher when you smoke them. You want as close to pure bud as possible. If you don’t want to waste all the trichomes on your sugar leaves, the best thing to do is save them in your separate trim pile and you’ll be able to extract the trichomes off the leaves later to make extracts like hash, caps or butter, This means you’re still getting all the THC, but without the added harshness of extra leaf matter. That’s why I highly recommend trimming all the sugar leaves until they are flush with the buds.

0_fat-cola-in-hand-sm.jpg

Sugar leaves are cut so they are flush with the bud, giving it a round, almost smooth appearance .

You should be left with a branch with trimmed bud on it. Now that you’ve got the hang of it, repeat this process on the remainder of the branches on your cannabis plant!

Do your best to make sure that all the ‘trim’ (the leaves trimmed from your bud) falls onto the tray designated for it. Not only does that let you save more trim for hash, it will help you with cleanup later! Try not to cut off any of the actual buds, but if you do by accident, feel free to throw it in the trim pile.

The whole trimming process can take a while depending on how much you ended up with, but if it’s more than you can do at once, it’s perfectly okay to harvest your plant in stages over a few days.

If the buds are already dried, you should put them in jars to prevent them from drying further even if they’re untrimmed. You could potentially come back to trim them later.

After trimming, your scissors (and fingers) will be covered in hash. Don’t throw that stuff away – it’s concentrated cannabis resin! You can vape, smoke or consume hash just like cannabis flowers!

Don’t toss out all your leaves! Learn how to turn your trim into…

Weed Butter
Canna Caps
Rick Simpson Oil (RSO)
Dry Ice Hash

6.) Dispose of your plant

If you haven’t yet, it’s time to securely dispose of the remainder of the plant!


Cut your plant up into pieces and double bag all the plant matter left over after harvest. Do not throw this bag away until the day your trash is picked up. This means there is less time where someone could go through your trash and find it!


ToDo:

Learn more about Complete Drying & Curing Marijuana Guide.

Learn more about pests and nutrient deficiencies.

Learn more about growing during flower and the stretching of colas.
 
How The VPD For Environment # 1 Is Automatically Dialed-In

The light is running 1 cycle of "24 hours lights-on and 0 hours lights-off" ... it is a constant heat source.

The light is 53 cm (21") above canopy centered over the plants.

The TaoTronics humidifier is set to 50% RH.

The Inkbird ITC-308 temperature controller is set to:

T: 25°C (77°F)
dC: 2°C (4°F)

When the temperature rises up to ... T + dC ... [25°C (77°F) + 2°C (4°F)] = 27°C (81°F) ... the exhaust fan turns on.

The CO2 is refreshed frequently when the exhaust fan turns on, ... expels the hot air and simultaneously draws in fresh air.

When the temperature drops back down to 25°C (77°F) ... the exhaust fan turns off.

This gives us the High Transpiration: Mid Flower/Late Flower VPD values we need for the C.R.E.A.M. and Cheese to flower.

*** The VPD Values I am Using For This Grow (Version 1)
 
Hey SQ - things are busy on my end and iv'e not been able to check your grow in the last 2 weeks or so - but just got caught up and everything is still looking good in there. Looks like you'll need to do some thinning out on the girls soon to improve light penetration and air flow :yummy:
 
Looking good, SQL, and of course I reread several times about curing and trimming. You sure save me a lot of searching time. Blessers Bro. Thanks for all you do.

Thanks @oopssteptinit!

I am about 3 weeks away from havesting my first plants ever ... so I figured I better do a complete review before that so the information is fresh in my mind and I can access it here quick when the time comes.

It's a lot of reading, but well worth it in my opinion ... and I even get to finish up the series today ... complete harvesting brought to you by ... flushing ... harvest ... trimming ... drying & curing :)

I already did a drying & curing article based on a thread here that I really like ... so I'm wondering what the Nebula Haze article will be like today.

Enjoy your weekend ... ttyl
 
Hey SQL - things are busy on my end and iv'e not been able to check your grow in the last 2 weeks or so - but just got caught up and everything is still looking good in there. Looks like you'll need to do some thinning out on the girls soon to improve light penetration and air flow :yummy:

Good eye as always @irie lion ... you were missed ... and we hope everything is still going great for you!

I'm actually very selective when it comes to pruning fan leaves ... and even more so now that six of the plants are going into flower.

Since this is my first grow, I am going to focus on spreading everything out instead of thinning things out.

I did a bunch of pruning during veg, and lollipopping before flower ... I can see light hitting the soil ... and I check for mold everyday ... so I'm pretty happy letting those fan leaves drive bud production.

Actually that's part of my current strategy to maximize my yield ... lots of fan leaves ... let the plant cannibalize the fan leaves because I spent lots of time in veg charging them with Nitrogen ... spread out the buds using LST ... keep the canopy even using LST (increases yield by 40%) ... and dial-in VPD in each environment.

Alright, enjoy your weekend ... ttyl
 
August 03 2019 - Update

Images:


IMG_20190803_135143.jpg

Bakerstreet #1 - Hanna Hemp - Looks healthy so far - growth nodes are exposed to light and air.


IMG_20190803_135202.jpg

Bakerstreet #2 - Henna Hemp - Looks healthy so far - growth nodes are exposed to light and air.


IMG_20190803_144823.jpg

C.R.E.A.M. #1 - Cowgirl Hemp - Looks healthy so far - budlets are exposed to light and air.


IMG_20190803_144837.jpg

Cheese #1 - Gouda Hemp - Looks healthy so far - budlets are exposed to light and air.


Growth Stage:

2 Bakerstreets: Day 6/ Week 10 ... Day 69 ... week 2 flower.

*** Should get pixels between August 03, 2019 and August 10, 2019.

*** Photoperiod Stages: 5 days Germination, 1 week seedling, 2-8 weeks veg, 6-12 weeks flower, 4-12 weeks cure
*** Allow 1 day to 3 days of dark before switching to 12-12
*** Pistels show up about 14 days (2 weeks) after switching to 12-12


1 C.R.E.A.M.: Day 6/ Week 9 ... Day 62 ... mid flower.
1 Cheese: Day 6/ Week 9 ... Day 62 ... mid flower.

*** Should be ready for final full flush between August 04, 2019 and August 11, 2019.
*** To check for final full flush the white pistils are 50% darkened and curled in & trichomes are 50% cloudy.
*** Should be ready to harvest between August 18, 2019 and August 25, 2019.

*** Autoflower Stages: 5 days Germination, 1 week seedling, 3 weeks veg, 3 weeks pre-flower, 3-6 weeks flower, 4-12 weeks cure
*** Pistels show up about 35 days (5 weeks) after Germination
*** Flowering takes about 42 days to 56 days (6 weeks to 8 weeks) after pistels show up


Environment #1 - Autoflower Veg/Flower:

*** The VPD is now automatically dialed-in to High Transpiration: Mid Flower/Late Flower.

RH is running between 50% and 55% - lights-on.

Canopy temperature is running between 25°C (77°F) and 28°C (82°F) - lights-on.

VPD is between 1.23 and 1.30 - High Transpiration: Mid Flower/Late Flower - lights-on.

*** How The VPD For Environment # 1 Is Automatically Dialed-In

*** The VPD Values I am Using For This Grow (Version 1)

CO2 is refreshed frequently when the exhaust fan turns on.

The light is running 1 cycle of uninterrupted "24 hours lights-on and 0 hours lights-off".

The light is 53 cm (21") above the canopy centered over the 2 plants.


Environment #2 - Photoperiod Flower:

*** I will start tracking RH, canopy temperature and VPD again when the Inkbird IBS-TH1 I ordered gets here.

*** The VPD Values I am Using For This Grow (Version 1)

CO2 is refreshed frequently when the exhaust fan turns on.

The light is running 1 cycle of uninterrupted "12 hours lights-on and 12 hours lights-off".

The light is 53 cm (21") above the canopy centered over the 2 plants.


Watering and Feeding:

Bakerstreets' Feed:

*** Next feed ... 6 litres (1.6 gallons) - water only on August 05, 2019 or August 06, 2019.
*** Expecting about 10%-20% - 0.6 litres (0.16 gallons) to 1.2 litres (0.32gallons) of run-off.


C.R.E.A.M.'s Feed:

*** Next feed ... 4 litres (1.0 gallon) - water only on August 05, 2019 or August 06, 2019.
*** Expecting about 10%-20% - 0.4 litres (0.11 gallons) to 0.8 litres (0.22gallons) of run-off.


Cheese's Feed:

*** Next feed ... 4 litres (1.0 gallon) - water only on August 05, 2019 or August 06, 2019.
*** Expecting about 10%-20% - 0.4 litres (0.11 gallons) to 0.8 litres (0.22gallons) of run-off.


*** For details on my feeding schedule refer to here: The Different Feeds I need For This Grow (Version 4)


Activities:

LST on all plants.
I am checking the plants twice each day and adjusting the LST because the plants are growing quicker now.
My priority is to expose the growth nodes to light and air because they are going to become colas.

Refilled the humidifier with water.

*** Trying to get the Bakerstreets' growth nodes placed evenly in the ScrOG squares.


Notes:

The priority has to be to expose the growth nodes/buds to light & air, and to keep the canopy even and flat.

*** I am going to let the plants grow naturally now and stop tucking the stems into the ScrOG. For details on this decisio, please refer here: How long to Veg Photoperiods? - Version 2

*** The VPD for Environment #1 is still automatically dialed-in.

*** I have ordered an Inkbird IBS-TH1 Wireless Thermometer Hygrometer to simplify collecting VPD data points for Environment #2 ... the photoperiod flower tent.

*** Once the photoperiods are harvested, then Environment #2 can become a Veg tent.


Lessons Learned:

Complete Drying & Curing Marijuana Guide

By Nebula Haze

Why Do Growers Dry and “Cure” Cannabis Buds?

Harvest time!

Your buds are ready for harvest, yet your job as a grower is not quite over yet. You still need to put your newly harvested buds through the cannabis curing process.

In order to ensure the best quality for your freshly harvested buds, you must prepare your buds with a process known as curing, which involves drying your buds slowly in a controlled environment, then keeping buds in glass jars over the course of a few weeks to let certain natural plant processes occur. The drying/curing process causes buds to smell better and for effects to feel more potent. It also reduces harshness.


Optimal Drying Environment:
Room Temperature – Around 70°F (21°C)
50% Humidity

Optimal Environment in Jars (Curing):
Room Temperature – Around 70°F (21°C)
58-65% Humidity

Growers cure marijuana buds because they will not achieve their peak potency and quality if they’re uncured. If you started with great genetics and you’ve taken care of your marijuana plants properly during their life, then curing is what makes the difference between “just okay” and trophy-worthy buds.

A big part of why buds from medical marijuana dispensaries or cannabis cups often seem so special is they have been expertly dried and cured. People who have never experienced buds prepared this way are often amazed by the smooth, pleasant experience of slow cured buds.

Why Do Growers Dry & Cure Buds After Harvest?

Here’s what drying and curing cannabis properly does for you…


  • Breaks down chlorophyll and dramatically improves taste / smoothness of buds
  • Gets rid of the unpleasant “fresh hay” or “cut grass” smell which is common on newly harvested buds
  • Brings out the subtle flavors and unique smell of your cannabis strain
  • Reduces “harshness” in buds; you’re less likely to start coughing or get a headache
  • Buds are less likely to cause anxiety, racing thoughts, or paranoia
  • Reduces the chance of mold or bacteria growing on your buds
  • Curing seems to actually increase potency! Read on to learn more…
In most cases, a proper cure will change the subjective effects of buds. There is something that happens during a slow curing process which changes the exact composition of cannabinoids and terpenoids. This changes how buds make you feel.

Try smoking buds directly off the plant vs smoking those same buds after they’ve been dried/cured. The best way to understand the difference is to try it for yourself!

Many growers feel that drying buds slowly and proper curing will actually make buds feel more potent up to a point. Growers also report that properly cured buds are much more pleasant to smoke, vaporize, or turn into edibles. This is likely due to how cannabinoids and terpenoids are altered during the curing process.

So now you may be wondering…

  • How do you dry your marijuana buds slowly?
  • How long do you dry your buds for and what’s the best drying method?
  • How do you cure buds perfectly every time, without leaving anything to chance?
Get the answers right here!

Note: This article covers the tried-and-true steps for traditional curing. This is the most used and well-studied way to cure your buds. However, there are other possible methods including water curing which I personally don’t have any experience with.

Drying & Curing Marijuana: Overview

Curing begins as soon as you cut down your plant. So in order to get the most from curing, you need to master the process of drying your buds.

An important part of the curing process happens during the first few days, as you begin drying your buds. During this initial drying phase, the main goal is to let your buds dry out relatively slowly (usually 3-7 days) while protecting buds against mold and bacteria growth.

Curing starts as soon as you cut down your plant!

Most growers trim their buds and hang them upside down to dry until the outsides of buds are dry and the small stems snap when you bend them. Basically, once your buds will pop off you’re ready to go

A relatively slow drying process (along with smart curing practices) gives you the best benefits. It doesn’t need to take forever, but any time you “speed dry” your freshly harvested buds you’re losing many of the benefits of curing. However, your buds are still improved by curing even if you overdry your buds or dry them a little too quick.

Note: If you use heat to speed dry your buds (microwave, oven, etc), buds will really taste terrible.


0_cannabis-harvest-drying-curing-cheat-sheet-small-version.jpg

An overview of the harvest / drying / curing cannabis process.

Now I will walk you through a step-by-step process so you can produce a professional cure every time, with no guesswork involved.

This method will work for you even if you’re just starting out and have never cured buds before. No matter what previous experience you have curing buds, this will show you how to ensure they come out connoisseur-quality every time.

How to Perfectly Dry & Cure Your Marijuana Every Time

What you need:

*** Wide mouthed mason jars – 1 litre (1 quart) size. These are sometimes labled as “32 oz” jars.

*** Place to Dry or Drying rack (optional) – I usually hang my buds from clothes hangers in my closet but you can hang buds from almost anything! String and creativity go a long way It’s only recommended to use a drying rack if there’s high humidity or a lot of buds to be dried in a small space, because a drying rack can dry buds too quickly in average humidity conditions.

*** Hygrometer (optional) – I like the Caliber IV Hygrometer because it easily fits inside quart mason jars. This measures the humidity of the air inside your jar, so you can make sure it’s not too humid or too dry for optimal curing.

*** Humidipaks (optional) – Boveda Medium 62% packs are cheap and specifically formulated for storing cannabis so it does not dry out or get crispy.

Step 1: Cut down your plant

Some growers cut the plant down at the base and hang the whole plant upside down to dry. Others will cut off branches and hang them to dry. Still others will cut off individual buds so they can lay them out and dry them on a mesh screen or rack.

How should you cut down your plant?

It’s tough to mess this part up! You can harvest your plant a piece at a time, and I’ve also seen growers trim their buds while they’re still on the plant so they can hang their whole plant upside down to dry.


0_chop-plant-marijuana-harvest-sm.jpg

Here’s a plant that is halfway through being harvested.

Step 2: Trim away extra fan leaves

Before you start drying your buds, most growers will trim away extra leaves.

At the very least, you should trim away all your big fan leaves, though many growers also trim down the little leaves that grow on the buds.

This improves the appearance of your buds, and will provide a smoother experience. Too much leafy matter can make buds more harsh.

The amount of leaves you trim off is due to personal preference. However, like the last step, you want to leave more if you live in a very dry area. You want to cut off as much as you can if your area is humid, to help speed up the drying process and prevent mold. If it’s very humid where you live than you may consider removing buds from branches while drying.

If Your Humidity Is…

*** Dry (Under 30% RH) – You might consider leaving more leaves on your plant while trimming to help slow down the drying process. The more plant matter left behind, the lower the buds dry. For example you could trim your buds but leave extra fan leaves, or possibly even not trim at all until after drying.

*** Average Humidity – If you never really notice the humidity where you live chances are it’s perfect for hanging your cannabis upside down to dry

*** Humid (Over 60% Humidity) – If it’s very humid where you live, you might consider actually separating buds from branches after trimming and put them on a drying rack or mesh to help them dry in the high humidity without running into problems with mold (here’s how one grower dried in high humidity).

I recommend trimming your buds while wearing disposable gloves, to prevent your hands from getting covered in sticky resin.

You may want to save your trim (resin-covered leaves or larfy buds you’ve trimmed off). These extra leaves are not good to smoke by themselves, but after being dried, the trim can be processed to make marijuana butter or other cannabis extracts.

Right after you harvest your plant, it’s important to start drying your buds slowly, over a couple of days to a week or more.

Step 3: Begin the slow drying process

Why should you dry your cannabis slowly? Drying your buds is the first part of the curing process, and important!


Optimal Drying Environment:
Room Temperature – Around 70°F (21°C)
50% Humidity

Here are some ideas to adjust your environment:

  • Air Conditioner – Cools Air & Lowers Humidity
  • Evaporative Cooler – Cools Air & Raises Humidity
  • Dehumidifier – Heats Air & Lowers Humidity
  • Humidifier – Heats Air & Raises Humidity
  • Heater – Heats Air & (Usually) Lowers Humidity
Buds which are quick-dried in a dehydrator/stove, via dry ice, or in a microwave taste terrible, smell even worse, and often leave you with a migraine or paranoia. When you quick-dry your buds, you are completely skipping over the most important part of the curing process!

In fact, even drying your buds in mildly hot temperatures, like 85°F (30°C), can burn off valuable smells (terpenes) & possibly certain cannabinoids.

Curing you cannabis properly makes up almost 50% of your final bud quality!

You can take the best cannabis in the whole world but if it’s not cured it’s going to be mid-quality at best!

There are many ways to dry your marijuana buds.

Hanging buds upside down to dry is considered the “standard” way of drying. You can get creative when coming up with ways to hang plants upside down.

You can dry buds by hanging them upside down from clothes hangers, string, almost anything you can think of. You can even hang the entire plant upside down. Personally, I prefer to hang buds upside down for the drying process.

However, you can dry your buds via many different ways!

These mesh drying racks are great for drying your newly harvested budsSome growers place their freshly harvested buds on a drying rack as pictured to the right.


0_buds-on-drying-rack.jpg

Some growers place their freshly harvested buds on a drying rack.

A drying rack will dry your buds faster than most of the other methods because the stems are removed from the buds (and the stems contain a bit of water). Using a drying rack is the preferred drying method if you live in a humid area where mold is a problem, if you’re drying a lot of buds in a relatively small space, or if you have huge colas or buds that you’re worried might mold.

You can leave as much or as little stem as you want. The more you leave, the slower the dry.

I usually dry my newly harvested buds in my grow tent, or a closet.

If you’re laying your buds on something flat like cardboard, it can create wet spots, and will leave an imprint on the sides of your buds where they touched the flat surface. That being said, cardboard can be a way to help people dry buds if they live in a humid environment because it will quickly pull the water out of the buds.

If buds are creating wet spots, you may need to rotate them every few hours so they dry more evenly. This is one of the reasons I prefer to use a drying rack if it’s humid, or hanging buds pretty much any other time.

If buds start to seem wet/soggy, or if you live in a very humid environment, you may need to use a small fan to create extra airflow in the drying area to prevent buds from getting too wet and causing mold. Never point a fan directly at your buds, only point it at a nearby wall. Even then, be careful of drying buds too fast with a fan! You should avoid using a fan unless it’s absolutely necessary because it can easily overdry buds. I’ve overdried an entire harvest by adding a fan before, so use with caution!

For those who live in extremely humid areas (where the high humidity in the air is preventing buds from drying even with a fan), there are more resources at the bottom of this article on how to dry out your buds properly.

The most important aspect of the drying process is to dry them slowly, and in such a way that it’s easy for you to check on them regularly. So don’t hide them in the back of a closet that’s hard for you to get to. You need to be able to check on your buds every day, and more often is possible (especially during your first few harvests, until you know how buds dry in your personal environment).

Step 4: Continue drying until outsides of buds feel dry to the touch, and smaller stems snap instead of bend, usually 3-7 days. Buds will “snap” off without leaving a stringy trail.

If buds are dry sooner than 3-4 days, it may mean you’ve dried your buds a little too fast, but that’s okay! Live and learn for next time. It’s difficult to get things exactly right at first because the size and density of the buds, and your environment can vary so much! Even if buds have been dried too quickly, they still benefit from the curing process, but it may take a little longer than normal for buds to be fully “cured.”

If you accidentally remove all moisture from the buds (dry your cannabis for too long), the curing process slows down dramatically, or may even come mostly to a halt. However just like buds dried too quickly, overdried buds will still cure, but it takes longer.

When to jar cannabis buds?

When hanging your buds upside down to dry, your buds are ready to be placed in jars when the outsides of all the buds are completely dry to the touch, but not brittle.The bigger stems will still be bendy but the smaller stems will snap when buds are ready to pull down.

When buds are finished drying, you’ll be able to snap off the smallest buds with your fingers without leaving a “string” of plant behind. “Stringiness” means there’s still too much moisture inside.


0_if-buds-snap-off-cannabis-finished-drying-sm.jpg

Although the buds may feel overdry at this point, if the bigger stems are bendy it means there’s still water hidden inside that will work its way to the outside of the buds during the curing process. This is the perfect time to pull down your buds and jar them.

If you pull down your buds before the smallest stems snap, you’ll find they tend to be too wet once you put them in jars, so you’ll end up having to dry them more anyway. But if you can find a stem that snaps, it’s better to take buds down too early since it’s a lot easier to take water away than add it back.

With drying methods where the buds have been removed from the stems, it’s important to jar buds as soon as the outsides feel dry to the touch, before the buds dry all the way through, since there won’t be any stems to “hold onto” some extra water.

If buds were completely separated from the stems during the drying process, they’re ready as soon as the outsides feel dry to the touch.

It’s ideal to pull buds down at the right time because you can slowly draw out the moisture from the middle of the buds, which allows the curing process to continue. As long as the outside of your buds feel dry to the touch, it is unlikely for mold to grow. Mold generally grows where the outsides of your buds feel moist or damp to the touch.

Some growers choose to sample some of their buds at this point, but be aware that the smell, taste, and potency are not even close to optimal yet. Buds that haven’t been cured are also usually harsh, tend to bother the back of your throat, and give some people headaches. Bud don’t worry, your bud quality continues to improve as you cure the buds and help break down some of the “bad stuff” that you don’t want in your buds.

Step 5: Place your buds in jars

From this point, your goal is to store your buds in a controlled environment. You want to stabilize the relative humidity at around 60-65% when the buds are placed in an enclosed container. This is the correct environment to cure your marijuana buds to perfection. If you’ve taken your buds down when the smallest stems snap, but the larger ones bend, then chances are your buds will already create the perfect humidity when they’re in the jars.


Optimal Curing Environment (in Jars):
Room Temperature – Around 70°F (21°C)
60-65% Humidity

0_stack-of-jars-liberty-haze-critical-kush-sm.jpg

Place your dried cannabis buds in jars for the “curing” process.

When the humidity is at 60-65%, your buds will feel completely dry on the outside, but won’t crumble or seem dusty in your hands (which usually means the humidity is too low).

Here’s how to jar your buds the right way every time, without any guesswork on your part.

The ideal storage containers for marijuana buds are wide-mouthed glass mason jars. These can be found pretty easily at big grocery stores, most craft stores, online, and at superstores (like Wal-mart). As cannabis cultivation has become more popular, these jars are appearing in more and more stores.

You want mason jars that hold 1 quart (labeled “Quart jars” or sometimes 32oz jars). Each of these jars will hold about an ounce of dried buds (usually about 0.75-1.25 ounces of bud will fit in one jar, but it can be more or less depending on the consistency of your buds).

One-quart glass mason jars have proven to be a great size for proper curing. Bigger jars are more likely to encourage mold – I’ve learned this one from experience Other types of jars often don’t seal the right way, which can prevent buds from curing properly. For example, the type of jars that have a rubber seal don’t seem to cure buds right for me. I always use quart-sized glass mason jars, and you’ll see that the majority of growers do the same.

You want to fill each jar 75% full of buds, so there’s still a bit of air at the top. If you shake the jars, you want the buds to be able to move around. If they’re sticking together it means they’re still too wet and you should leave the lids off for a little while to help them dry out.

If buds are sticking together in clumps when you try to shake the jar, it means they still have too much moisture and need to be dried further. Just like when buds are too dry, when buds are too wet they slow down the curing process, but it’s even worse because it can cause mold. Never let buds sit in jars if they feel wet, or even moist on the outside!

Buds should always feel completely dry on the outside, and shouldn’t stick together. If you ever smell “ammonia” it means they’re too wet and bad bacteria is starting to grow

If you notice that any buds feel damp or moist, do not store them in the jars yet! Allow those buds to continue drying slowly until they start to feel dry on the outside before putting them in jars.If they’re already in jars and feel moist, make sure to leave the tops of the jars off until the buds feel dry again.

I know it’s tough to keep them from drying out all the way, yet not putting them in too wet. But if you follow these steps you’ll be able to get it perfect!

How much difference does the humidity inside the jar make?

More on curing buds in anaerobic conditions

Some growers cultivate strongly anaerobic conditions during the drying/curing process on purpose. For example, some indoor growers put their cannabis buds in jars while at least partially wet on the outside, causing extra bacterial growth. Buds cured in very wet conditions look different, smell different and produce different effects, but may be more harsh.

Another real-life example of curing buds in anearobic conditions is some outdoor growers will throw newly harvested cannabis buds in a pile while wet, leaves and all, and allowed it to sort of cook in place like a compost pile. After some amount of time, the buds are wrapped up and compressed for storage, often still partially wet, then cut up into bricks. This is considered a type of “brick weed.”


0_example-cannabis-brick-weed-sm.jpg

Example of “brick weed” cured in anaerobic (wet) conditions.

Any curing process that involves letting buds stay wet and sealed up at the beginning produces weed with a different consistency and different effects. Buds become crumbly and they lose their green color after just a week or two, becoming more tan or golden. Many people agree that curing in anaerobic conditions can produce bud that is more “harsh” and this type of bud is generally considered “inferior.” To be fair to both sides, there are people I’ve met who prefer this type of cannabis because they like the slightly different effects.

That being said, curing buds while still wet can be unsafe by causing unwanted mold or a bad type of bacteria to grow. If you cure buds while they’re dry on the outside and moist on the inside, as stated in this tutorial, you can achieve the same mental and physical effects of anaerobic-cured weed without the harshness, simply by giving buds a little more time to cure.

If you want to safely get the effects of anaerobically cured bud, all you have to do is cure buds in jars for 2+ months. They start to slowly get a similar appearance and consistency of bud cured in anaerobic conditions, but instead of being harsh they actually get smoother over time. The mental and physical effects of long-cured buds also seems to get stronger as it’s cured longer (up to a point), giving similar heady and body effects that some describe as being a little “drunk.” Long-cured buds gives you the same benefits without the harshness or lack of safety. Because of that, I highly recommend avoiding sealing up buds that feel wet on the outside during the curing process!

Step 6: Curing (first few weeks): Open all jars regularly to inspect and air out buds


*** To be continued tomorrow!


ToDo:

Learn more about ... Complete Drying & Curing Marijuana Guide - Step 6.

Learn more about pests and nutrient deficiencies.

Learn more about growing during flower and the stretching of colas.
 
How long to Veg Photoperiods? - Version 2

By rmoltis at THCFarmer:

Try not to focus so much on when.

You will have to judge based on height and observed growth rates over time.

People say 2x-3x stretch.
So with your final planned pot size.
Put them in the room and measure from the top of said pots to the maximum vertical distance with the planned buffer for heat between the lights and canopy.

Once total vertical height is measured either divide it by 2 to get your ideal flowering height for a slow growing plant.
Or divide by 3 for ideal height for a fast growing plant.

You could also just err on the side of 3x growth to be on the side of caution.

By @SQl2kGuy :

For example ... using the 24"x48"x60" photoperiod flowering tent:

The ScrOG is currently set at 24".
The plant height is currently 24" ScrOG - 14" pot = 10" plant height.
The light has already been flipped to 12-12 on July 22, 2019.
The plant has been stretching and I have been tucking the stems for about 12 days now.

I have: 60" tent - 14" pot - 12" light-heat buffer - 6" light = 28" total vertical height.
The canopy height can be 28" / 2 = 14" for a slow grower.
The canopy height can be 28" / 3 = 9" for a fast grower.

This means that I could have flipped to 12-12 without a ScrOG at 9" for a fast grower.
This means that I could have flipped to 12-12 without a ScrOG at 14" for a slow grower.

With the ScrOG, ... I have 18" of total vertical height ... so it is definitely safe to stop tucking now.

Basically, I could have let the plant stretch normally after flipping to 12-12 without a ScrOG when the plant was 9" tall.

*** At this point, I am going to allow all the plants to stretch normally, and to stop tucking the stems in.
 
August 04 2019 - Update

Images:


IMG_20190804_201330.jpg

Bakerstreet #1 - Hanna Hemp - Looks healthy so far - growth nodes are exposed to light and air.


IMG_20190804_201339.jpg

Bakerstreet #2 - Henna Hemp - Looks healthy so far - growth nodes are exposed to light and air.


IMG_20190804_201545.jpg

C.R.E.A.M. #1 - Cowgirl Hemp - Looks healthy so far - budlets are exposed to light and air.


IMG_20190804_201558.jpg

Cheese #1 - Gouda Hemp - Looks healthy so far - budlets are exposed to light and air.


Growth Stage:

2 Bakerstreets: Day 7/ Week 10 ... Day 70 ... week 2 flower.

*** Should get pixels between August 03, 2019 and August 10, 2019.

*** Photoperiod Stages: 5 days Germination, 1 week seedling, 2-8 weeks veg, 6-12 weeks flower, 4-12 weeks cure
*** Allow 1 day to 3 days of dark before switching to 12-12
*** Pistels show up about 14 days (2 weeks) after switching to 12-12


1 C.R.E.A.M.: Day 7/ Week 9 ... Day 63 ... mid flower.
1 Cheese: Day 7/ Week 9 ... Day 63 ... mid flower.

*** Should be ready for final full flush between August 04, 2019 and August 11, 2019.
*** To check for final full flush the white pistils are 50% darkened and curled in & trichomes are 50% cloudy.
*** Should be ready to harvest between August 18, 2019 and August 25, 2019.

*** Autoflower Stages: 5 days Germination, 1 week seedling, 3 weeks veg, 3 weeks pre-flower, 3-6 weeks flower, 4-12 weeks cure
*** Pistels show up about 35 days (5 weeks) after Germination
*** Flowering takes about 42 days to 56 days (6 weeks to 8 weeks) after pistels show up


Environment #1 - Autoflower Veg/Flower:

*** I will start tracking RH, canopy temperature and VPD again when the Inkbird IBS-TH1 I ordered gets here.

*** The VPD Values I am Using For This Grow (Version 1)

CO2 is refreshed frequently when the exhaust fan turns on.

The light is running 4 cycles of "5 hours lights-on and 1 hours lights-off".

The light is 53 cm (21") above the canopy centered over the 2 plants.


Environment #2 - Photoperiod Flower:

*** I will start tracking RH, canopy temperature and VPD again when the Inkbird IBS-TH1 I ordered gets here.

*** The VPD Values I am Using For This Grow (Version 1)

CO2 is refreshed frequently when the exhaust fan turns on.

The light is running 1 cycle of uninterrupted "12 hours lights-on and 12 hours lights-off".

The light is 53 cm (21") above the canopy centered over the 2 plants.


Watering and Feeding:

Bakerstreets' Feed:

*** Next feed ... 6 litres (1.6 gallons) - water only on August 05, 2019 or August 06, 2019.
*** Expecting about 10% to 20% ... 0.6 litres (0.16 gallons) to 1.2 litres (0.32gallons) of run-off.


C.R.E.A.M.'s Feed:

*** Next feed ... 4 litres (1.0 gallon) - water only on August 05, 2019 or August 06, 2019.
*** Expecting about 10% to 20% ... 0.4 litres (0.11 gallons) to 0.8 litres (0.22gallons) of run-off.


Cheese's Feed:

*** Next feed ... 4 litres (1.0 gallon) - water only on August 05, 2019 or August 06, 2019.
*** Expecting about 10% to 20% ... 0.4 litres (0.11 gallons) to 0.8 litres (0.22gallons) of run-off.


*** For details on my feeding schedule refer to here: The Different Feeds I need For This Grow (Version 4)


Activities:

My priority is to expose the growth nodes to light and air because they are going to become colas.

Refilled the humidifier with water.

*** Trying to get the Bakerstreets' growth nodes placed evenly in the ScrOG squares.

Notes:

The priority has to be to expose the growth nodes/buds to light & air, and to keep the canopy even and flat.

*** I am going to let the plants grow naturally now and stop tucking the stems into the ScrOG. For details on this decision, please refer here: How long to Veg Photoperiods? - Version 2

*** The VPD for Environment #1 is not automatically dialed-in anymore. I need to go back to 4 cycles of 5-1 because the plants did not grow well under 24-0!

*** I have ordered an Inkbird IBS-TH1 Wireless Thermometer Hygrometer to simplify collecting VPD data points for Environment #2 ... the photoperiod flower tent.

*** Once the photoperiods are harvested, then Environment #2 can become a Veg tent.

*** I took @irie lion 's advice and pruned the two Bakerstreets. There were a lot of fan leaves that's for sure.

*** The experiment is to see just how quickly the Bakerstreets can recover from the pruning.

*** I am just amazed though ... the Bakerstreets have been growing for 70 days and they are so tiny!!!

*** I hope they produce some good colas!!!

*** Nevertheless, I never expected to grow larger plants this grow, and certainly wasn't counting on going from quadlining to a ScrOG!!!

*** But hey .... what a learning experience; ... there has been so much happen in this grow ... I know it is making me a better grower overall!

*** So basically now ... I am not going to move the Bakerstreet plants or move their stems around anymore in the ScrOG. I have to just let them grow and learn from whatever happens ... good or bad!

*** The other part of the pruning experiment ... is to not prune the C.R.E.A.M. or the Cheese. In my opinion, they are simply to far into flower to prune! I will just keep spreading out the colas.


Lessons Learned:

Complete Drying & Curing Marijuana Guide

By Nebula Haze

Step 6: Curing (first few weeks): Open all jars regularly to inspect and air out buds

During the first few days, you may want to check even more often than once/day, especially if you are worried about mold or bacteria from too much moisture.

It’s important that you’re checking on your buds at least every 24 hours during the beginning stages, as described below. In addition to checking on your buds, it’s also important to open the jars once a day, because buds need fresh air as part of the curing process.

If you smell ammonia or the outside of buds feel moist, it means buds are too wet and need to air out before closing the jars again. If it smells more like cannabis every day, it means you’re doing it right!

For the impatient, this also gives you the opportunity to “try out” your new buds and see how they improve during the curing process

As mentioned already, the trick to a great marijuana cure is controlling the humidity of the environment. Ideally, you would like to keep your buds stored in an enclosed container with about 60-65%% relative humidity. This is the perfect amount of moist and dry to get the fastest and best curing process.

To be able to get a reading on your current humidity levels (so you can make sure they’re perfect every time), you may want to invest in a tool called a hygrometer.

I like the Caliber IV hygrometer, which is small enough to fit in your curing jars and can be found online for cheap. A hygrometer is more of a luxury than a necessity, though it will take out a lot of the guesswork.


0_buds-in-jars-with-caliber-iii-hygrometers-sm.jpg

The Caliber IV hygrometers display both the temperature and the relative humidity in each curing jar.

Use a hygrometer for pro cannabis curing results, as it will allow you to determine exactly where you are in the curing process and spot possible humidity problems before they affect your buds. Even if you only have one, you can put it in different jars during your daily check to get an idea of the RH (relative humidity) in your jars.

Buds need some amount of time “to sweat” in the jar before you can get an accurate reading of how much moisture is really in the jars. Sometime buds which seemed dry when you put them in will feel damp and soggy when you check them a few hours later. This is because the moisture that was contained in the middle has spread out to the rest of the buds, and it means the buds need to be dried further.

A hygrometer will let you measure the relative humidity within your curing jars most precisely, but I was able to do this process for years without any extra tools just by following the general guidelines below for how buds should look/feel.

0_cannabis-harvest-curing-cheat-sheet.jpg

Overview of curing cannabis humidity requirements.
For the first week, you want to air out your jars for a few moments at least once a day. Just open all the jars and close them again once a day. While the jars are open, check on buds to determine the current humidity levels. You may also take this time to shake the jars and move buds around, to ensure there are no moist spots, and buds aren’t sticking together in clumps.

This is what you’re checking for every time you open your jars.

Buds feel wet – Wet buds need to be placed outside the jar to dry for another 12-24 hours. Moist buds should not be touching each other! It is very important you react quickly if buds feel damp to the touch, as this is the most likely time for mold to grow.

> 70% humidity – When buds are too wet, your hygrometer will read greater than 70% relative humidity after buds are in jars with hygrometer for 24 hours. If buds are very wet, you may see the humidity climb up this high within just a couple of hours. If you see the humidity rising on your hygrometer at a rate of 1% per hour or more, you may want open the jars early, or at least keep a close eye, as your buds are probably too moist.

Buds feel moist – If you shake the jar at this point, you may notice that some of your buds are still sticking together. You’re almost there, but buds are still a little too damp and you’re at risk for mold or anaerobic bacteria. If you live in a normal to dry climate, you may be able to get away with just leaving the top off the jars for 1-4 hours. If you live in a humid climate, you may have to take the buds out of the jars and lay them out until the outsides begin to feel dry again.

65-70% humidity – When buds are slightly moist, your hygrometer will read 65-70% relative humidity after buds are in jars with hygrometer for 24 hours.

Buds are not wet, but also not brittle – You’re in the cure zone! Your buds may feel a bit sticky to your fingers. Buds should move independently and not clump together in big bunches when you shake the jars.

60-65% humidity – When buds are in the cure zone, your hygrometer will read 60-65% relative humidity after buds are in jars with hygrometer for 24 hours.

Some growers prefer to keep it a little lower during curing, down to around 55%, especially if they’re curing a whole lot of cannabis, because it helps prevent the chance of mold or “moist pockets” in the jars.

At this point, some growers add a Boveda 62 Humidipak to their curing jar with the buds to help keep the humidity in the correct range during the rest of the cure.

Buds are too dry – Buds feel brittle and crumbly. At this point, there is not enough moisture in the jars for the curing process to continue at a normal pace, and buds tend to cure much more slowly.

< 55% humidity – When buds are too dry to continue curing, your hygrometer will read less than 55% relative humidity, even after buds are in jars with hygrometer for 24 hours. If it’s between 55-60%, don’t worry too much! Curing will still take place, just perhaps a little bit slower.

In fact, even if you completely overdry your buds, they will still benefit from the curing process!

IMPORTANT: Keep opening all jars at least once/day for first 1-2 weeks of curing

For the first 1-2 weeks, no matter what readings you get, you should continue checking your buds and opening all the jars once a day. Even if buds are too dry, it’s important to air out the buds quickly once a day for this first stage, as they need air to continue the curing process.

Once you are sure buds have been steadily in the cure zone for a few weeks, you may start opening the jars just once/week or even less.

Having Trouble Curing? Want to Prevent Problems During Your Cure? Get Boveda 62 Humidipaks

For those who struggle with curing even after going through all the steps in this curing tutorial, there’s a product known as a “Boveda 62” humidipaks which can help maintain the correct humidity in your jars. These are especially helpful at preventing the humidity from getting too low, even if the humidity is very low where you live. Some growers choose to use these every time they jar their buds to maintain the humidity in the 62% range.

Boveda Humidipaks (62% version) are specifically made for cannabis and can help maintain humidity at 62%, as well as rehydrate buds.

0_41XxZwlWOXL._SL160_.jpg
Humidipaks are used to regulate the humidity automatically. They were invented to keep cigars fresh in humidors (which is how they originally got their name), but the company now makes humidipaks that are specifically formulated for storing cannabis at the right humidity (as stated on their website). These are the Boveda Medium 62% Humidipaks.

Note: Boveda is trying to move aways from the term “humidipak” these days for some reason, but it’s such a perfect name!

0_buds-curing-humidipak-sm.jpg

You simply place the little pouches inside with your buds after they’ve finished drying.
Even when using Humidipaks, it’s important that you follow the rest of the steps outlined in this tutorial to ensure that your cure goes great.

Do you need to get Boveda 62 Humidipaks?

No. If you follow all the steps outlined in this article, you likely will not need Humidipaks. Most growers are able to cure their buds perfectly well without them.

However, they can be helpful if you will be curing your buds in an environment with the incorrect humidity, especially if the air is really dry where you live. They can also be helpful if you’re not used to curing and are afraid of messing it up.

Humidipaks also work very well for long-term storage. When we used them, they didn’t seem to lower the humidity when it was too high in our curing jars, but they did protect buds from drying out.

Will Boveda 62 packs reduce the smell of your buds?

We have never noticed that. Most growers seem to agree that these packs won’t reduce bud smell if they are added to the jars after the humidity has already been stabilized around 62% humidity for a few days.

Keep opening all jars at least once/day for first 1-2 weeks of curing

For the first 1-2 weeks, whether or not you’re using Boveda 62 humidipaks, you should continue checking your buds regularly and opening all the jars once a day.

Once you are sure buds have been steadily in the cure zone for a few weeks, you may start opening the jars just once/week or even less.

Re-Hydrating Overdried Buds

If you feel like you’ve overdried your buds, don’t panic! Sometimes it feels like buds are too dry even when there is still moisture inside. It’s a good idea to leave buds in jars for at least 2-3 days to see if moisture starts coming to the surface from inside. If buds still feel bone dry after a few days of being jarred, that’s when you might consider rehydrating buds.

Don’t Panic if Buds Are Too Dry!

If you’ve only got household items, trying to re-hydrate buds afterwards is risky and probably not a good idea. Re-hydration increases the risk of mold, especially if using something organic, like an orange peel, so use something that’s mean to to do the re-hydrating.

Boveda Humidipaks for Re-Hydrating Dry Buds

Marijuana buds being cured in jars with Boveda Medium 62 HumidipaksIf you’ve been watching buds closely from the beginning, it is unlikely that buds will become over dry. However, if you have over-dried buds, one safe option to at least reduce the brittleness (freshen them up) is to add 62% Boveda Humidipaks to your jars, which will bring the humidity back up to 62% (they don’t work well for reducing humidity though – they can only raise the humidity and keeping it at the 62% level).

These will help slowly infuse moisture back into your buds and won’t affect the taste or increase the chances of mold.

Once the buds have been re-hydrated, you can remove the Humidipak if desired. Some growers have reported that leaving Humidipaks in jars during the first 4 weeks of curing can reduce the taste/smell of buds, though when we used Humidipaks during the curing process we didn’t notice any difference in smell or flavor.

Step 7: Long term storage

As long as buds remain consistently in the cure zone after several weeks, you can begin to open jars once/month.

Buds will continue to improve from curing for up to 6 months. After 6 months, further curing will not continue to have much effect. At this point you want to prepare the buds for long term storage to maintain their potency for as long as possible.

For long-term storage (months), buds should be kept in air-tight containers (the wide-mouthed mason jars they’ve been curing in are perfect) and placed in a cool, dark environment.

For serious long-term storage (6 months or more), you may want to consider vacuum sealing your buds, or even better, storing them in your freezer in tightly packed mason glass jars!

Buds should feel dry and have been curing for at least 3 months before any attempt to store them long term. It is better to err on the side of buds being too dry when you’re going to store buds for a long time without checking on them. Even if buds get brittle, they can be “freshened up” later with a Humidipak.

Properly stored buds can retain a lot of their potency for years

After curing for a year or more after harvest, buds will tend to produce more of a “mellow” effect, and will look a lot more beige than green, but other than that the effects stay mostly the same as long as buds are stored properly.

~ 62% humidity – When buds are dry enough for long term storage, your hygrometer will read 62% relative humidity or slightly less. It’s important that buds are not wet at all before long-term storage, or they may mold!

A great way to make sure buds don’t contain extra moisture is to leave your cured buds in unopened jars for a few weeks first, to make sure the humidity reading is completely accurate before your store your buds somewhere you won’t be able to easily check. Adding a Boveda 62 humidipak to the jar will also help keep the humidity where it needs to be!

That’s it! Perfectly cured buds every time!


ToDo:

Learn more about ... Growing cannabis with the SCROG (Screen of green) method.

Learn more about pests and nutrient deficiencies.

Learn more about growing during flower and the stretching of colas.
 
August 05 2019 - Update

Images:


IMG_20190805_152622.jpg

Bakerstreet #1 - Hanna Hemp - Looks healthy so far - growth nodes are exposed to light and air.


IMG_20190805_152634.jpg

Bakerstreet #2 - Henna Hemp - Looks healthy so far - growth nodes are exposed to light and air.


IMG_20190805_152826.jpg

C.R.E.A.M. #1 - Cowgirl Hemp - Looks healthy so far - budlets are exposed to light and air.


IMG_20190805_152835.jpg

Cheese #1 - Gouda Hemp - Looks healthy so far - budlets are exposed to light and air.


Growth Stage:

2 Bakerstreets: Day 1/ Week 11 ... Day 71 ... week 3 flower.

*** Should get pixels between August 03, 2019 and August 10, 2019.

*** Photoperiod Stages: 5 days Germination, 1 week seedling, 2-8 weeks veg, 6-12 weeks flower, 4-12 weeks cure
*** Allow 1 day to 3 days of dark before switching to 12-12
*** Pistels show up about 14 days (2 weeks) after switching to 12-12


1 C.R.E.A.M.: Day 1/ Week 10 ... Day 64 ... late flower.
1 Cheese: Day 1/ Week 10 ... Day 64 ... late flower.

*** Should be ready for final full flush between August 04, 2019 and August 11, 2019.
*** To check for final full flush the white pistils are 50% darkened and curled in & trichomes are 50% cloudy.
*** Should be ready to harvest between August 18, 2019 and August 25, 2019.

*** Autoflower Stages: 5 days Germination, 1 week seedling, 3 weeks veg, 3 weeks pre-flower, 3-6 weeks flower, 4-12 weeks cure
*** Pistels show up about 35 days (5 weeks) after Germination
*** Flowering takes about 42 days to 56 days (6 weeks to 8 weeks) after pistels show up


Environment #1 - Autoflower Veg/Flower:

*** I will start tracking RH, canopy temperature and VPD again when the Inkbird IBS-TH1 I ordered gets here.

*** The VPD Values I am Using For This Grow (Version 1)

CO2 is refreshed frequently when the exhaust fan turns on.

The light is running 4 cycles of "5 hours lights-on and 1 hours lights-off".

The light is 53 cm (21") above the canopy centered over the 2 plants.


Environment #2 - Photoperiod Flower:

*** I will start tracking RH, canopy temperature and VPD again when the Inkbird IBS-TH1 I ordered gets here.

*** The VPD Values I am Using For This Grow (Version 1)

CO2 is refreshed frequently when the exhaust fan turns on.

The light is running 1 cycle of uninterrupted "12 hours lights-on and 12 hours lights-off".

The light is 53 cm (21") above the canopy centered over the 2 plants.


Watering and Feeding:

Bakerstreets' Feed:

*** Next feed ... 6 litres (1.6 gallons) - water only on August 06, 2019 or August 07, 2019.
*** Expecting about 10% to 20% ... 0.6 litres (0.16 gallons) to 1.2 litres (0.32gallons) of run-off.


C.R.E.A.M.'s Feed:

*** Next feed ... 4 litres (1.0 gallon) - water only on August 05, 2019 or August 06, 2019.
*** Expecting about 10% to 20% ... 0.4 litres (0.11 gallons) to 0.8 litres (0.22gallons) of run-off.


Cheese's Feed:

*** Next feed ... 4 litres (1.0 gallon) - water only on August 05, 2019 or August 06, 2019.
*** Expecting about 10% to 20% ... 0.4 litres (0.11 gallons) to 0.8 litres (0.22gallons) of run-off.


*** For details on my feeding schedule refer to here: The Different Feeds I need For This Grow (Version 4)


Activities:

My priority is to expose the growth nodes to light and air because they are going to become colas.

Refilled the humidifier with water.

*** Trying to get the Bakerstreets' growth nodes placed evenly in the ScrOG squares.

Notes:

The priority has to be to expose the growth nodes/buds to light & air, and to keep the canopy even and flat.

*** I am going to let the plants grow naturally now and stop tucking the stems into the ScrOG. For details on this decision, please refer here: How long to Veg Photoperiods? - Version 2

*** I am not yet convinced that heavy defoliation on the Bakerstreets will lead to more node growth and more yield.

*** I will do a final full flush on the C.R.E.A.M. & Cheese when the white pistils are 50% darkened and curled in & the trichomes are 50% cloudy.

*** I am definitely not a fan of going from Quadlining to ScrOGing!


Lessons Learned:

Growing cannabis with the SCROG (Screen of green) method

By RoyalQueenSeeds

Getting optimal yields from your indoor marijuana garden requires a different approach than what is commonly used outdoors, and the Screen Of Green (SCROG) method is an ideal way to maximize the amount of canopy that receives light from your high-intensity discharge lamps.

ScrOGing

The Sea of Green (SOG) has been popular for years, and the SCROG method relies on the same features, but growers add a screen that can maximize light exposure. Screens can be as simple as chicken wire or nylon netting that allows you to hold back the tops of the growing canopy. Ideally, the screen should have holes with a 5-cm diameter.


0_scrogging-diagram_1.jpg

SUSPENDING THE SCREEN

Screens should be kept as close to your lights as possible, and you can train your plants' tops to increase the number of marijuana buds that have access to light. Screens are kept between the growing medium and your favorite Cannabis plants. Generally, marijuana gardeners put one plant for every 30 square centimeters of screen. If you're not sure, it's better to use less plants rather than more. You can grow all of our marijuana strains with the SCROG method, and it works just as good with Indicas as it does with Sativas. Because Cannabis Sativa has a tendency to stretch during the first few weeks of flowering, the plants are an ideal option, and you can use the screen to keep the total height of your indoor marijuana garden down, making sure that your buds do not burn under intense indoor lights.

0_Inner-BubbleGum_1.jpg

VEGETATIVE MARIJUANA GROWTH WITH SCROG

Knowing the way that your marijuana plants will grow is crucial to getting optimal yields with the SCROG method. If you're growing one of our outstanding Cannabis Sativa strains, like our Sour Diesel, you may want to keep your plants in the vegetative stage for a few weeks. Because Cannabis Indica varieties, like our Special Kush, will not stretch much during flowering, you can keep them in the vegetative stage for a longer period of time.

TRAINING YOUR MARIJUANA PLANTS

The main concept behind the SCROG method is that instead of growing a single top bud, you can grow multiple colas under your light. As your plants grow through the screen, you simply pull them back down and tie the branches to the screen. This creates more budding sites and allows you to maximize your indoor marijuana harvest. Plants can easily be tied down with plastic ties, and you can guide the branches to the empty sections of your screen. As the plants grow, they will branch out, and you'll get a crop of massive buds that have access to the light on which they thrive. Keep in mind that you'll probably see more branches when you turn your lights back to 12 hours of darkness and start the flowering period.

0_scrog.jpg

TRIMMING LEAVES

Because the SCROG method attempts to create more budding sites, removing the larger fan leaves allows your buds to get more energy, so you can harvest dense buds that are coated with trichomes. It's essential to keep in mind that the plants depend on sun leaves for energy, and you may want to be sure that you don't remove too many of the larger leaves.

PROPER AIR CIRCULATION

While growing Cannabis with the SCROG method, you'll have a thicker canopy, so optimal air circulation is crucial. You can also find some of our Cannabis strains that are mold resistant, so you don't need to be concerned about the increased humidity. If you're growing your indoor marijuana garden in a tent, having an air-cooled lamp is the best way to keep temperatures and humidity in the proper ranges.

STRAINS SUITED TO SCROG

GREEN GELATO


Green Gelato is one of those strains that is spoken about with longing amongst cannabis growers and connoisseurs. Growers enjoy the ease of maintenance and the thrill of watching dense nuggets form as the 12-12 progresses. Striking purples and mauves develop as the fragrances reach their tell-tale Kush, mint biscuit, and fruity dessert crescendo. Green Gelato is certainly the most flavoursome way to introduce a far-out 25%+ THC into your system. In combination with a unique terpene profile, this strain will whisk your brain away and give your muscles a case of the jellies.

A slight indica dominance gives Green Gelato a number of characteristics that take well to the ScrOG. A high flower-to-leaf ratio means more light exposure to nuggets as there is minimal shading by excessive leaf production. Minimal leaf production also means less need for time-consuming under-shucking. Tight flower clusters form at each node, rather than forming long colas, which creates an evenly exposed canopy of homogeneous buds. Lower flowers that might otherwise be small on an untrained plant are given the opportunity for maximum growth.

0_Green-Gelato-Scrog.jpg

OG KUSH

OG Kush quickly became a much sought-after strain the moment it was introduced in the US. Then, it wasn’t long until it found equal appreciation in the global cannabis scene. The fragrance, look, potency, and palate of this plant continues to thrill cannabis fans on every continent. Striking citrus top notes predominate over gentler sweets and sours, and an enjoyable aftertaste lingers long after spliffs are finished—extracts are a pure flavour sensation. Euphoria and
mental clarity with a bone-deep physical effect make it a favourite for recreational and therapeutic use.

The healthy stretch between nodes of OG Kush makes it an apt selection for the ScrOG. Topping a number of times and exchanging apical dominance for area allows buds at each site to reach their full potential, creating a carpet of Kush with enough distance between nuggets to prevent shading and allow airflow. Cannabis in general responds with vigour to training, and OG Kush is no exception, producing evenly-sized and equally dense flowers across the whole light footprint. OG Kush delivers great yields for a plant that is so undemanding to grow.

0_OG-Kush_8.jpg


ToDo:

Learn more about ... How And When To Transplant Cannabis Seedlings.

Learn more about pests and nutrient deficiencies.
 
SQL, I done goofed when i lost track of this grow, excellent job here.
A lot of info captured here in astounding details.
A true labour of love and shining example of a journal written with care & attention.
Spent last night going back over it.
Really was my pleasure.
Thank you.
W
 
SQL, I done goofed when i lost track of this grow, excellent job here.
A lot of info captured here in astounding details.
A true labour of love and shining example of a journal written with care & attention.
Spent last night going back over it.
Really was my pleasure.
Thank you.
W

Hey @WankirA ... good to see you again. I'm flushing my plants right now ... but tomorrow I will ping you about your perpetual grow, ... sound okay?
 
Always welcome round my way fella.
 
Just an FYI on C.R.E.A.M genetics, so far my two have finished at just over the 7 week mark, by no more than 3 days max. All the trichomes were cloudy, and some were turning amber. Sprouted on the 16th of June. Just cut one down today, the other will be tomorrow when I acquire another box. The one harvested today was in the 1.5 gallon plastic bucket, the other is in a 3 gallon smart pot. Smart pot is much bushier overall, but buds are not as thick and dense. Trichomes were clouded just the same amount on both plants
IMG_9514.JPGIMG_9525.JPGIMG_9535.JPG
IMG_9516.JPG

Hey @GeOMaTTiC ... thank-you so much for this feed back ... it is extremely valuable to me!!!

Unfortunately though, the C.R.E.A.M. is my smallest plant ... although I used LST to spread it out a lot. It is in a 5 gallon pot.

Let's compare wet and dry weight please so we can compare if pot size comes into play. Is that okay with you?

This was my first grow, so I'm not expecting very high yields ... I'm just really glad it is still alive and healthy!!!

Alright ... ttyl
 
August 06 2019 - Update

Images:


IMG_20190806_204937.jpg

Bakerstreet #1 - Hanna Hemp - Looks healthy so far - growth nodes are exposed to light and air.


IMG_20190806_204955.jpg

Bakerstreet #2 - Henna Hemp - Looks healthy so far - growth nodes are exposed to light and air.


IMG_20190806_205059.jpg

C.R.E.A.M. #1 - Cowgirl Hemp - Looks healthy so far - budlets are exposed to light and air.


IMG_20190806_205107.jpg

Cheese #1 - Gouda Hemp - Looks healthy so far - budlets are exposed to light and air.


IMG_20190806_210152.jpg

Mini Bakerstreet #1 & Mini Bakerstreet # 2- Look healthy so far - growth nodes are exposed to light and air.


Growth Stage:

2 Bakerstreets: Day 2/ Week 11 ... Day 72 ... week 3 flower.

*** They got their pixels on August 05, 2019.

*** Photoperiod Stages: 5 days Germination, 1 week seedling, 2-8 weeks veg, 6-12 weeks flower, 4-12 weeks cure
*** Allow 1 day to 3 days of dark before switching to 12-12
*** Pistels show up about 14 days (2 weeks) after switching to 12-12


1 C.R.E.A.M.: Day 2/ Week 10 ... Day 65 ... late flower.
1 Cheese: Day 2/ Week 10 ... Day 65 ... late flower.

*** Recharged the soil on August 06, 2019.
*** I learned never do final flushes today ... it stresses out the plant too much.
*** Should be ready to harvest between August 18, 2019 and August 25, 2019.

*** Autoflower Stages: 5 days Germination, 1 week seedling, 3 weeks veg, 3 weeks pre-flower, 3-6 weeks flower, 4-12 weeks cure
*** Pistels show up about 35 days (5 weeks) after Germination
*** Flowering takes about 42 days to 56 days (6 weeks to 8 weeks) after pistels show up


Environment #1 - Autoflower Veg/Flower:

*** The Inkbird IBS-TH1 I ordered got here today, so I will start tracking RH, canopy temperature and VPD again.

*** The VPD Values I am Using For This Grow (Version 1)

CO2 is refreshed frequently when the exhaust fan turns on.

The light is running 4 cycles of "5 hours lights-on and 1 hours lights-off".

The light is 53 cm (21") above the canopy centered over the 2 plants.


Environment #2 - Photoperiod Flower:

*** I will start tracking RH, canopy temperature and VPD again when Environment #1 is dialed-in again.

*** The VPD Values I am Using For This Grow (Version 1)

CO2 is refreshed frequently when the exhaust fan turns on.

The light is running 1 cycle of uninterrupted "12 hours lights-on and 12 hours lights-off".

The light is 53 cm (21") above the canopy centered over the 2 plants.


Watering and Feeding:

Bakerstreets' Feed:

*** Next feed ... 6 litres (1.6 gallons) - Full Dose - Week 7 - CGRSFS , CS, BPSS, BTTE on August 07, 2019 .
*** Expecting about 10% to 20% ... 0.6 litres (0.16 gallons) to 1.2 litres (0.32gallons) of run-off.


C.R.E.A.M.'s Recharge & Cheese's Recharge:

pH: 6.57
ppm: 1024

Soil tap water # 1 - 8.0 litres (2.11 gallons).
Soil tap water # 2- 8.0 litres (2.11 gallons).
Soil distilled water # 1 - 4.0 litres (1.05 gallons).
Soil feed - 6.0 litres (1.05 gallons).

I used a full dose of the Week 10 CGRSS, BTTE, CS & BPSS.


C.R.E.A.M.'s Run-Off & Cheese's Run-Off:

pH: 5.56
ppm: 1232

*** Instead of a full final flush, I am going to do a soil recharge about 3 weeks before harvest so the plants can have a really healthy root system with no unwanted salt build up during late stage flowering.

*** I learned today that due to the complex nature of organic soil, EC readings will be too inaccurate to determine whether the appropriate amount of nutrients are present in the soil.

*** I will track feed/run-off data points over time, as I may find them useful in the future.


*** Soil watering and feeding is done 1 hour after the lights turn on ... so the roots have been stimulated to draw nutrients up into the plant.

*** For details on my feeding schedule refer to here: The Different Feeds I need For This Grow (Version 4)


Activities:

My priority is to expose the growth nodes to light and air because they are going to become colas.

Refilled the humidifier with water.

*** Trying to get the Bakerstreets' growth nodes placed evenly in the ScrOG squares.


Notes:

The priority has to be to expose the growth nodes/buds to light & air, and to keep the canopy even and flat.

*** I am going to let the plants grow naturally now and stop tucking the stems into the ScrOG. For details on this decision, please refer here: How long to Veg Photoperiods? - Version 2

*** I am not yet convinced that heavy defoliation on the Bakerstreets will lead to more node growth and more yield.

*** I am definitely not a fan of going from Quadlining to ScrOGing!

*** I am now in the #nofinalflush club; instead I am going to recharge the soil 3 weeks before harvest or if the plant becomes unhealthy.

*** I need to work on VPD and LUX tomorrow.

*** I need to germinate a few Chemdawg seeds tonight.

*** I think the Bakerstreet clones may have actually worked!!!


Lessons Learned:

PPM and You: A Quick Guide

By blueskyorganics

While we try to make cannabis growing as simple as possible, some technical terminology is just unavoidable. Lately, we’ve had many novice growers ask us to explain PPM, TDS and EC readers, and how they all work together to help you grow better cannabis. Understanding these concepts isn’t the easiest thing in the world, so we’ve decided to write a definitive guide in three parts: the 10 second Cliffs Notes, 30 second explanation, the two minute talk, and the five minute deep-dive into the world of PPM. Enjoy!

PPM in 10 Seconds

*** PPM is a measurement of nutrients in the soil or growing medium.
*** Organic soils are too comple—x to be analyzed with ordinary PPM readers. Our growing system is scientifically calibrated to provide the ideal nutrients at the right time.

PPM, TDS, and EC in 30 Seconds

PPM stands for Parts Per Million, a measure of concentration. By concentration, we’re referring to how much of any nutrient, or ‘soluble’, is dissolved in the water you feed your plants with. It’s a way to measure tiny amounts of dissolved nutrients in water. PPM does not measure the type of soluble in water, only the total amount.
Measuring PPM matters because cannabis plants are extremely sensitive to proper nutrition. High PPM can cause nutrient burn. PPM are measured using a TDS or EC meter. TDS stands for Total Dissolved Solids, while EC stands for Electrical Conductivity. Both effectively measure PPM, though EC readers require some basic math to convert their units to PPM.

The 2 Minute Talk: What is PPM?

Next, let’s get to the science of soluble nutrients and cannabis growing. PPM, or parts per million, aren’t really a class of nutrient or an ‘ingredient’ in any true sense. As its name suggests, a PPM is simply a unit of measurement, like a percentage. In fact, a percent is a ratio of one part per hundred, or ‘cent’. If you’ve ever cooked rice, you’re probably familiar with ratios. For every cup of rice, you use two cups of water. That’s a 2:1 ratio of water to rice, or two parts water per single part rice. If you weren’t clear on the term before, hopefully you can see where it comes from now: a ‘PPM’ is a single unit (say, a millilitre) of any given substance per million units (one million millilitres, or 1,000 litres) of another substance.

That’s Pretty Small

Yes, it is. It seems impossibly small. One mL in 1,000 litres isn’t just a drop in a bucket; it’s less than three quarts in an olympic sized swimming pool. How can a PPM — or even hundreds of PPM — matter whatsoever in growing your cannabis? Even 10,000 PPM equals just one percent. It matters because plants don’t eat their food by the mouthful; they eat their food by the molecule.

0_root-system-1060x1857.jpeg


Cannabis plants, like all leafy plants, absorb nutrients through their roots. Roots are porous membranes capable of drawing water and nutrients out of the soil, which the plant then uses to produce food through photosynthesis, and as ‘building blocks’ for all its structural and chemical components, from leaves to flowers and, yes, cannabinoids. Plants can only ‘eat’ so much from the soil at once; if a plant is flooded with certain solubles beyond what it can handle, the roots can become gridlocked and unable to take up any nutrients. Other nutrients, when taken in abundance, can actually damage the plant, causing issues with chlorophyll production or even effectively poisoning the plant.

That’s where PPM come in. Cannabis plants have different nutritional needs throughout their lifespan. For each stage of growth, a different concentration of nutrients is considered ideal. Using a TDS or EC meter to measure PPM is an accurate way to ensure your plants receive exactly the right amount of nutrients, and prevent them from soaking up too much of the wrong stuff.

The Five Minute Deep Dive: PPM and Organics

The 30 second guide covers only the most basic understanding of PPM and their relation to cannabis cultivation, while the two minute guide further explains the scientific concept of PPM. Think of them as glossary entries — it helps you understand roughly what’s going on, but you’ll need to know more to really put that knowledge into practice.

This five minute guide aims to go through the process of purchasing and calibrating a TDS (Total Dissolved Solids) or EC (Electrical Conductivity) meter, measuring PPM in your water, and ensuring your plants are receiving the nutrients they need — no more, no less. It also talks about how PPM and organic growing interact, and why your readings may not be accurate when you grow organically.

Purchasing and Calibrating TDS or EC Meter

TDS and EC meters are finely calibrated tools for measuring solubles in water. Both TDS and EC meters measure electrical conductivity in the water, and determine the soluble levels based on how conductive the solution is. TDS meters give you a measurement in PPM, while EC meters require a simple mathematical conversion to PPM (multiply the EC number by 1000 then divide by two).

TDS and EC meters can be purchased from any hydroponics or growing store, or from many online retailers such as Amazon. They can cost anywhere from $15 to $50 depending on their features and intended use. While almost any TDS or EC meter can be used, you may want to shop around to find one with the features, shape, and size you think will work best for you.

TDS and EC meters may not work perfectly right out of the box. You should always calibrate your meter to ensure it’s accurately measuring PPM. Calibration is done by inserting your meter into a solution verified at a certain level of PPM. These can be purchased online or at many growers supply stores. To calibrate your meter, be sure the calibration fluid is at testing temperature, usually around room temperature. Test the fluid with your meter according to the package instructions. If it displays the correct PPM, it’s properly calibrated. Otherwise, follow the meter’s instructions to calibrate it.

Measuring PPM in Your Soil and Fertilizer Solution

Measuring your nutrient solution PPM should be just as simple as calibrating the meter, right? Close, but not quite. You need to remember that unless you use distilled water, your water will have a PPM count of its own. First, measure the untreated water you plan to dissolve nutrients into. Hopefully, its PPM are fairly low. If they’re high (say, above 400 PPM), you may need to filter your water prior to dissolving nutrients into it. While the solubles in tap water aren’t necessarily nutrients, they still count toward the total PPM; you must account for the existing solubles in your math to ensure you don’t harm your plants.

0_watering-can-e1508865383120-1060x430.jpeg


Latent solubles also exist in your soil, and can similarly burn your plants if they are too concentrated. In order to test soil PPM for cannabis growing, take a sample of several ounces of soil and mix it with distilled water in equal measure. Much like pH testing your soil, you want to mix the soil and water thoroughly to ensure the water absorbs the solubles, but don’t get too soupy. Let this mixture sit for 24 hours, stirring occasionally. Once you’ve allowed everything to meld together, use a simple filter like a coffee filter to strain out all the soil and fine particles. Strain the mixture until the water runs clear; this may take several rounds of filtering. Once the water runs perfectly clear, test it with your meter. The reading is your soil nutrient content in PPM!

Another quick and dirty method that’s pretty accurate is to make the same distilled water and soil mix described above. Place the mixture in a plastic baggy for 24 hours to allow the interaction between distilled water and media. Then, use a pin or paper clip size tool to poke small holes into the bag— five or six holes should do. Try not to make the holes too big. You don’t want to get any dirt in the solution. Gently squeeze the baggy over a small container, collecting the filtered solution for your measurement.

I’m growing organically and my readings are way off!

Yeah, this gets a little complicated. PPM are a straightforward measure for hydroponic or standard, synthetics-based growing. There’s a set number that’s ideal for each stage of growth, and that’s it. Organic growing is a little different. Part of the philosophy of organic growing is that the nutrients don’t just come from some refined, synthetic fertilizer. The soil itself should be fortified and made nutritious for your plants using natural, organic ingredients. Why does this affect PPM readings?

Rich, healthy organic soil is more complex than artificially fertilized soil or hydroponic solutions. The nutrients are stored in more complex molecules than with artificial fertilizers, that are released slowly over time. EC meters work by measuring the electrical conductivity of salts in water; organic nutrients haven’t yet broken down into simple salts. It’s like the difference between complex carbohydrates found in whole grains and refined white sugar. The organic nutrients get broken down by microorganisms over time, much like complex carbs get broken down by our digestive system. Therefore, the PPM readings you get from organic soil won’t reflect the actual nutrients that soil contains.

However, they may not be lower, as you might expect them to be. Why? There are plenty of non-nutrient solubles found in organic fertilizers that can confuse your readings. Remember how we talked about solubles in tap water earlier? This is a similar concept; many organic soil additives can end up adding acids and carbohydrates that are electrically conductive, thus throwing off your TDS meter’s EC readings.

Is it worth testing organic soil for PPM?

Good question. Due to the complex nature of organic soil, EC readings will be too inaccurate to determine whether the appropriate amount of nutrients are present in the soil. To determine if organic soil is well-balanced for your growing system, you’ll need to carefully monitor pH, watch the plant for signs of nutrient deficiency or imbalance, and learn from experience. If you have the resources, you can send a soil or plant matter sample to a lab for analysis. Alternatively, you could always rely on our simple four-step process for growing flavorful and potent organic cannabis.


ToDo:


Learn more about ... How And When To Transplant Cannabis Seedlings.

Learn more about pests and nutrient deficiencies.
 
Wow!
What an amazing journal you have going on here brutha! It's something I'm sure the admins such as @Teddy Edwards would be proud to see.
Great work! Your contributions in such a short time say plenty. :bravo:

Thank-you kindly ... this is a very important journal for me because it is my first and I need to learn.

But, ... more important, I truly believe I am part of Canadian history ... and that makes me proud. I am honored to be able to say I am Canadian and my government stepped up ... admitted to the lies ... and went though a lot of heartache to make cannabis legal. A G7 country at that!

I am now able to grow medicine in my home as any free person should be able to do ... and I am growing the very first seeds available to grow in Canada ... Tweed Bakerstreet.

I am hoping my granchildren and future friends will be able to look at this journal in 5 or 10 years and say ... my grandpa and Dr. Watson were a part of history ... and it's on the world famous site 420 Magazine ... you know, ... the site that took a brave stand ... with a lot of risk ... to allow people to be able to learn and share during the horrible cannabis prohibition.

I fully understand that this site and what it allows us to do is an important part of our future and a part of correcting government mistakes. I am going to harvest two plants in a few weeks because of what I was able to learn and track here.

Without this site, I would most likely have failed and moved onto another project. I have seen a lot of people call out for help here ... and the senior growers help them right away. It's great to see people who don't quit because they have valuable support available to them.

Bottom line ... my family ... Dr. Watson ... the 420 community ... and standing up against cannabis prohibition makes me proud and gives my life a bit more purpose!!!

0_flags.jpg

By the Dawn's Early Light and the True North Strong and Free!!!
 
Back
Top Bottom