Xlr8's Psychedelic Bloom Party Extravaganza

re: Xlr8's Psychedelic Bloom Party Extravaganza

I have changed how I look at this over time. In the end, and between us and our plant, it's all academic - they're done when they're done. So... it becomes a matter of communication and consistency that matters as far as here in the forums. I used to count flowering as "Day 1" as soon as pistils started showing and after 12/12 was initiated. However, it became clear that many people track "Day 1" as when the flip to 12/12 is made. Not everybody, however, and it remains confusing because of this.

Upon doing a little research, I read a post by Subcool from TGA Subcool genetics that solidified why I do it how I do it now. Someone asked him point-blank, "When you suggest flowering times for your strains, do you start from the initiation of 12/12, or when you first see pistils?" (or something to that effect). His answer was (paraphrasing): "The flowering days are assuming a reduction in daylight from 18/6 to 12/12, and the flowering days start as soon as this reduction to 12/12 is made".

Now, I realize Subcool's thinking isn't necessarily the way everyone wants to think of this, nor every breeder. However, to me, communicating days from flip seems the most universal language when communicating in the forums here. Plus, I had just bought a bunch of "TGA" seeds, so it seemed like the way to go for that reason, too.

Thank you for the props my friend (though I'm hardly a guru!). :thanks:


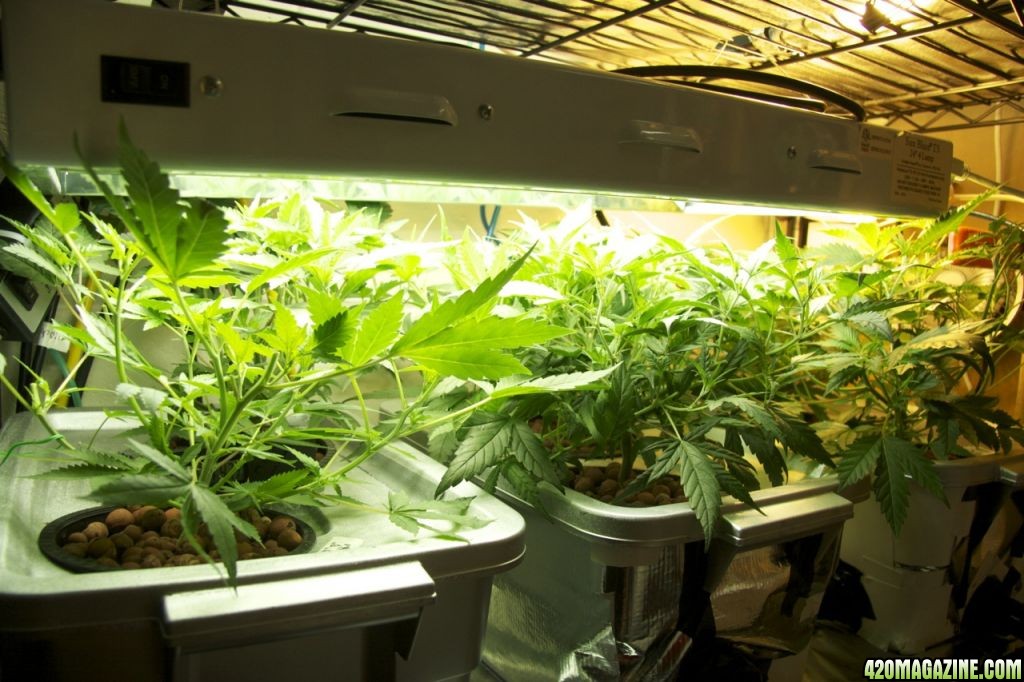
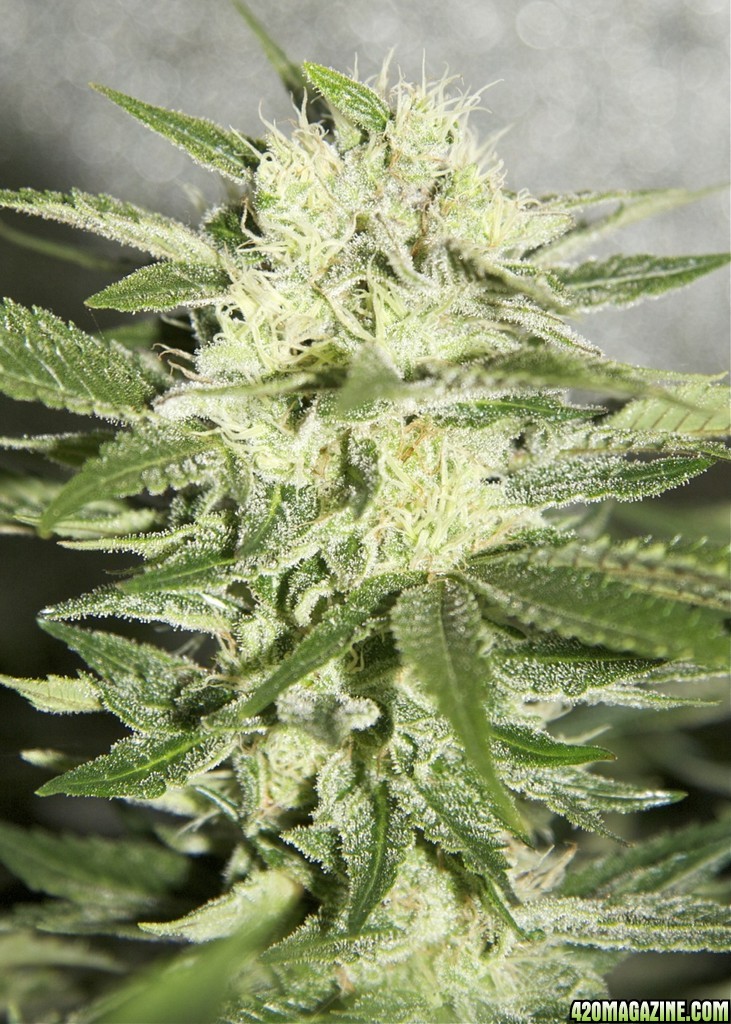
One other note: I'm insane, so I keep growing multiple strains at once in my grows. Indicas and Sativas living together and other silly notions. Sometimes, they show pistils at different times. Heck, some strains reach sexual maturity and show pistillate pre-flowers whilst still in veg - while others take up to 12 days in bloom. Another reason that for me, I find "Day 1" to be easier thought of as when the photoperiod was reduced to 12/12...

Absolutely right Xlr8!

I agree 100%. I understand where people are coming from wanting to start counting when they see flowers, but I think that is overlooking an interesting or useful statistic. I'm curious to know how long it takes from flip until the plant shows flowers. By counting from the day of flip, it also gives a common reference point for the different strains. I'm running 9 strains right now, so does that mean I started flowering at 9 different times? lol No! Maybe some growers just feel better saying their flowering times were shorter. IMHO, who cares. Select strains based on fast flowering of course, but it is what it is. I'd rather know how long from flip to harvest than any of the other numbers. For scheduling a perpetual grow, that's the critical piece of data.

Let's say you're trying to choose between 2 strains and it comes down to flowering time. One of them says it flowers in 57 days. The other says it flowers in 54 days! Go with the faster strain, right? Maybe not. What if those numbers were counted from the day the plant started showing flowers. What if the 50 day plant took 5 days longer to start flowering? Maybe that 57 day plant was showing flowers after the first day.

Count from flip. Every other method is worthless to anyone except that grower. Without a standard reference, we can't make meaningful comparisons.

OK I'm done. I see this topic tossed around often, and I've bit my tongue until now. Thanks for letting me vent on your thread X :Namaste:
 
re: Xlr8's Psychedelic Bloom Party Extravaganza

Nice summary of mainlining X! It made more sense with your pictures than the ones in the original thread. Especially the last couple pics.

I always avoided topping and would just keep bending down that main top to let the other branches grow bigger. In this new room, I'm planning to top after 3 nodes like you are. I'm not doing a lot of training though. I'm not sure how long I'll have to veg yet, but the goal is a pseudo SOG, except with 6 colas instead of 1 each.
 
re: Xlr8's Psychedelic Bloom Party Extravaganza

Thanks for the breakdown on mainlining guys!!

wiw!

:thumb:
 
re: Xlr8's Psychedelic Bloom Party Extravaganza

Alright I'm finally gonna break down and ask ya Vick, what in the hell does wiw stand for???
 
re: Xlr8's Psychedelic Bloom Party Extravaganza

:rofl:
 
re: Xlr8's Psychedelic Bloom Party Extravaganza

Yeah still have no idea! I even googled it lmao.

Hey X or anyone. According to my local hydro store they won't be making hydroton anymore due to some mine shutting down or something. Anyways he offered "PlantIt" clay pebbles as a substitute. Are you or anyone familiar with this? It looks smaller than the stuff you got in your pics. Also how much ya think it'll take to fill 12 net pots? I got 3 45 liter bags to start.
 
re: Xlr8's Psychedelic Bloom Party Extravaganza

ok..
I'm going to clarify what "wiw" is..
Because a lot of people have been wondering why the hell i wiw like i do..

It's like a "yew"! Or a "yahoo"! Or even a "yeehaw"!

I've made this sound all the time since i can remember..
Whenever i'm stoked on something it just seems to slip out.

wiw!

see?

Kind of like this..

[video=youtube;gowblwkdehg]
[/video]

i apologize for any confusion i have caused anyone..
again.

*I don't know what the hell is wrong with my computer.. But I have tried to post this for the past hour now, everytime it keeps telling me my message is too short. wha? so this fine print is just a big middle finger to my computer.
 
re: Xlr8's Psychedelic Bloom Party Extravaganza

Thanks everyone for the reps on the mainlining post, but I want to make sure to reiterate that the real credit isn't mine. Big thanks to WildBill for bringing it to our attention and the grower "Nug Buckets" for the original concept.

I do think this is a brilliant idea if executed correctly. The original idea from "Nug Buckets" was to create a "manifold" from which you get 8 or 16 equal colas. Definitely use Go0gle to do some more research on this technique if you want to try it, but I wanted to take an opportunity to expand on it some here as I really like the methodology for an indoors strategy.

Nonetheless, I appreciate the reps! :thanks:
 
re: Xlr8's Psychedelic Bloom Party Extravaganza

Absolutely right Xlr8!

I agree 100%. I understand where people are coming from wanting to start counting when they see flowers, but I think that is overlooking an interesting or useful statistic. I'm curious to know how long it takes from flip until the plant shows flowers. By counting from the day of flip, it also gives a common reference point for the different strains. I'm running 9 strains right now, so does that mean I started flowering at 9 different times? lol No! Maybe some growers just feel better saying their flowering times were shorter. IMHO, who cares. Select strains based on fast flowering of course, but it is what it is. I'd rather know how long from flip to harvest than any of the other numbers. For scheduling a perpetual grow, that's the critical piece of data.

Let's say you're trying to choose between 2 strains and it comes down to flowering time. One of them says it flowers in 57 days. The other says it flowers in 54 days! Go with the faster strain, right? Maybe not. What if those numbers were counted from the day the plant started showing flowers. What if the 50 day plant took 5 days longer to start flowering? Maybe that 57 day plant was showing flowers after the first day.

Count from flip. Every other method is worthless to anyone except that grower. Without a standard reference, we can't make meaningful comparisons.

OK I'm done. I see this topic tossed around often, and I've bit my tongue until now. Thanks for letting me vent on your thread X :Namaste:

Hi Hiker -
Good points as far as why you also prefer to count from the flip. :thumb:

Whatever works for someone is fine by me. I guess I don't care too much either way, though it's nice to know how they're doing it. I try to always make clear that I'm counting days since the photoperiod change so people can relate to it one way or another. It's just a way to communicate and plan - they're done when they're done! :)
 
re: Xlr8's Psychedelic Bloom Party Extravaganza

Nice summary of mainlining X! It made more sense with your pictures than the ones in the original thread. Especially the last couple pics.

I always avoided topping and would just keep bending down that main top to let the other branches grow bigger. In this new room, I'm planning to top after 3 nodes like you are. I'm not doing a lot of training though. I'm not sure how long I'll have to veg yet, but the goal is a pseudo SOG, except with 6 colas instead of 1 each.

Thanks Hiker. Topping is a really valuable tool for training indoors, and really helps to promote multiple colas and a bushier plant if done right. No reason to ever avoid it, they respond very positively by redirecting their growth into the other branches. Also, "super cropping" is a technique that you'll really benefit from. Basically you are crushing the inner part of the stem between your fingers and twisting gently, until the top folds over. If you are gradual, and work it a bit, you can sometimes do it without a split - but a split isn't a big deal normally either. I do this up to about 18 days into flower as a another way to keep the canopy as level as I can in relation to the lights. :)

I like to imagine an invisible SCROG screen that I'm keeping the tops level with as I train the plants, similar to your pseudo-SOG idea.
 
re: Xlr8's Psychedelic Bloom Party Extravaganza

Yeah still have no idea! I even googled it lmao.

Hey X or anyone. According to my local hydro store they won't be making hydroton anymore due to some mine shutting down or something. Anyways he offered "PlantIt" clay pebbles as a substitute. Are you or anyone familiar with this? It looks smaller than the stuff you got in your pics. Also how much ya think it'll take to fill 12 net pots? I got 3 45 liter bags to start.

Hi DocDee -

I haven't heard of "Plantit" pebbles yet - sorry. But, you are correct there is an impending discontinuation due to that very reason.

This is from Jandre2k3, regarding the end of hydroton. I haven't really considered what I'm going to do for sure, but this is where I'll start:


Okay, I heard a nasty rumor from my herp (reptile and amphibian dealer) that our beloved hydroton expanded clay pellets were discontinued. This concerned me as a hydroponic grower, and as you all know, I'm not one to go by what one person says, so I decided to do some research. I have found that MANY people are talking about this very topic, and with an inquiry into the product at my local hydro store, I am now certain that the rumors are true. They said they got a letter from their supplier stating that it, in fact, had been discontinued; but rest assured, they have 20 palates of the stuff and will not be running out any time within the next few months...


Below is a "paste" of a letter I recently read on the subject. I decided to post it here because of the alternatives given, so that we hydroton lovers do not despair.


What Are My Alternatives Now That Hydroton is Discontinued?
Hydroton-RIP1.png

We've heard rumors for some time regarding the discontinuation of Hydroton, and we recently received confirmation from one of our suppliers in the form of the following letter. It was pretty succinct and informative so we just decided to post it here.

The short of the story is that Hydroton has indeed been discontinued by the manufacturer due to a lack of source material (the right kind of right clay), but all is not lost! There are a number of great alternatives to Hydroton; some alternatives are nearly identical to Hydroton while others are physically very different but provide substantially similar benefits and grow qualities.
Sunlight Supply Letter Regarding Hydroton Being Discontinued:
Dear Valued Customer,
In the recent past Sunlight Supply, Inc. received email correspondences from Mr. Rudolf Sittig from Hydroton in Germany to announce the discontinuance of Hydroton as a product offering us an explanation as to the circumstances surrounding this unfortunate decision.
As we understand it, Okotau the German name of the company itself (Hydroton is the product name), has closed its business servicing the horticulture industry after 27 years. The clay mine in South Germany was closed down because it ran out of the special clay necessary to manufacture the horticulture grade Hydroton. Further, an alternative mine was able to produce the product however the nature of the clay was different and as such did not meet the required specifications for the manufacture of the Hydroton product.
The following is an excerpt from Rudolf's letter to us [Sunlight Supply, Inc.]:
"Since the original manufacturing plant was closed down at the end of March, the expanded clay from their alternative plant is made from different clay which does not, according to our samples, result in a similar quality. As our laboratory results from our samples show, the amount of salt and other parameters are beyond the limits of 'Fischer-Penningfeld'. These investigations are long and very positive cooperation. For your future we wish you all the best."
"Fischer Penningfeld" (University standard) is the worldwide known standard for Hydroculture.
Drawing the conclusion out of this situation we decided to stop selling Hydroton as the parameters of quality are no longer secured.
However, we have 5 alternatives to present to our customers today:
#1 Mother Earth Hydropebbles:
hydropebbles-50-liter-7141201.jpg

Of the qualifying alternatives Hydropebbles, our new trademarked brand name, is the most similar to the traditional Hydroton we are all used to. Its overall size, shape, consistency and feel are very similar to Hydroton. However, while Hydroton had a rusty red color to it, Hydropebbles are more brownish in color appearance. It will be available in all warehouse locations in 1-2 weeks. We are using the same product item number as Hydroton. Pricing is identical to Hydroton by location. The bag size is 50L (please be aware our competitors bag size is 45L), the bags are clear. The weight per bag is 55lbs and the bags per pallet is 50 (Hydroton was 30).
Hydropebbles - 50L (714120): Compared to normal soil, Hydropebbles offers many advantages. The material is not only completely clean and odorless, it is the ideal round shape. Hydropebbles ensures good root aeration, prevents rotting, prevents excess acidity and prevents soil pests. It is made of clay with high water storage properties and balanced capillary action to accelerate plant growth.

#2 Gold Label Brand Hydrocorn
gold-label-brand-hydrocorn-7137501.jpg

Formerly called Gold Label Hydro Korrels. Item # 713750. These clay pebbles come from Holland and have the very similar rusty red color appearance as Hydroton. This media has a more varied shape than Hydroton which some have reported as favorable due to its ability to interlock.
Gold Label - Hydrocorn - 50L (713750)[/URL]: Gold Label Hydrocorn is manufactured using a mix of the best quality pure clay and are baked in an open furnace using high grade clean fuels, guaranteeing absence of heavy metals or other contaminates. Gold Label Hydrocorn proudly carries the RHP for horticulture quality certificate. The unique uneven shape of the pebble is an ideal surface for roots and beneficial bacteria. The porous structure has a high water capacity and is suitable for both ebb/flood and top irrigation systems.

#3 Gold Label Brand Custom 80/20 Mix
gold-label-custom-80-20-7137601.jpg

80/20 is 80% Hydro Korrels and 20% Coco with added mycorrhizae. The sodium and chloride contents are extremely low for a coco substrate, ensuring a stable behavior throughout the use. Mixed with 80% Gold Label Special Mix Hydro Korrels which is the substrate of choice for the professional hydroponics grower around the world.This substrate was specially developed for serious gardeners growing heavy feeding plants and is the tested and recommended growing medium for the Flo-n-Gro system.


#4 Hydrolite By Botanicare
botanicare-hydrolite-7148141.jpg

This new media comes in 2 sizes as indicated below and can be used successfully as a stand alone media as well as to amend other soil and hydroponic mediums. Made in the USA.
Hydrolite is a natural, silica-based, volcanic mineral with a unique, porous, crystalline structure which allows it to hold nutrients until plants need them. Hydrolite's ability to retain essential plant nutrients and aerate the growing medium makes it an ideal amendment for both hydroponic systems and soil gardens.


  • Improves aeration and is highly porous.
  • 70% silicate and does not float.
  • Retains nutrients and is reusable.
  • Nutrient charged to balance CEC.


#5 Growstones
growstones-hydroponic-growth-medium-7142301.jpg

This new media is a new up and comer. This is a new technology product. It is a green environmentally friendly, porous media made from 100% recycled glass. Made in the USA.
Growstones Hydroponic Substrate is the perfect growing media for use in hydroponic growing systems as simple as manually irrigated containers, or as advanced as automatically drop irrigated containers, Ebb-Flow systems, and NFT tables. It replaces strip-mined materials like Hydroton or stonewool, reducing environmental degradation. Growstones are designed to allow for rapid moisture absorption and enhanced drainage and oxygenation.

Representatives from our company [Sunlight Supply, Inc.] have had more recent correspondence with Rudolf within the last few weeks. At this time there are no foreseeable plans to reintroduce Okatau branded Hydroton. If this changes we will certainly let you know.
For the time being, we are hopeful that one or more of these 5 products we distribute will serve to fill your needs.
...


re: Xlr8's Psychedelic Bloom Party Extravaganza

Picture update -- Day 56 since bloom-period photoperiod reduction

These pics were taken just before "lights on", with the exception of the last photo. I'm thinking at least another week, week and a half for the lot at this point... Since I had some plants/strains with the possibility of a little color, for fun, I've let the temps get a little lower the last week and a half - so far to a low of about 61f at night. They're all showing some purple color at this point though it's not dramatic or obvious in most of the pics.

Jillybean forest... these are all (but not every) Jillybean tops. I think this plant could have been a monster yielder if I'd have given her more space (though she took a lot on her own!). Maybe if I like it, I'll grow out a big ole' solo bush to see what kind of yield I can get... :)
feb_13_3.jpg


Jillybean
feb_13_1.jpg


Jillybean
feb_13_2.jpg


Vortex - small sativa buds, and a lot of stretch but oh my the resin!!
feb_13_6.jpg


feb_13_7.jpg


Humboldt She smells like jasmine and heaven. I'm really anxious to try this one!
feb_13_9.jpg


Pineapple Express
feb_13_4.jpg
 
re: Xlr8's Psychedelic Bloom Party Extravaganza

The idea of "ways to veg before putting plants in the Flo N Gro" came up in another thread, so I thought I'd post a breakdown again of my DIY veg system. It's worked perfectly from day one, and is an excellent way to start plants for the Flo N Grow.

The only changes I've made since it's original creation, is I've gone away from the flexible air bubblers/diffusers, and switched to old-school cheap 12"? airstone "bars". Ideal, would be a micro-pore diffuser, but they're pricey and overkill for this.

Like the Flo N Gro, once it's set up, it's just managing PH in the reservoir, and doing your weekly reservoir change. I've got it dialed in with my nutes now that the PH stays pretty constant, so I literally only do weekly reservoir changes now, which only take about 30 minutes with this system (at the most). Other than that, it's just managing/training the plants. Easy breezy! When I need to, I pull the net-pots from this system, and bury them net-pot and all in the hydroton of the Flo N Grow. Just enough to cover the lip of the 5.5" netpots when I bury them. Voila! Hopefully this is helpful to someone or sparks an idea for them. :)

Unlike the Flo N Gro, this DIY I did uses gravity to help it along. In its purest essence, there are flood fittings (see below) that can be set for a minimum level and maximum level of nutrients. A pump in the reservoir, set to a timer, floods for 5 minutes at periodic intervals. 5 minutes is enough time for the roots in all plant sites to get a good soaking before it drains again. The pump runs for the entire 5 minutes, but the overflow fitting keeps it from well, overflowing. ;)

Here's a little more detail with pics on the DIY hydro system I built:


The grey "Brute" rubbermaid garbage container in the lower right of the pic is the reservoir. Notice on the lid there are 2 hoses, and an opening for electrical. One hose is "flood/drain" connection, that connects to a 200 gph pump inside (controlled by a timer). The other hose is for the "overflow drain" and simply dumps the water back into the container after (and during) a flood when it rises to a preset level. Finally, there is a small blue airline that runs paralell to the power cord for the pump, and serves to aerate the reservoir (connected to a small, un-pictured airpump). When the system floods, the pump in the reservoir pumps the nutrients from underneath the far right plantsite (top right of the photo). Along the front of the containers is tubing that connects the plant sites so that during a flood, all 3 plant sites are flooded, too:
sep_4_1.jpg


The far-right plantsite is the controller for the other plant sites, too. Inside are botanicare flood/drain fittings (available at most hydroponic stores). One of the fittings is for flooding and draining, and one is for overflow. When the system floods, it comes through one lower fitting, and will continue to flood until it reaches a level set by risers in the other fitting. While the system will flood as long as the timer runs, this second fitting is what keeps you from overflowing. I have it set to a height so that the netpots are thoroughly drenched, but not so high that it overflows. You can buy the fittings in a kit like this (google or check your hydro store). Notice that there are 2 different heights. The shorter one is for flooding and ultimately draining (once the flood cycle ends, the nutrients will drain back through the pump to the reservoir). The second, taller one has risers that allow you to set a max height for your flood before it simply drains back to the reservoir. Here's what I used for fittings (by botanicare):

botanicare_fittings.jpg


This is a picture from when I was building it. The lower fitting now has one riser piece to allow for a set level of nutrients to stay in each plant site vs. a full drain. THe top piece on these are a filter. So, they drain at the bottom of that piece. In this earlier picture, the lower fitting would drain flush to the bottom (completely). The overflow fitting has (3) of these "risers" and allows for the nutrient level to flood the entire bottom portion of the netpots. The fittings are easily installed by cutting a (I believe 1 1/2 inch hole) and then screwing them together top and bottom:
DIY_hydro_1.jpg


In this photo of the far-right plantsite/controller, you can see the overflow fitting that sets flood height. Unpictured is the lower drain/flood fitting, which isn't visible due to the front of the container. Notice I'm starting to just starting to get roots showing through the bottom of the netpot. The floods should allow root development all along the netpot sides, while dwc only typically results in a mat of roots extending mostly from the bottom only.
sep_4_2.jpg


I tried to get a pic of the shorter flood fitting in the container, which can be seen to the right of the visible root in this photo. Normally, it would be fairly flush to the bottom, but I've installed a riser (available individually at my hydro store) so that after a flood, a pre-determined amount of nutrients are left in each plant site, which are aerated to perform in a DWC manner. When not flooded, the nutrients are about an inch, inch and a half below the netpots - fairly ideal for recirculated DWC I think. Without the extra riser and aeration, this would be essentially be a gravity assisted Flood/Drain unit. The riser and aeration in the plant sites allows it to be DWC when it's not flooding.
sep_4_3.jpg


Here's one of the other plantsites. The nutrient level is controlled for it by the far right "controller" plant site, so aside from being connected in the front, they really just house the plants and contain an airstone (well, bubble bar or whatever you call this thing that acts like an airstone):
sep_4_4.jpg


Really hope this helps -- let me know if I missed anything or if you have more questions! :)

DIY hydro veg update:

Thought I'd show you all how things are going with my DIY hydro system for my little veg space. As mentioned before, I got sick of hand watering moms and pre-mixing nutrients for the task. Although I really like how well coco coir works for a medium, it was taking up about 90% of my time with the plants, and I really needed to do something different given my health and limitations. So, I made the DIY hydro tubs that are a combo of DWC and Ebb n Grow/flood styles. Basically, DWC with periodic floods that drench the root zone in oxygen rich nutrients. The floods also serve one other important purpose, which is to recirculate the nutrients with the larger remote reservoir, below the plant sites.

How's this working? Unbelievably well so far. The biggest problem I have right now, is that they are growing so fast that I literally need to trim them every day. Honestly, this was my fear of doing the hydro veg/moms to begin with, but I still don't mind the trimming as much as the constant hand-watering, and I've got so much less time invested in the veg portion of my growing. So - huge success so far.

There are 6 plants in my DIY veg units total - 2 unique phenos of Pineapple Express (one more indica-like, one more sativa-like in appearance), 2 unique phenos of my Deadhead Ripper (clones of the plants in flower), an OG Ripper clone, and a Chocolope:
sep_25_3.jpg


For fun, I took a picture of the rootzone on one of the plant-sites. They all look about like this, and are very white and healthy overall. These are a Chocolope (front) OG Ripper (rear):
sep_26_1.jpg


I know roots aren't too exciting, but I wanted to show how well I think it's working so far. I'm very pleased.
 
Back
Top Bottom