Hijinks
New Member
Hello all, Hijinks coming out of lurking (recently registered but I have been reading these forums for years). Today I am happy to bring you my first grow journal.
I live in the wonderful state of Colorado where cannabis is now legal for recreational purposes (woohoo!), and I have also been a registered MMJ patient for 3 years. After buying my first home I decided to build my very first grow. I live at 7,000ft in the mountains and have an extra bedroom in my basement which is now in the process of being converted into my grow room.
First a little bit about the space:
The room is located in the basement and is roughly 14x7x14, however it is not exactly square (see below).
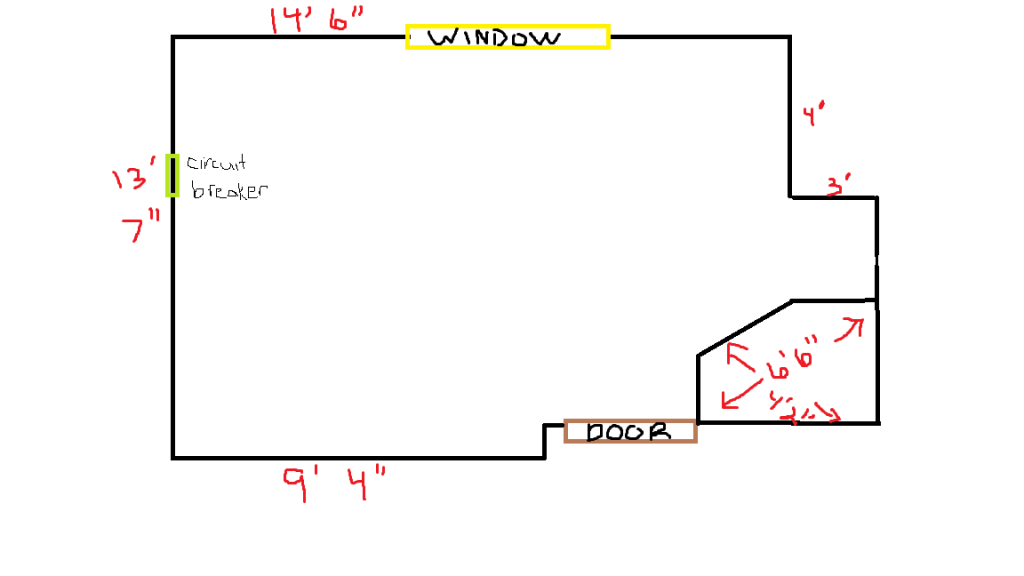
(the closed off area is a closet)
After much planning (weeks of google research), I decided on sectioning out the room in the following way:

This left me with a 5x9 veg room, a 9x9 flower room, and two separate areas for sprouts/clones and a mother plant or two as well as room leftover to grow into or use as a work station.
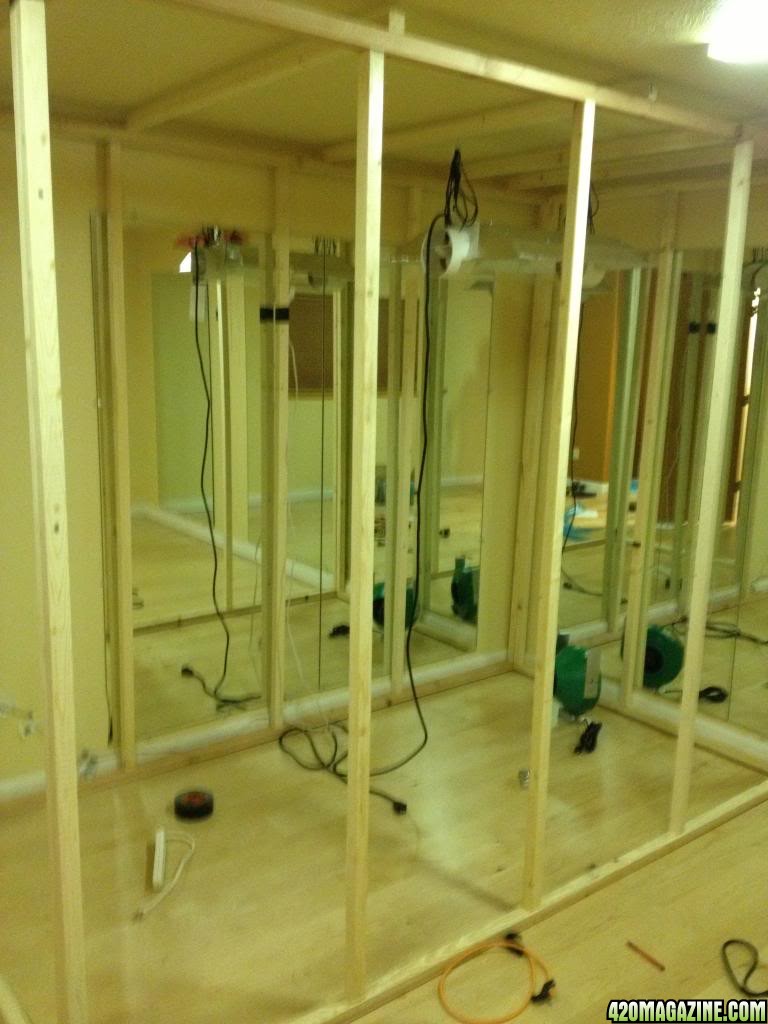
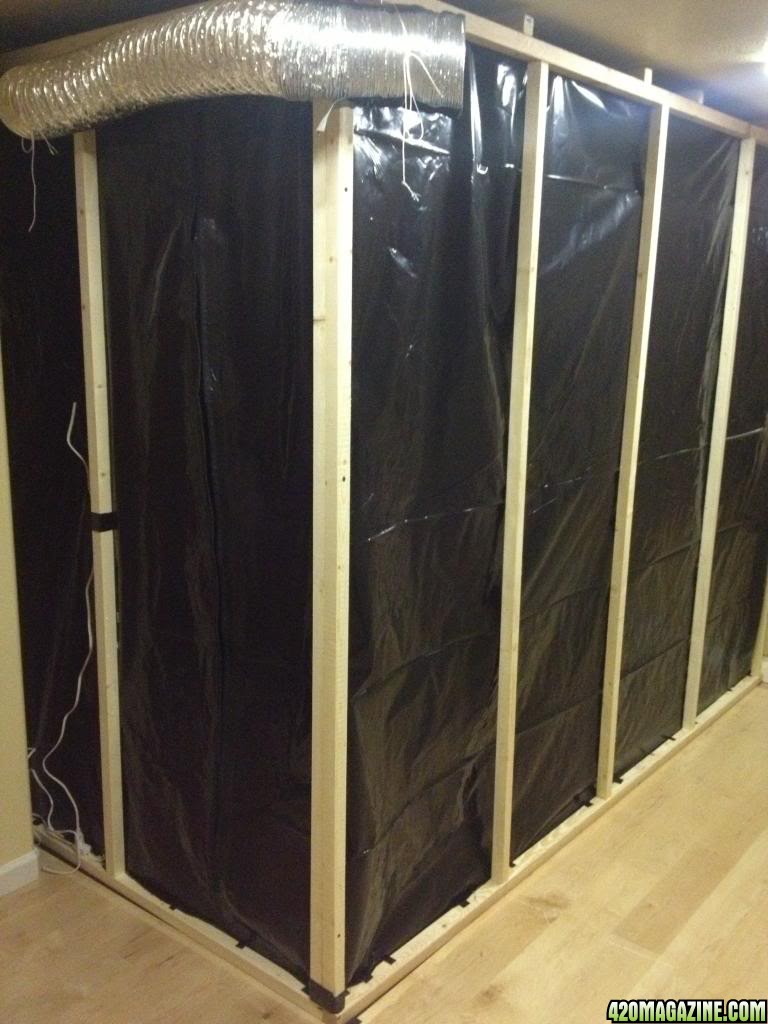
My first task was to frame out the veg room. Although I own the home, I still do not want to damage the room if I can avoid it, so I went to Home Depot and bought a bunch of 2x2x8's and some 2x4x10's (no one carries 2x2x10 but you can easily buy a $40 circular saw and split 2x4's in half like I did) and built myself a frame.
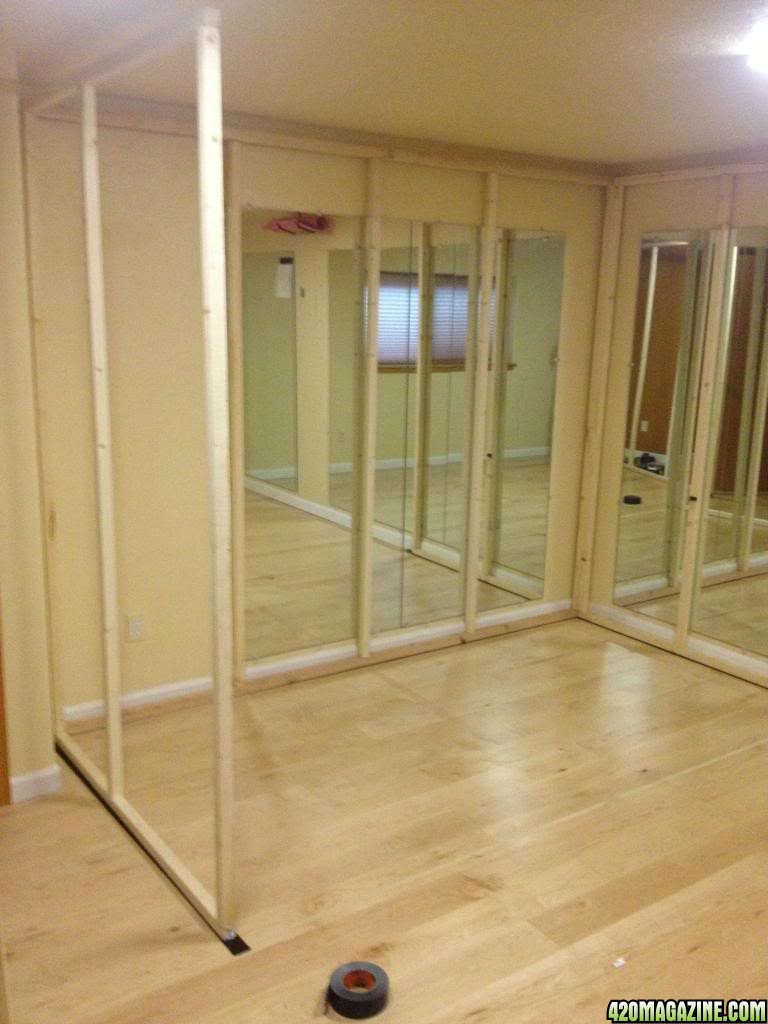
As you may or may not be able to see, the room I am building in used to be a fitness room so it is covered in mirrors. (call me crazy but I left them all up in case it helped block any RF interference)
After finishing the 2x2 frame for the veg room, I placed everything out that was to be hung (lights, ballasts, exhaust) and screwed all necessary holes for hooks so that going in after plastic is up was easier.
I used 4mil black plastic for the floors - I hope to upgrade to pond liner eventually

Make sure you leave a little extra slack in the floor so it doesn't tear easily - especially if using staples like I do.
After everything was in place, I took it all down so that I could put the panda film up easier. I ended up getting a roll that was 10ft high so I could wrap the walls as well as the ceiling all in one piece making it extra light proof! Putting up panda film was EASILY the most frustrating part of building this by myself. I recommend doing it with a friend.
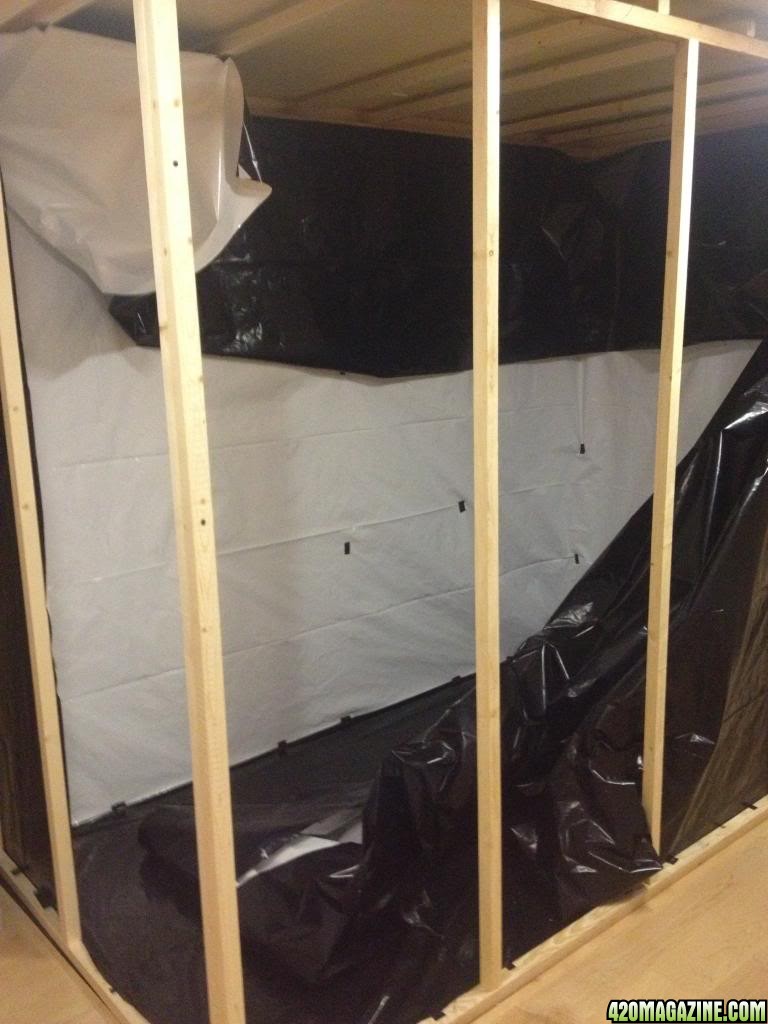
Finally after the walls and ceiling were done I was able to remount everything into place.
From there I just tidied up the wires and hooked up the exhaust!
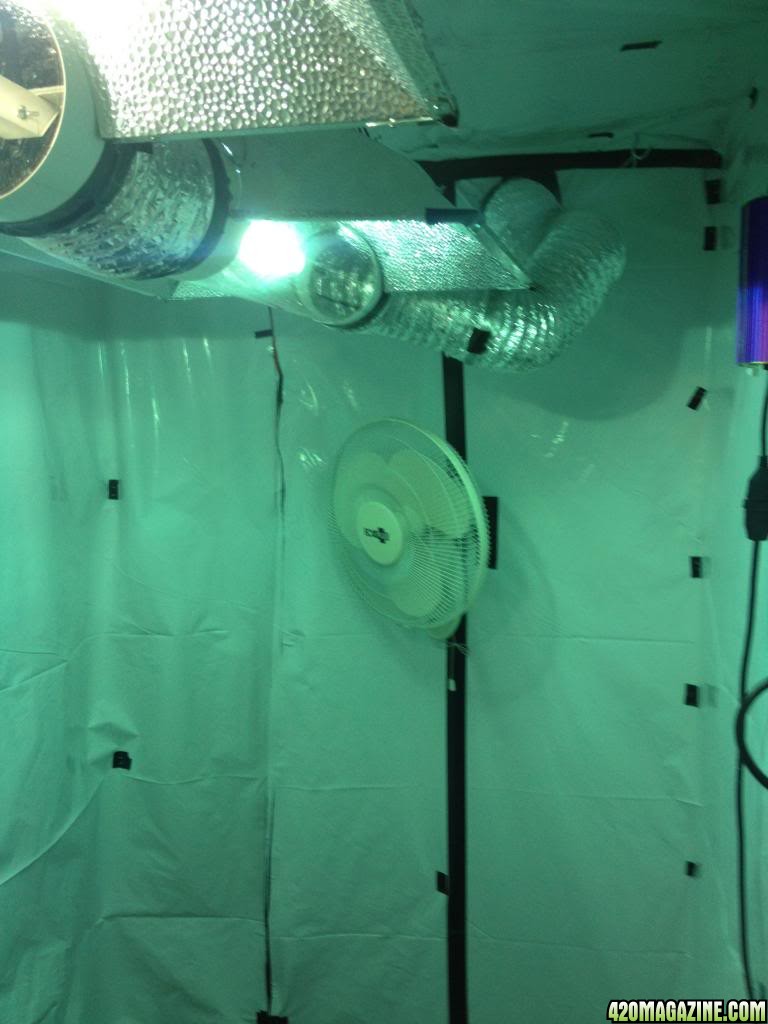
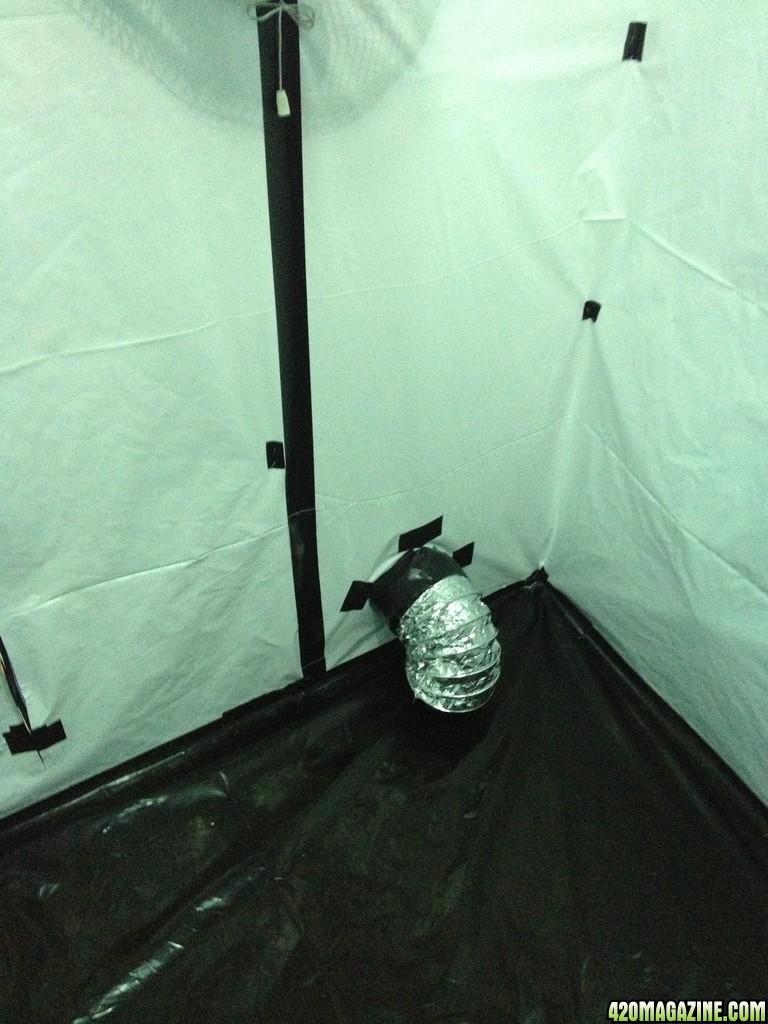
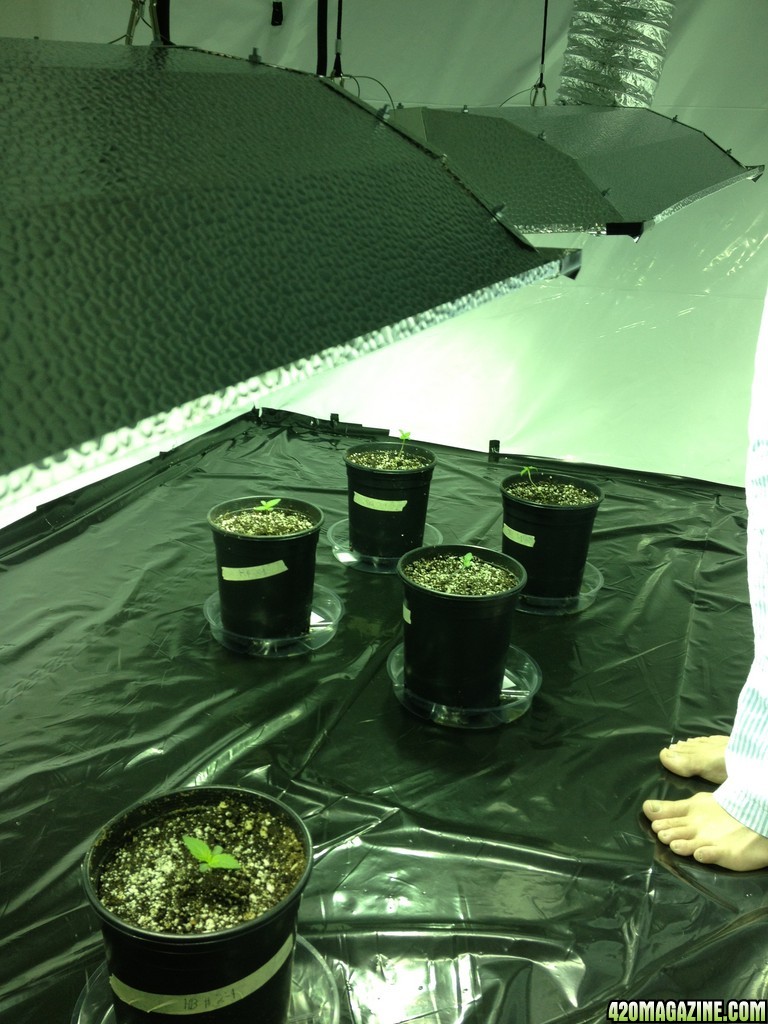
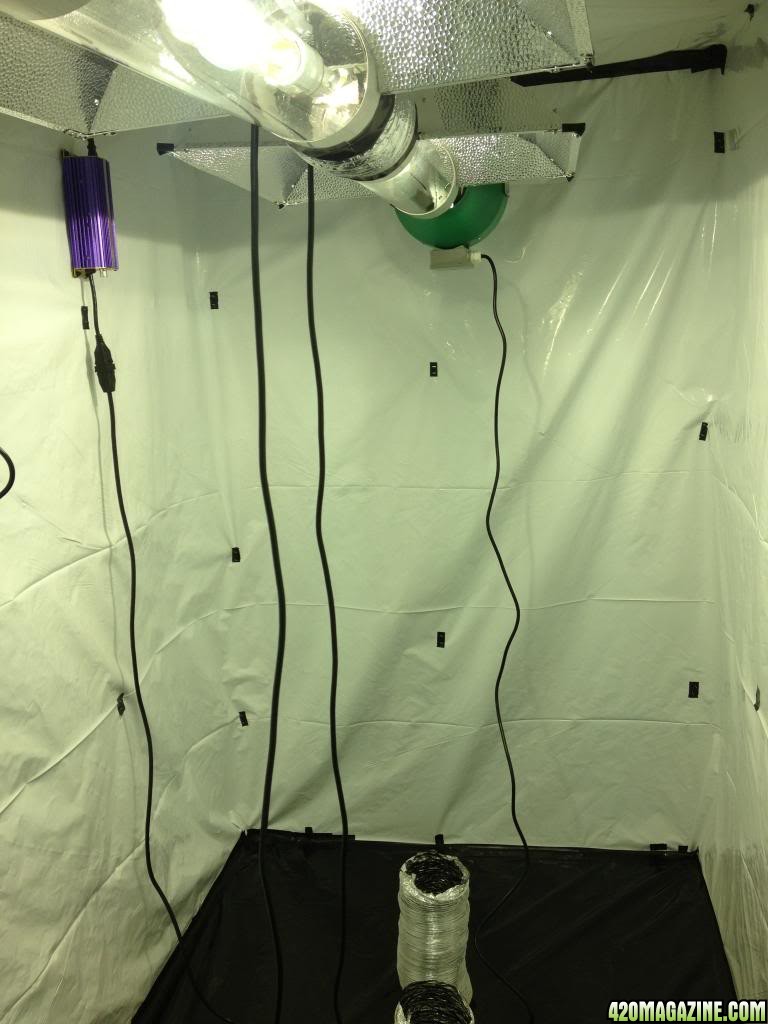
Here is the outside of my 5x10 (really 4'10"x9) veg room so far. Today I added a 7' "Lite Tite" zipper door entry. The only thing left to do is add the passive intake. I will easily have a 4x8 area to grow in inside.
You can see that the exhaust is currently just venting into the main room, however, I plan on venting it further to the window before using it to veg.
I am pretty damn proud of myself for building this so far. I have minimal handyman experience and thought I would run into way more speed bumps than I actually did. If you are debating building something for yourself and are holding back because of experience, just go for it! You will learn a lot along the way.
The room maintains 65-69deg temp 24 hours of the day during the hottest days of the summer, so I am looking forward to seeing how easy it is to get to 72-76.
Another great feature about the room is that is contains the breaker box for the house. Because the room itself is only on a 15 amp circuit, I called an electrician who comes at the end of the month to install a 8 new plugs, each with their own 20 amp circuit. Luckily because the breaker is in the room, it will be a relatively easy install for the electrician and I will save on the bill!
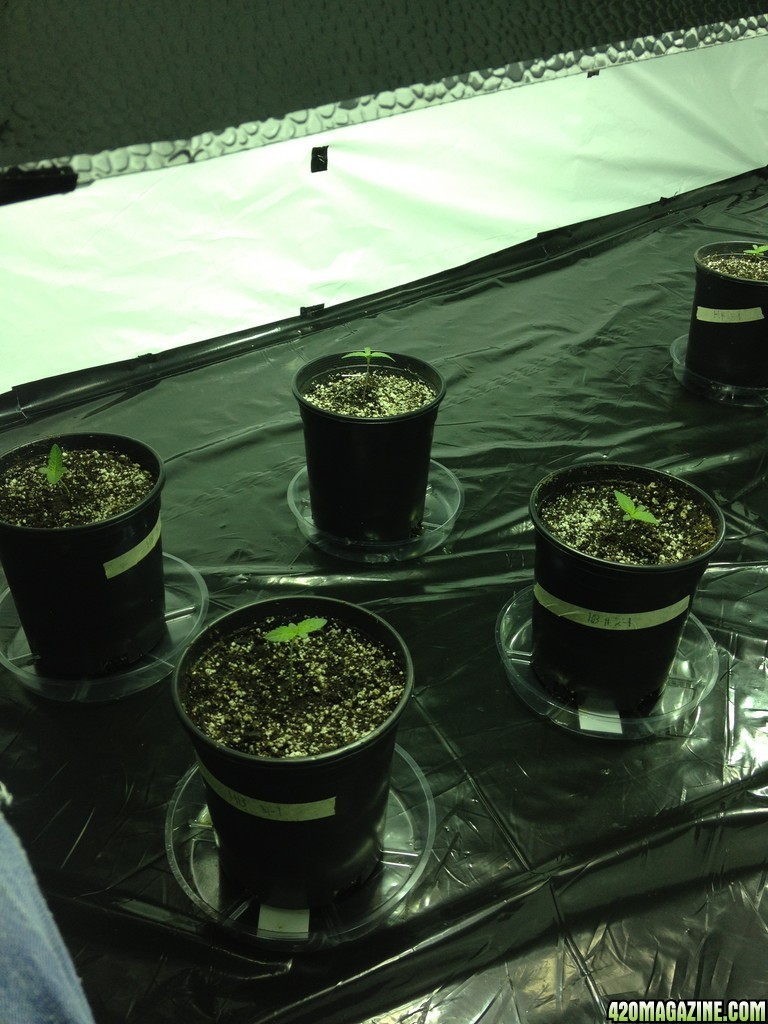
I was also able to bang out a little sprout area today in my 36"x38" odd nook area. I added some of my scrap pieces of panda film to the sides:
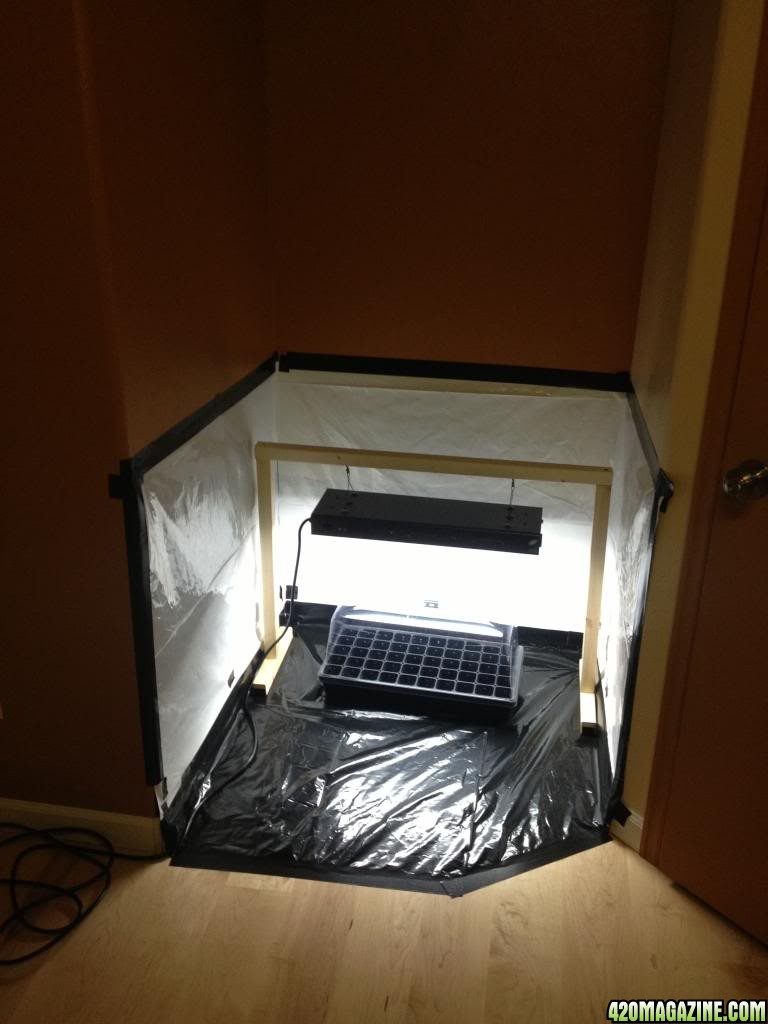
saved about $50 on the stand for the T5 light by just building one out of scrap 2x2's
Next a little bit about the equipment being used:
As this is my first grow I wanted to start small(ish). I also didn't want to use any 1000w bulbs because of heat issues as well as only a 7.5ft high ceiling.
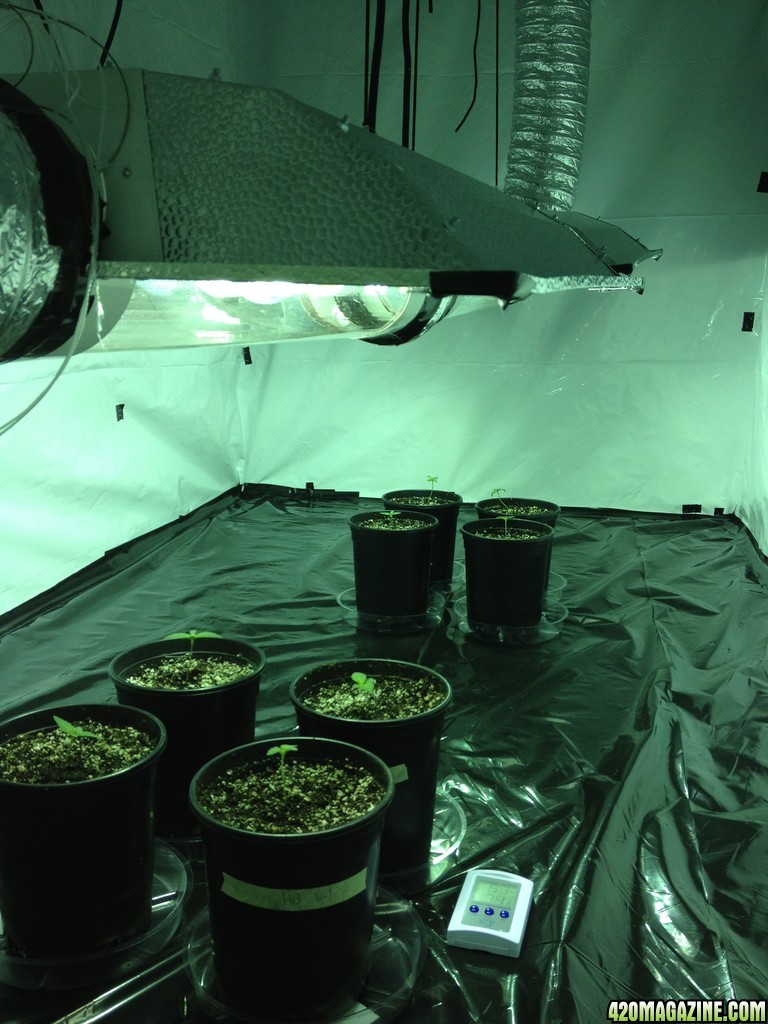
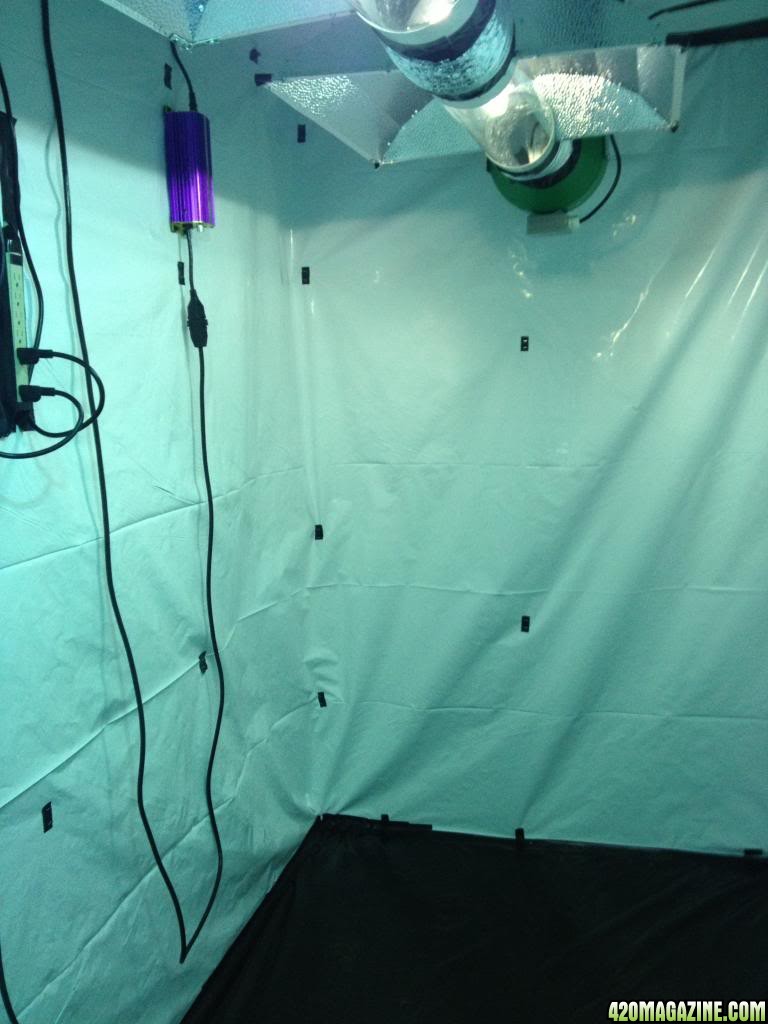
I decided to get two 400watt Apollo mh lights that have an air cooled hood for the veg room. Because my veg grow area is 4x8, I positioned each light above a 4x4 area. The ballasts can run MH as well as HPS and the seller (AMAZON! great deal but we will see how good it actually is) sent both bulbs with each, so if I don't get around to building the flower room I can always just use the veg room.
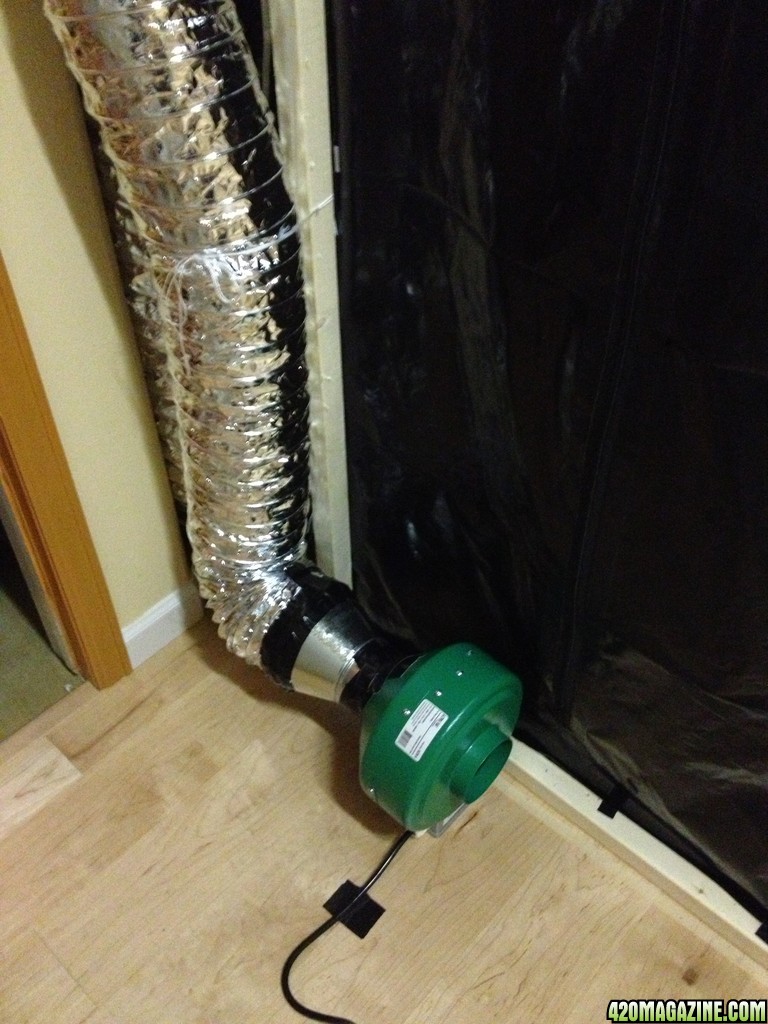
Everything other than the lights I ended up picking up at a local store (Way to Grow - this place is killer!). 18" wall mount fan, 6" inline fan, and a 2 ft 2 bulb T5 system for sprouts/clones.
Because of the size of the space and my aesthetic for clean lines, I ended up hooking up my exhaust fan directly to my air cooled hoods. Now don't get me wrong - I understand that the best way to maximize the potential of the air cooled hoods is to bring in a fresh intake through them and then exhaust it, but this would mean another line of ducting going through my small room. I took the chance and decided to hook it up directly to the exhaust hoping I get enough heat reduction so I won't have to use an A/C unit. You can't see it very clearly, but here is a sketch of what I mean.
Here is how mine is currently hooked up:
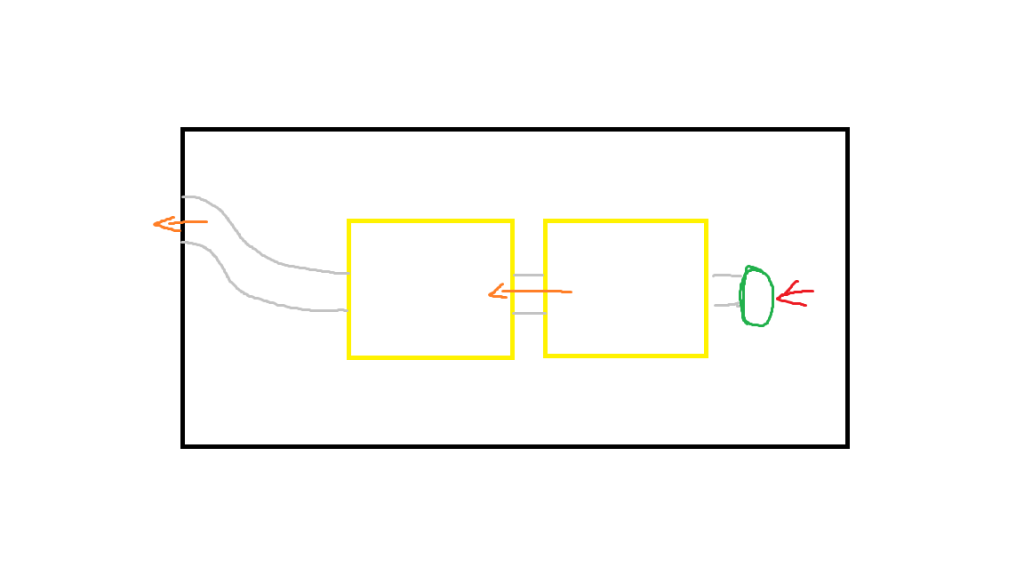
Here is what I understand to be the ideal way to set it up:
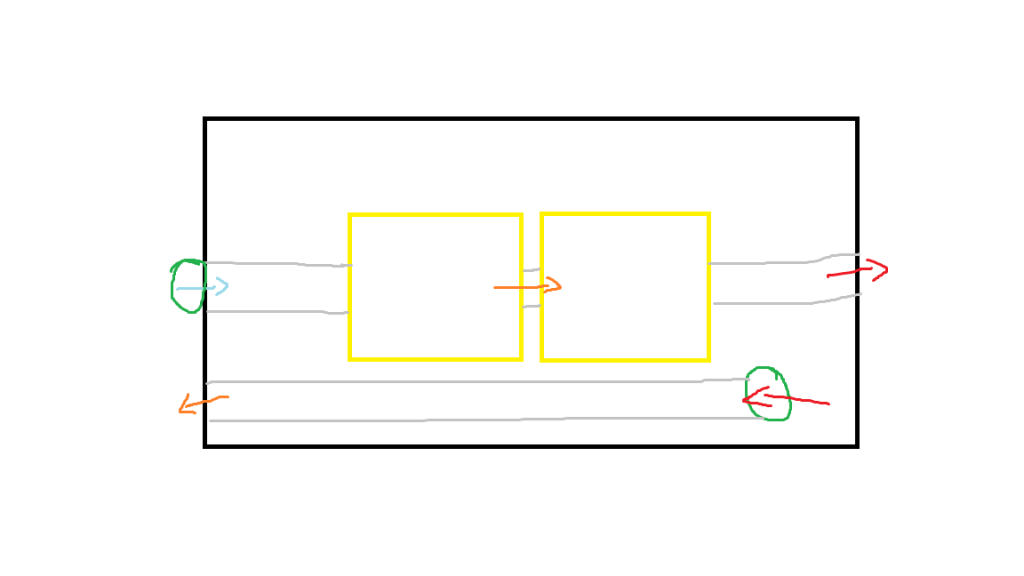
I'm rolling the dice with this one - if temps get too hot I will have to abandon my straight-line method of exhaust and redo it to the ideal setup.
I plan to get four 600watt lights for the flower room (8x8 grow area, 1 light per 4x4 area), and I will definitely get Apollo again if these 400watters turn out to be good.
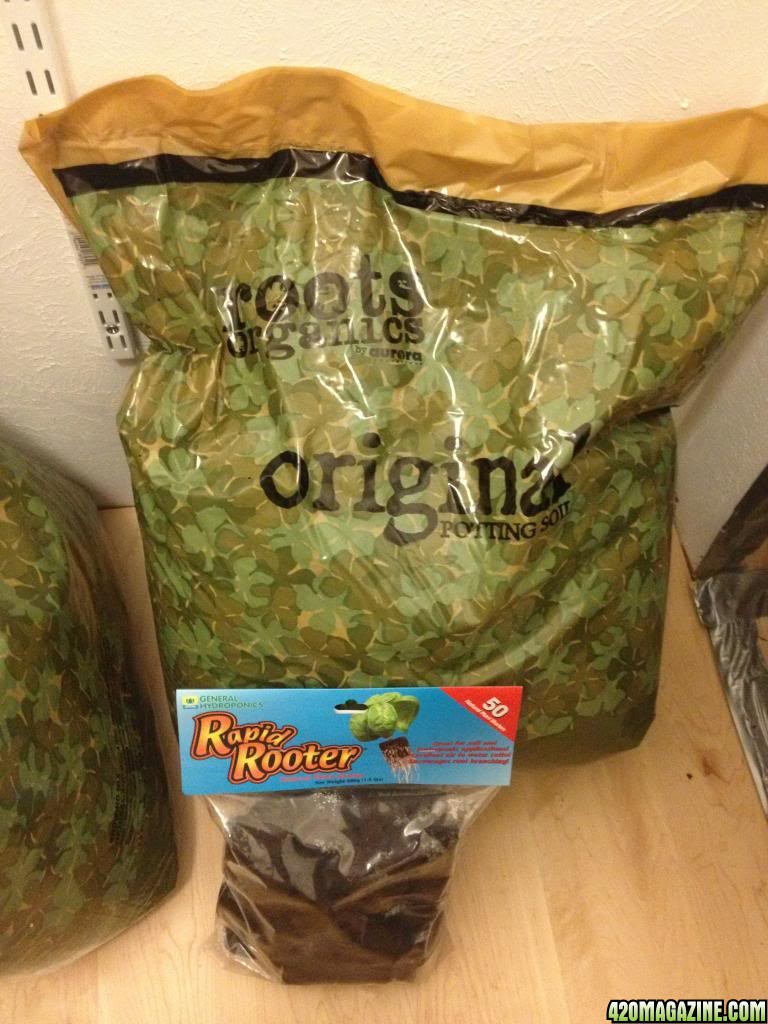
For soil I will be using "roots organics" and "rapid rooter" pellets, and I plan to use 1-gallon pots to start veg.
Finally! Some info about the cannabis being grown!
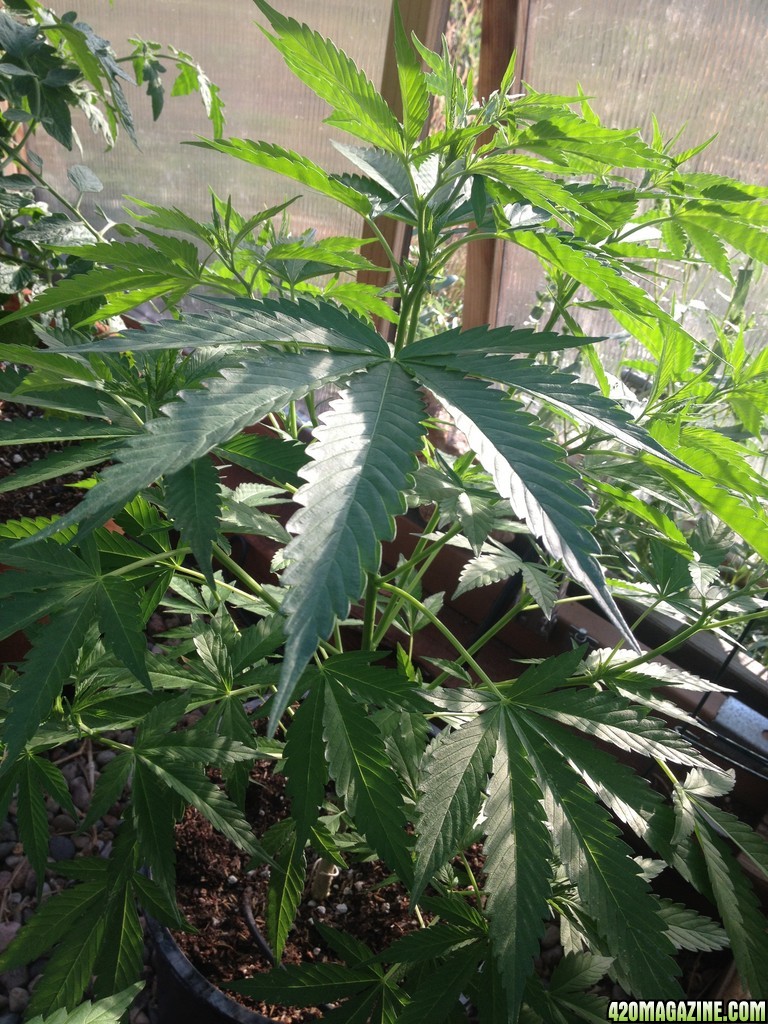
I decided to order feminized seeds from Single Seed Centre. I chose six "818 Headband aka Sour Kush" from Cali Connection and six "Skywalker OG Kush" from Reserve Privada. I am a fairly picky when it comes to my smoke - currently I only smoke oil/dabs, and even my oil only comes from the finest buds. It is easy to maintain this snobby smoke-style because I have an amazing dispensary hook-up that only sells the finest oils, but it is starting to really impact my wallet. Lately every time I spend $200 in the dispensary I think to myself, "that could have been $200 going to the grow". Hopefully with these 12 plants I will be able to find myself a mother for each strain and have perpetual good smoke! (that is the plan, anyway)
Headband Original Sour Diesel x SFV OG Kush IBL)
This is easily one of my favorite strains of all time. I have quite a high tolerance when it comes to smoking, but headband gets me every time. I am very excited to see how this bud turns out.
Skywalker OG: (Skywalker x The OG #18)
I decided to get this one because it was another OG Kush cross, and hopefully the headband and skywalker will have similar growth periods and heights.
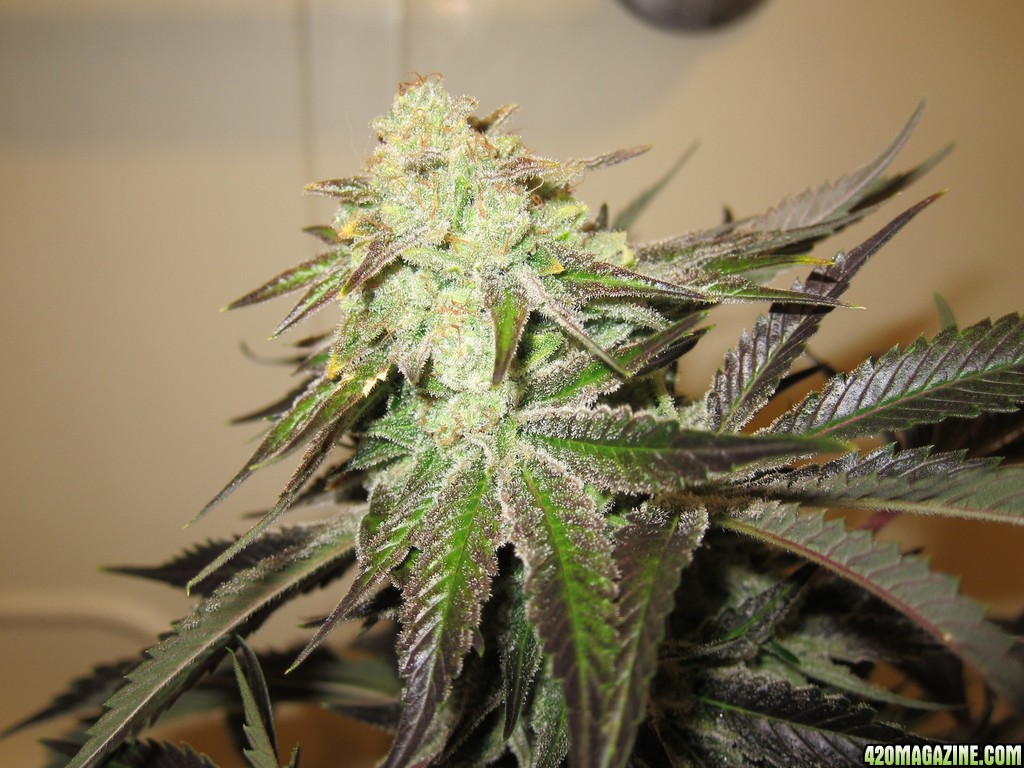
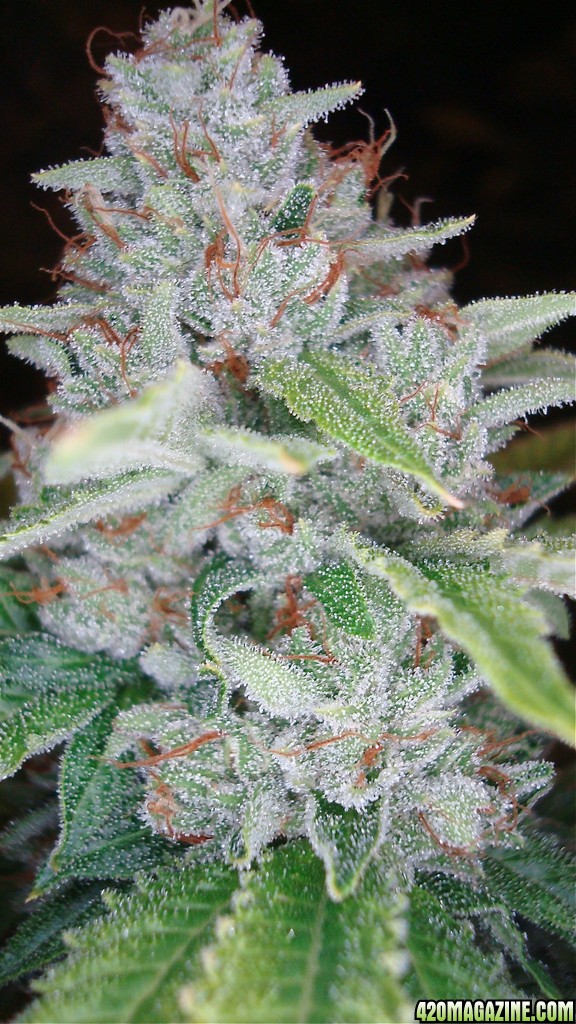
They are beautiful aren't they?! I hope mine come out even half as nice as those pictures.
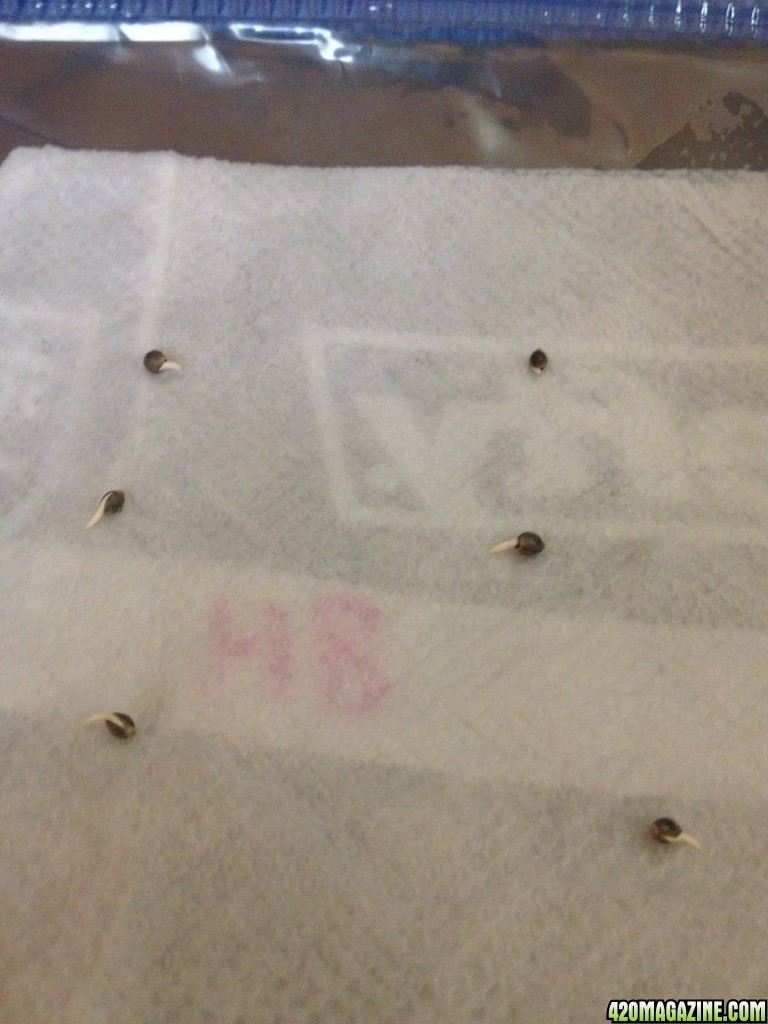
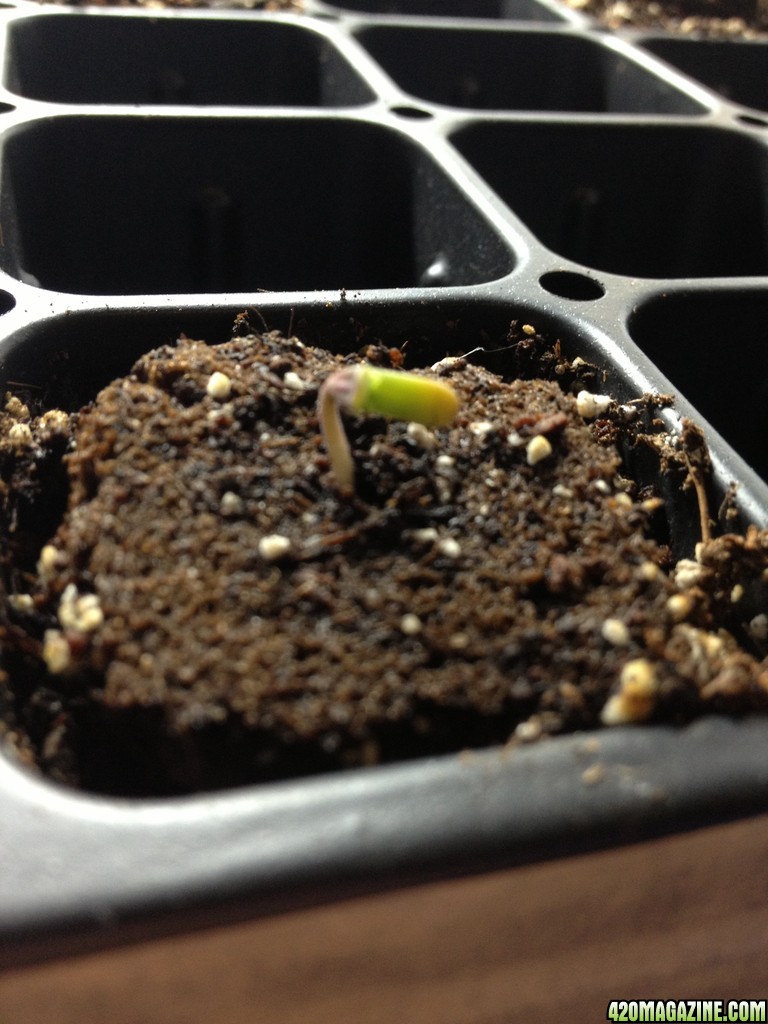
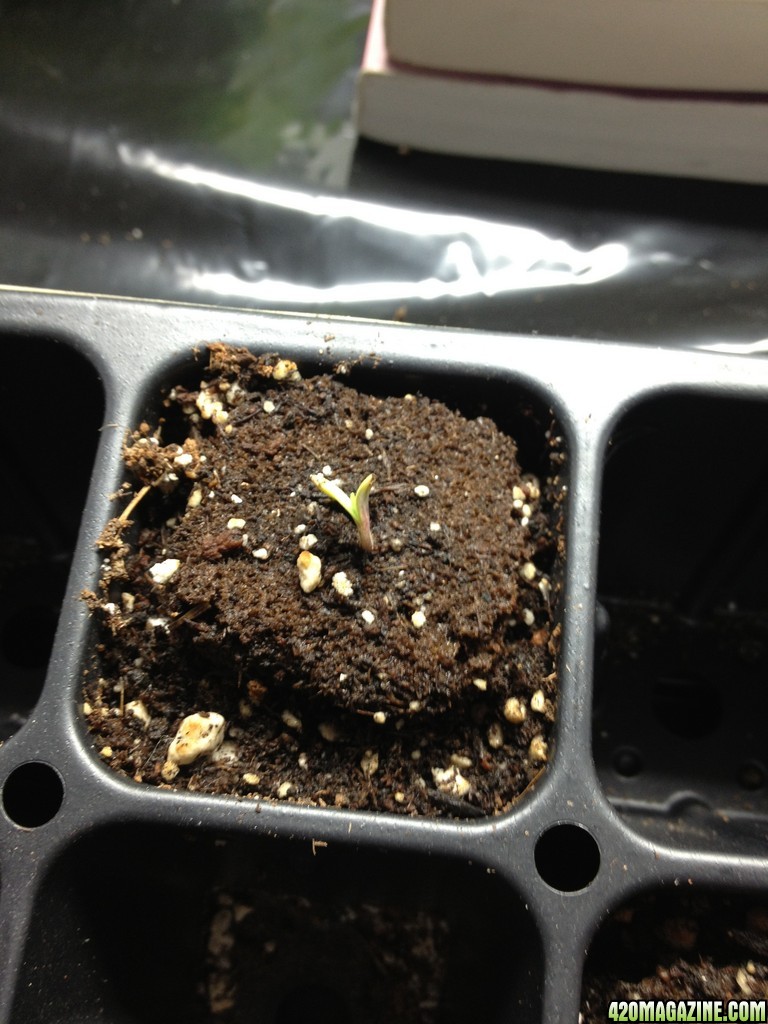
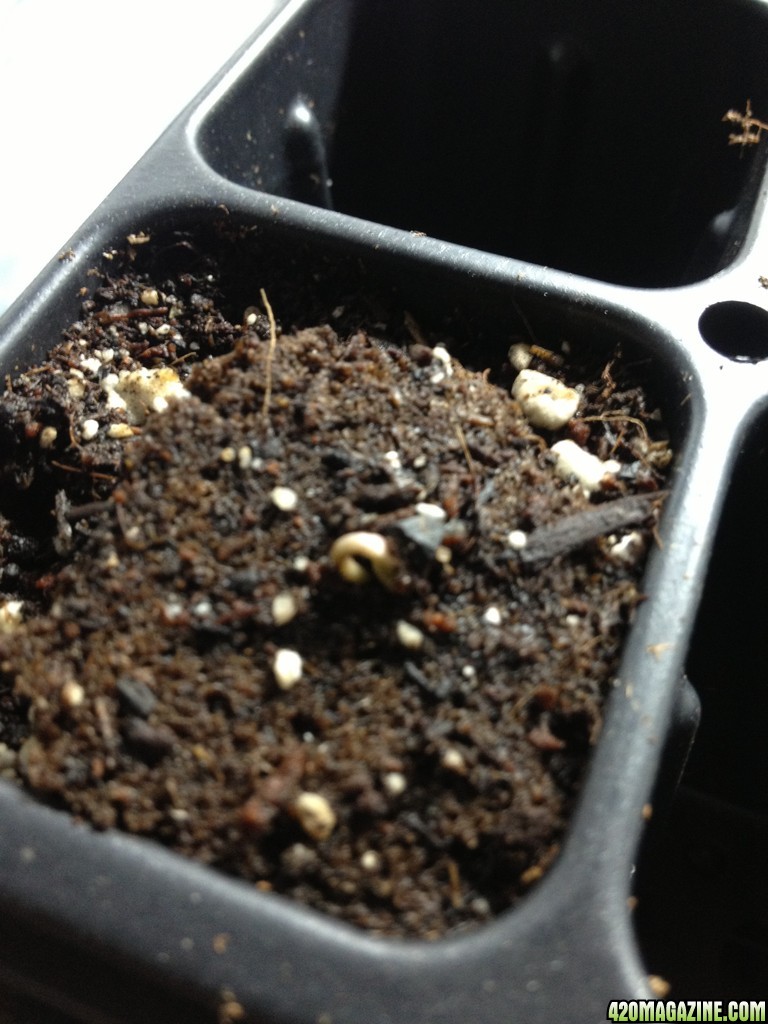
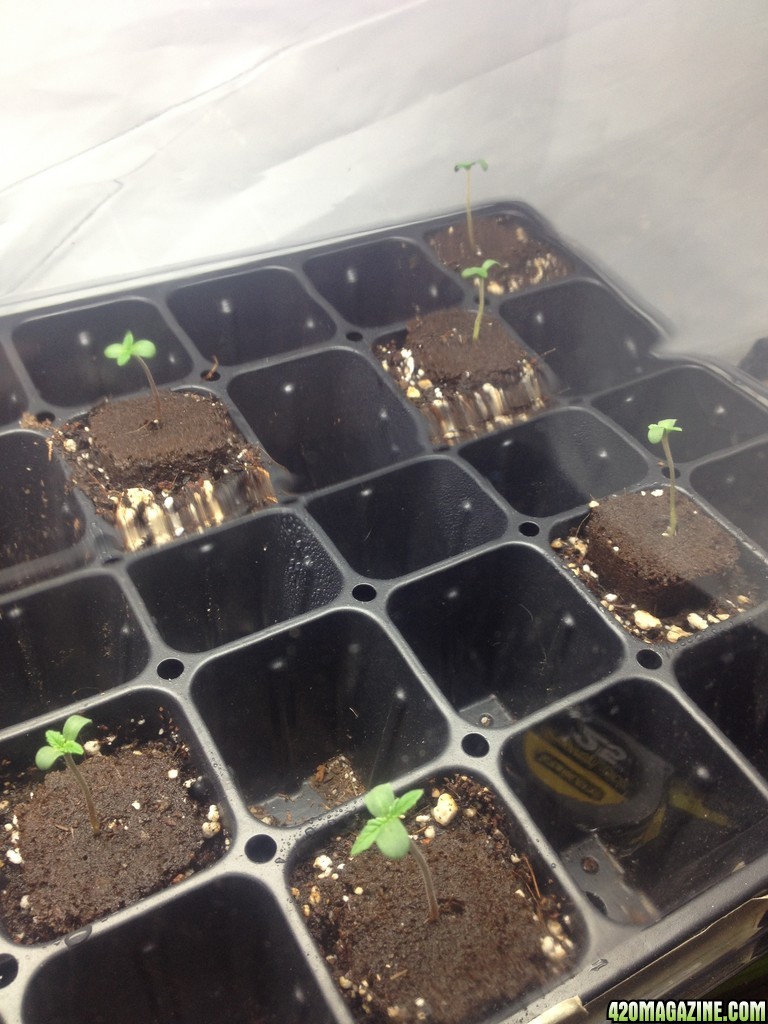
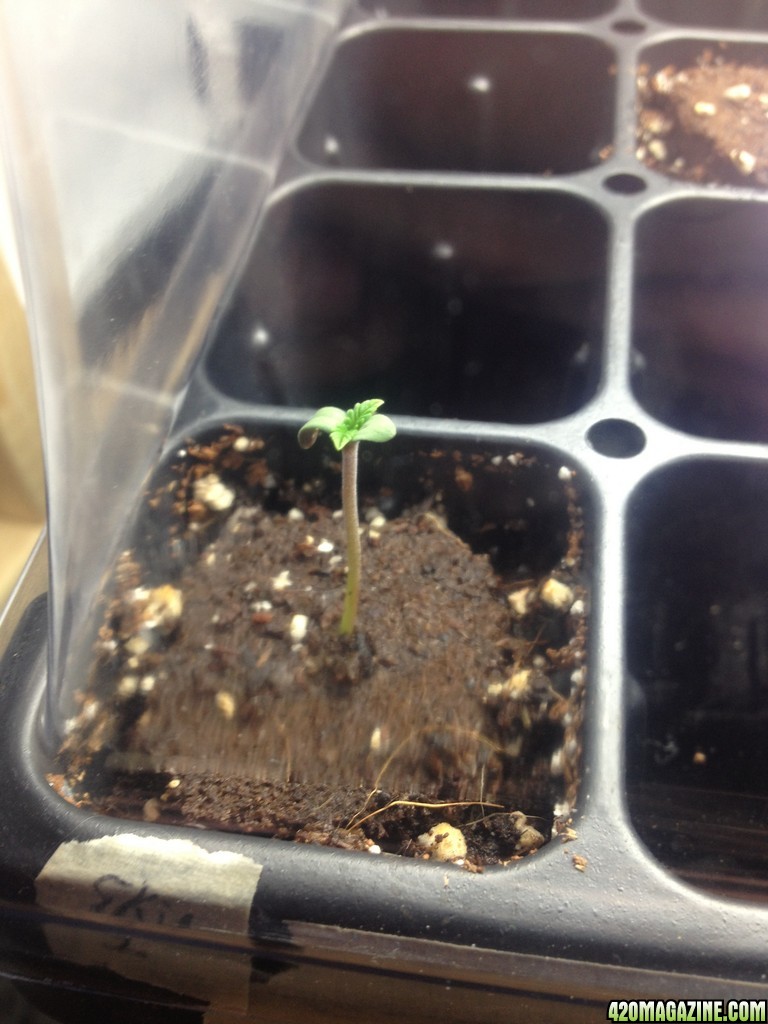
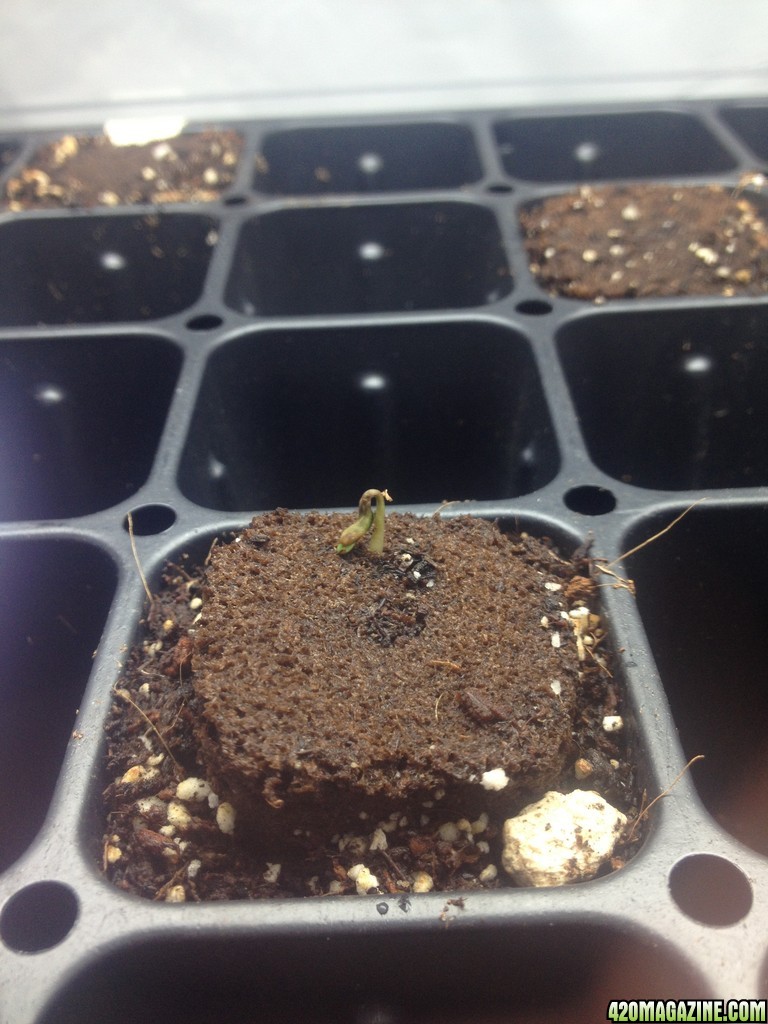
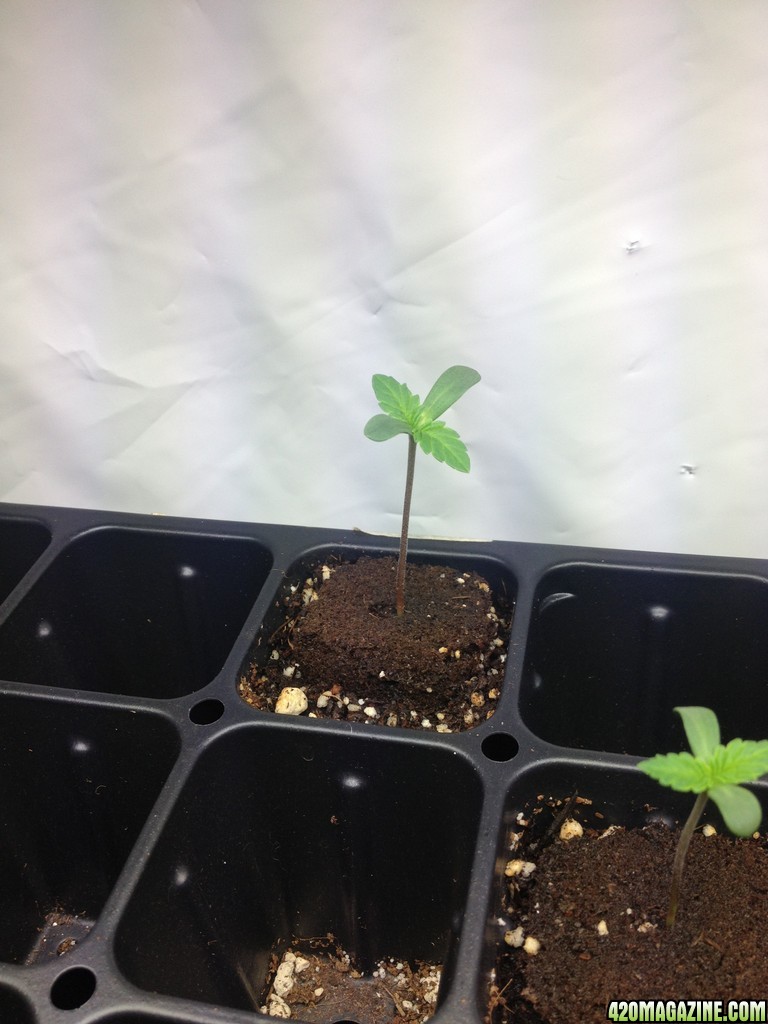
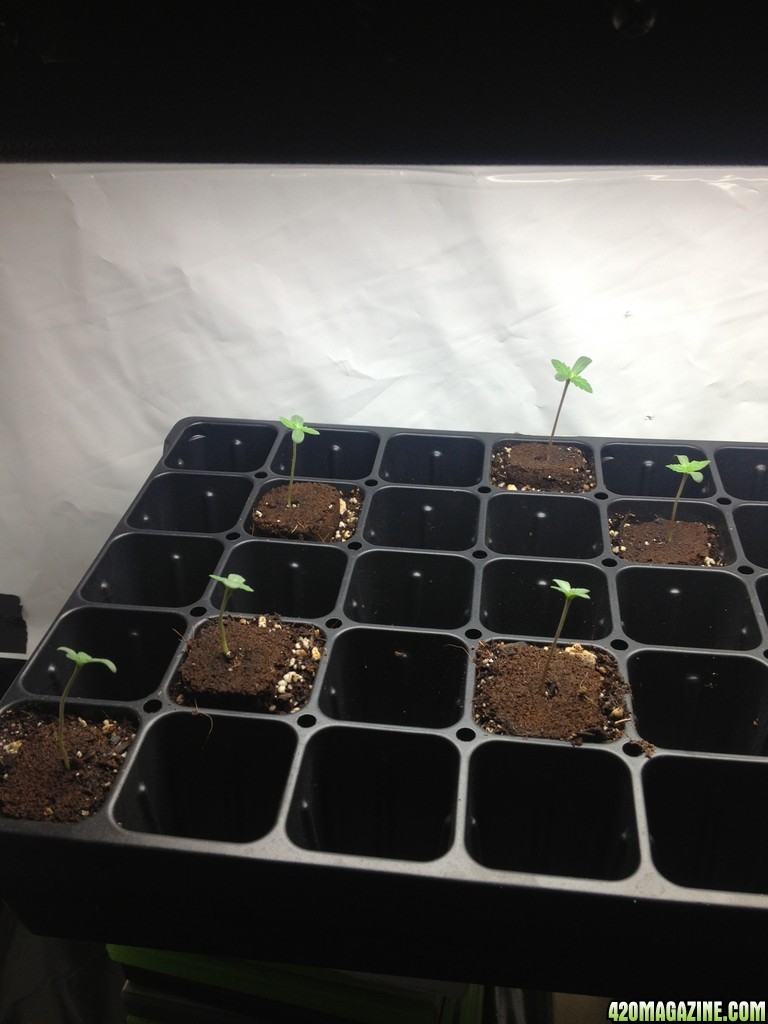
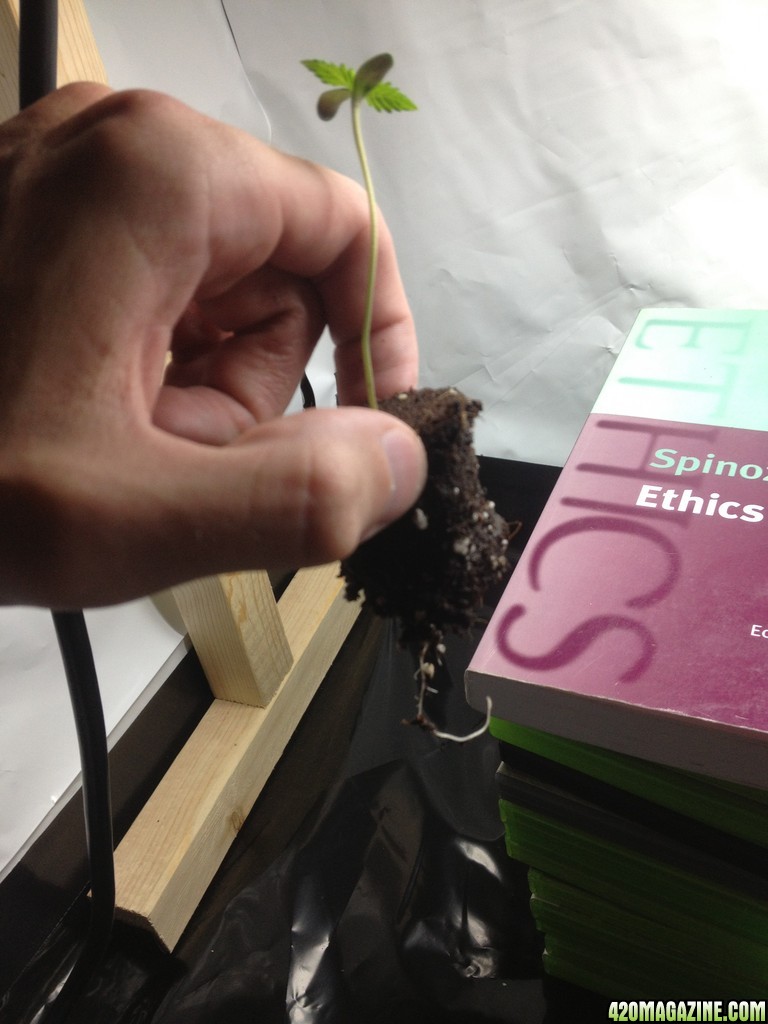
Received the seeds today (came after only 7 days). To germinate I decided to soak them in water for about 5 hours before putting them into damp paper towels inside of a zip lock. They are sitting on top of my DVR box which maintains a constant heat.
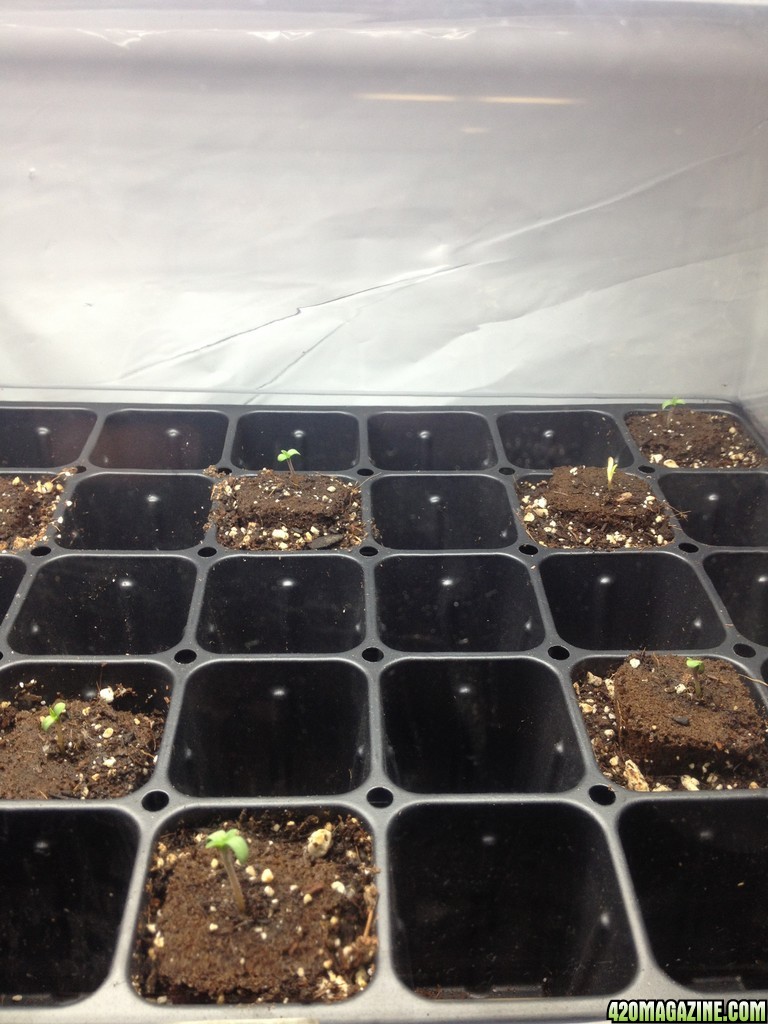
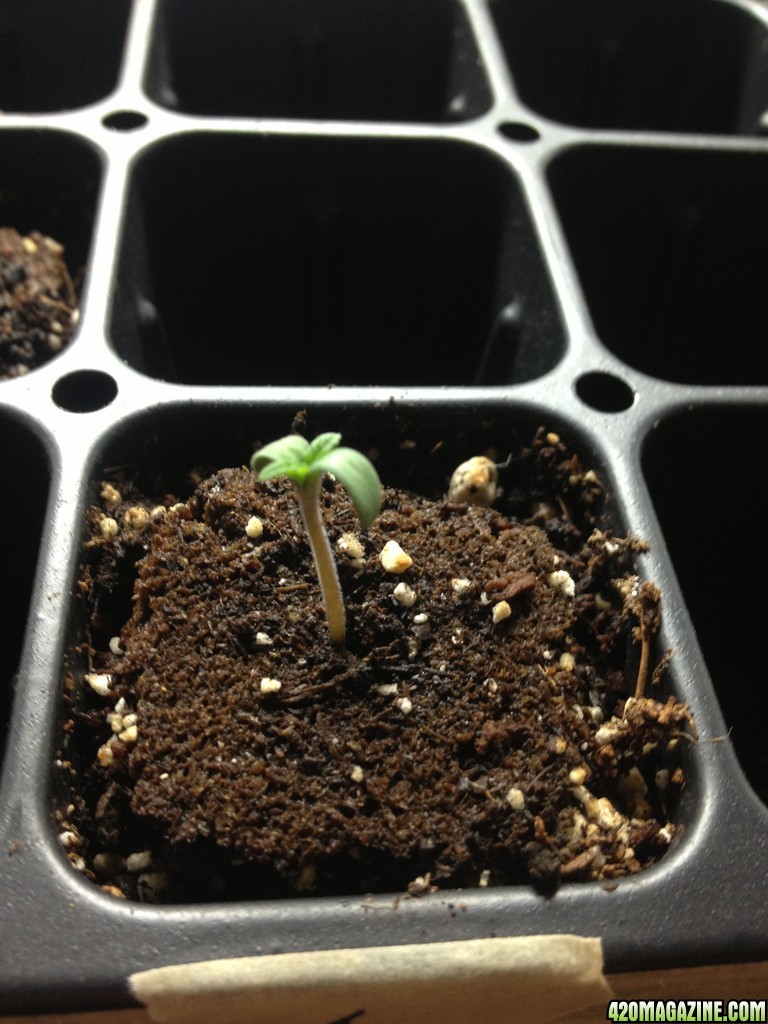
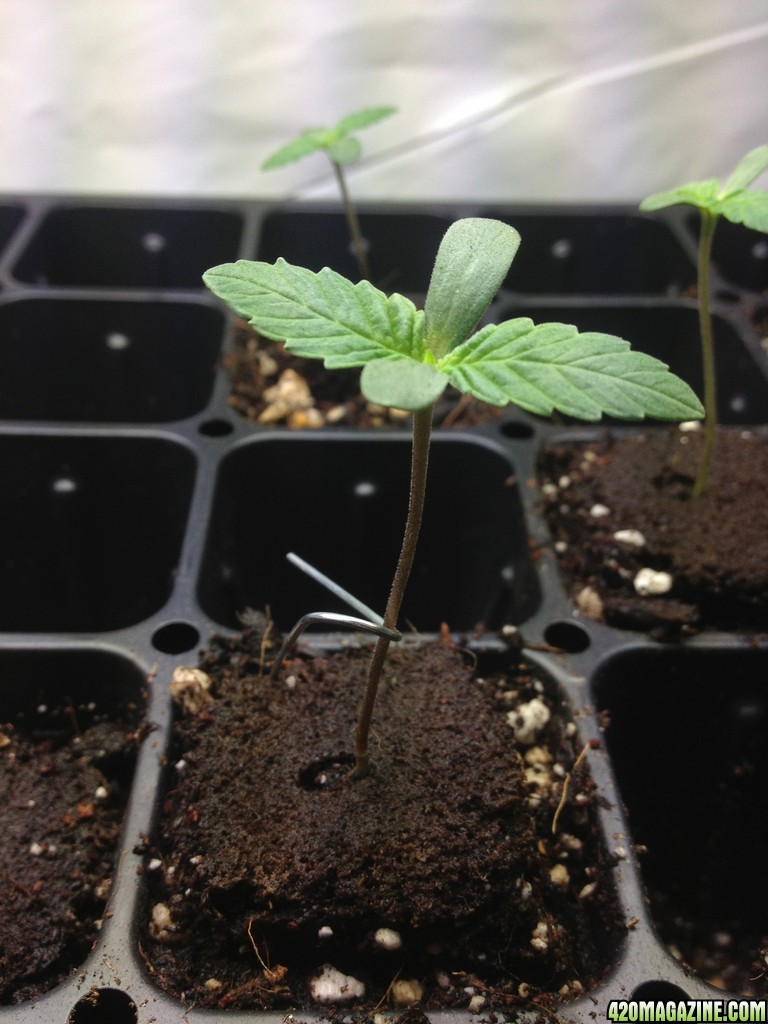
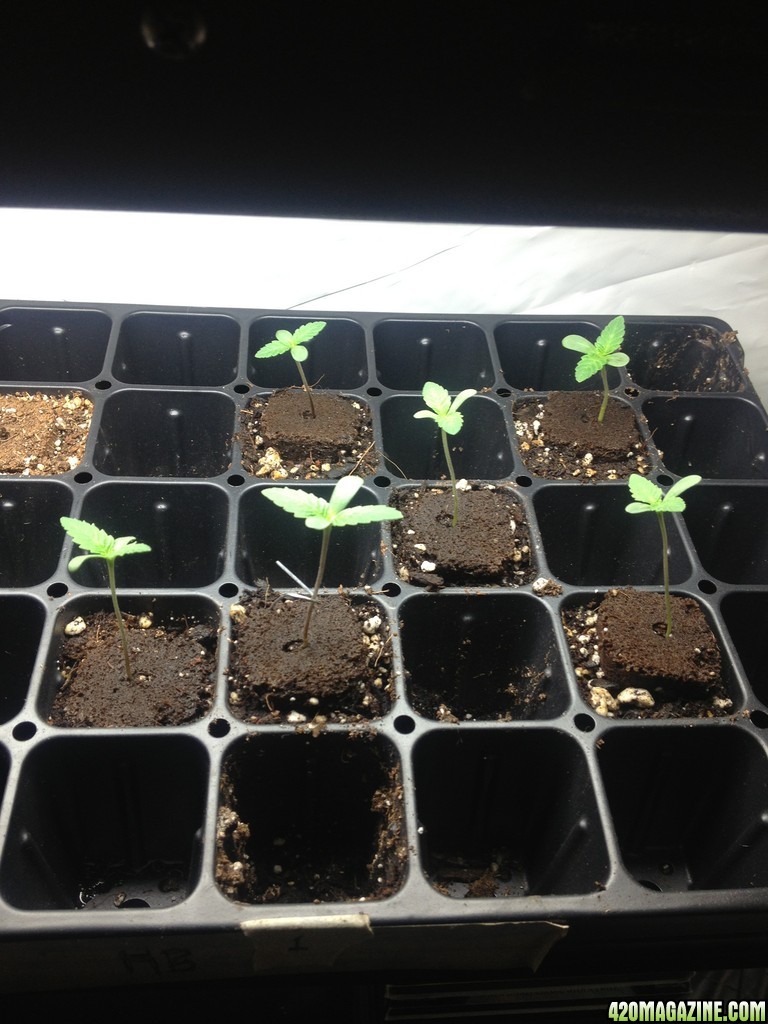
I'm so excited for one to sprout!
I will update this journal regularly. Thanks in advance for any constructive criticism. I really appreciate the feedback.
I live in the wonderful state of Colorado where cannabis is now legal for recreational purposes (woohoo!), and I have also been a registered MMJ patient for 3 years. After buying my first home I decided to build my very first grow. I live at 7,000ft in the mountains and have an extra bedroom in my basement which is now in the process of being converted into my grow room.
First a little bit about the space:
The room is located in the basement and is roughly 14x7x14, however it is not exactly square (see below).
(the closed off area is a closet)
After much planning (weeks of google research), I decided on sectioning out the room in the following way:
This left me with a 5x9 veg room, a 9x9 flower room, and two separate areas for sprouts/clones and a mother plant or two as well as room leftover to grow into or use as a work station.
My first task was to frame out the veg room. Although I own the home, I still do not want to damage the room if I can avoid it, so I went to Home Depot and bought a bunch of 2x2x8's and some 2x4x10's (no one carries 2x2x10 but you can easily buy a $40 circular saw and split 2x4's in half like I did) and built myself a frame.
As you may or may not be able to see, the room I am building in used to be a fitness room so it is covered in mirrors. (call me crazy but I left them all up in case it helped block any RF interference)
After finishing the 2x2 frame for the veg room, I placed everything out that was to be hung (lights, ballasts, exhaust) and screwed all necessary holes for hooks so that going in after plastic is up was easier.
I used 4mil black plastic for the floors - I hope to upgrade to pond liner eventually
Make sure you leave a little extra slack in the floor so it doesn't tear easily - especially if using staples like I do.
After everything was in place, I took it all down so that I could put the panda film up easier. I ended up getting a roll that was 10ft high so I could wrap the walls as well as the ceiling all in one piece making it extra light proof! Putting up panda film was EASILY the most frustrating part of building this by myself. I recommend doing it with a friend.
Finally after the walls and ceiling were done I was able to remount everything into place.
From there I just tidied up the wires and hooked up the exhaust!
Here is the outside of my 5x10 (really 4'10"x9) veg room so far. Today I added a 7' "Lite Tite" zipper door entry. The only thing left to do is add the passive intake. I will easily have a 4x8 area to grow in inside.
You can see that the exhaust is currently just venting into the main room, however, I plan on venting it further to the window before using it to veg.
I am pretty damn proud of myself for building this so far. I have minimal handyman experience and thought I would run into way more speed bumps than I actually did. If you are debating building something for yourself and are holding back because of experience, just go for it! You will learn a lot along the way.
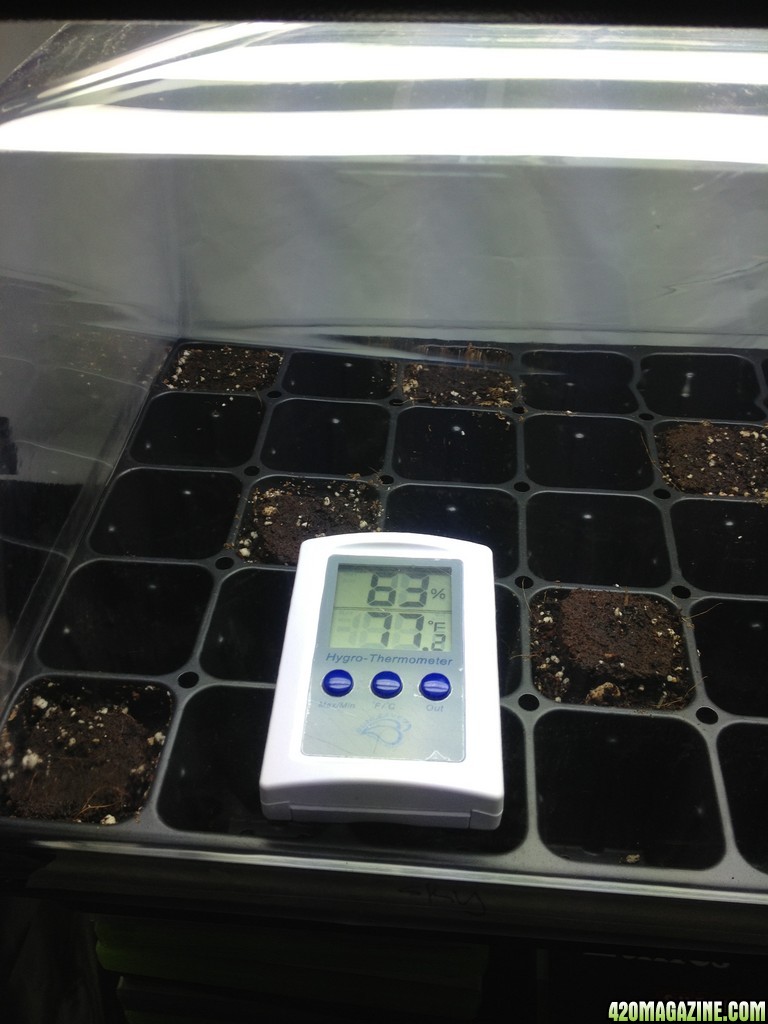
The room maintains 65-69deg temp 24 hours of the day during the hottest days of the summer, so I am looking forward to seeing how easy it is to get to 72-76.
Another great feature about the room is that is contains the breaker box for the house. Because the room itself is only on a 15 amp circuit, I called an electrician who comes at the end of the month to install a 8 new plugs, each with their own 20 amp circuit. Luckily because the breaker is in the room, it will be a relatively easy install for the electrician and I will save on the bill!
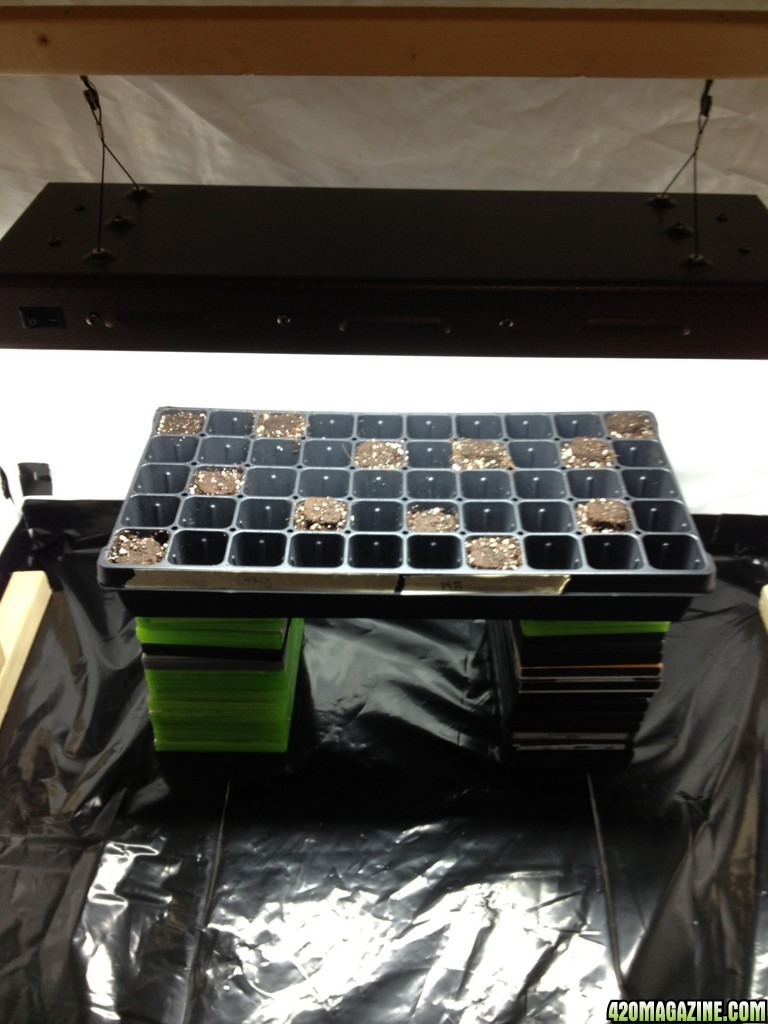
I was also able to bang out a little sprout area today in my 36"x38" odd nook area. I added some of my scrap pieces of panda film to the sides:
saved about $50 on the stand for the T5 light by just building one out of scrap 2x2's
Next a little bit about the equipment being used:
As this is my first grow I wanted to start small(ish). I also didn't want to use any 1000w bulbs because of heat issues as well as only a 7.5ft high ceiling.
I decided to get two 400watt Apollo mh lights that have an air cooled hood for the veg room. Because my veg grow area is 4x8, I positioned each light above a 4x4 area. The ballasts can run MH as well as HPS and the seller (AMAZON! great deal but we will see how good it actually is) sent both bulbs with each, so if I don't get around to building the flower room I can always just use the veg room.
Everything other than the lights I ended up picking up at a local store (Way to Grow - this place is killer!). 18" wall mount fan, 6" inline fan, and a 2 ft 2 bulb T5 system for sprouts/clones.
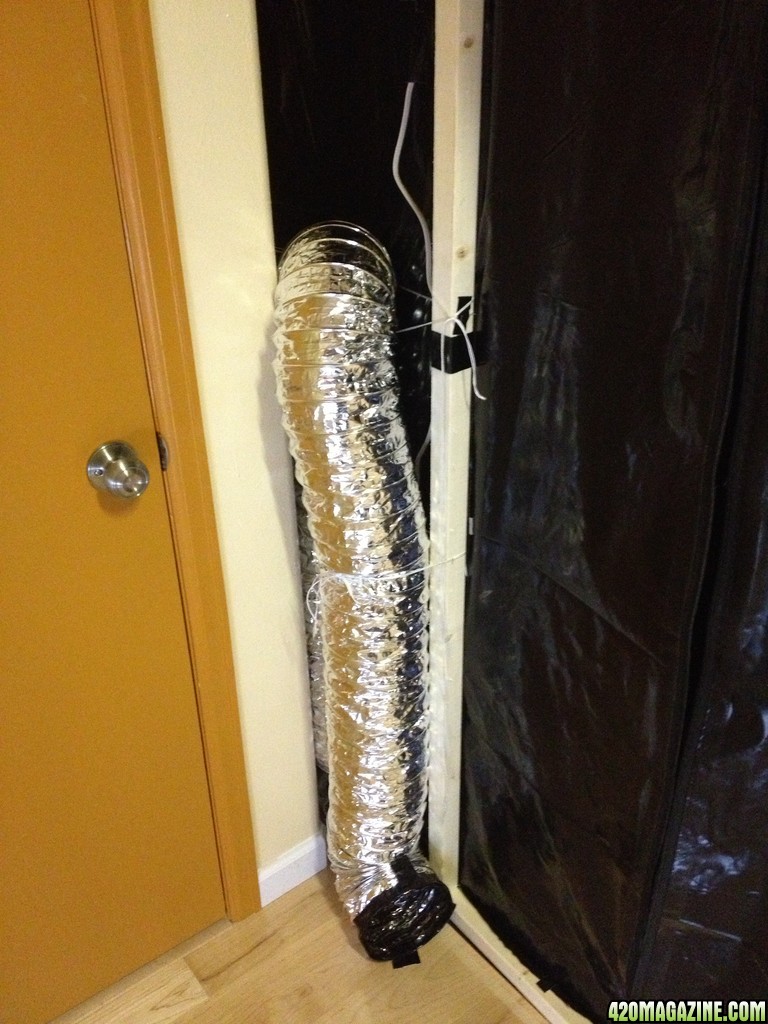
Because of the size of the space and my aesthetic for clean lines, I ended up hooking up my exhaust fan directly to my air cooled hoods. Now don't get me wrong - I understand that the best way to maximize the potential of the air cooled hoods is to bring in a fresh intake through them and then exhaust it, but this would mean another line of ducting going through my small room. I took the chance and decided to hook it up directly to the exhaust hoping I get enough heat reduction so I won't have to use an A/C unit. You can't see it very clearly, but here is a sketch of what I mean.
Here is how mine is currently hooked up:
Here is what I understand to be the ideal way to set it up:
I'm rolling the dice with this one - if temps get too hot I will have to abandon my straight-line method of exhaust and redo it to the ideal setup.
I plan to get four 600watt lights for the flower room (8x8 grow area, 1 light per 4x4 area), and I will definitely get Apollo again if these 400watters turn out to be good.
For soil I will be using "roots organics" and "rapid rooter" pellets, and I plan to use 1-gallon pots to start veg.
Finally! Some info about the cannabis being grown!
I decided to order feminized seeds from Single Seed Centre. I chose six "818 Headband aka Sour Kush" from Cali Connection and six "Skywalker OG Kush" from Reserve Privada. I am a fairly picky when it comes to my smoke - currently I only smoke oil/dabs, and even my oil only comes from the finest buds. It is easy to maintain this snobby smoke-style because I have an amazing dispensary hook-up that only sells the finest oils, but it is starting to really impact my wallet. Lately every time I spend $200 in the dispensary I think to myself, "that could have been $200 going to the grow". Hopefully with these 12 plants I will be able to find myself a mother for each strain and have perpetual good smoke! (that is the plan, anyway)
Headband
Original Sour Diesel x SFV OG Kush IBL)
This is easily one of my favorite strains of all time. I have quite a high tolerance when it comes to smoking, but headband gets me every time. I am very excited to see how this bud turns out.
Skywalker OG: (Skywalker x The OG #18)
I decided to get this one because it was another OG Kush cross, and hopefully the headband and skywalker will have similar growth periods and heights.
They are beautiful aren't they?! I hope mine come out even half as nice as those pictures.
Received the seeds today (came after only 7 days). To germinate I decided to soak them in water for about 5 hours before putting them into damp paper towels inside of a zip lock. They are sitting on top of my DVR box which maintains a constant heat.
I'm so excited for one to sprout!
I will update this journal regularly. Thanks in advance for any constructive criticism. I really appreciate the feedback.