

Navigation
Install the app
How to install the app on iOS
How To Use Progressive Web App aka PWA On 420 Magazine Forum
Note: This feature may not be available in some browsers.
More options
You are using an out of date browser. It may not display this or other websites correctly.
You should upgrade or use an alternative browser.
You should upgrade or use an alternative browser.
The Joy Of Growing - SweetSue Goes Perpetual
- Thread starter SweetSue
- Start date
-
- Tags
- doc bud's hb kit los

- Thread starter
- #122
Boy, does that resonate wit dis guy!
When your standout success over a period of a year or more is growing pot, a person has to wonder what God has in mind ...
Seriously?
I was scrolling through the page while on the bus and the page stopped here, so I read it again and thought about that. The reality is that growing pot had a number of very positive effects in our lives. It led me here, just where I needed to be at a critical point in my life path. Without the support I found here I'm not certain I would be quite as bubbly as I now find myself - a wondrous side effect of the larger community attachment.
I was able to supply high-quality meds for Dale when he needed them most, and I was able to do that without busting the family budget.
We were able to offer our daughter hope for a control for her anxiety that didn't come with side effects.
I was introduced to the idea of cannabis as a medicine, so much more than just something to get high.
I discovered a passion for both living soils and journaling that have drastically changed my life.
Although on the surface, the accomplishment of growing cannabis may appear insignificant, in reality it was anything but. What floors me is the accelerated way all this transpired. I keep getting this sense that there's something just around the bend, when all I really intended was to document a grow and spread lots of joy.
Actually, my greatest accomplishment in the past year was keeping my family alive. Literally, alive. Both of them kissed death on the cheek, Dale more than once, and lived to walk away. A year so harrowing that at one point I was looking at that bridge we can see from the living room window and thinking. For about two minutes, but two minutes that shook me. We survived, in great part to my insistence that we just. keep. going.
Geez Greytail, you really sent me on a tangent there.

- Thread starter
- #123
Today was the regular scheduled day for the coconut water/Aloe Vera juice drench and at long last I am able to begin adding Agsil16H (water soluble potassium silicate). This copy and paste from Build A Soil explains why this is such a necessary addition to the no-till.
Silica - The Hidden Cost of Chemicals
A major mineral is missing in many soils and most soil tests do not even monitor its presence. This mineral can increase stress resistance, boost photosynthesis and chlorophyll content, improve drought resistance, salt tolerance and soil fertility and prevent lodging. lt can also reduce insect pressure, frost damage and destructive disease while lowering irrigation rates, neutralizing heavy metal toxicity and countering the negative effects of excess sodium. If I were to tell you that this same missing mineral can increase root growth, boost yield and enhance crop quality, you could well ask, "how could we have overlooked something so important?" and you would be correctIt has been a serious oversight. The mineral in question is silicon, and science is rapidly revealing the scope and scale of our silicon neglect.
Poverty in a Sea of Abundance
Silicon is not classed as an essential nutrient, but, in response to a wealth of new findings highlighting the importance of this nutrient, that status may soon change. Silicon is the second most abundant mineral on the planet. It is everywhere. Clays are alumina silicates and sand is largely silicon, so how could there be a shortage of silicon? The answer lies in the form of silicon that enters the plant. Plants uptake silicon as silicicacid and this is what is missing in the soil. Something we have done in conventional agriculture appears to have compromised the conversion of insoluble silicon into the plant available form. It may reflect a mineral imbalance or we may have knocked out some of the soil microbe species that solubilise this mineral. It is not yet understood what drove the widespread deficiency but we do know that a healthy, disease suppressive soil should contain 100 ppm of monosilicic acid (as measured in a soil analysis) and very few soils come anywhere near that mark!
Little was known about the multiple roles of silicon until recently. It was known to be present in every soil but it was only when it became less plant available that it was realized that there may be a link between this loss and a host of growing problems. During the last decade, silicon seems to have become "flavor of the month" in the soil science community. Researchers have delved more deeply and hundreds of papers have been presented at the International Silicon Conferences in Brazil and South Africa. This neglected mineral is now emerging as a key player in proactive pest and disease management and the production of nutrient dense food. If you are not yet aware of the silicon story then this article should serve to fill some gaps.
In Conclusion
Proactivity is the essence of the biological approach. If you understand how plants protect themselves, then you provide the necessary components to maximise that process and minimize the need for chemical intervention. In this context, silicon is an essential pre-requisite for proactive pest and stress management and should be an integral part of every good nutrition program.
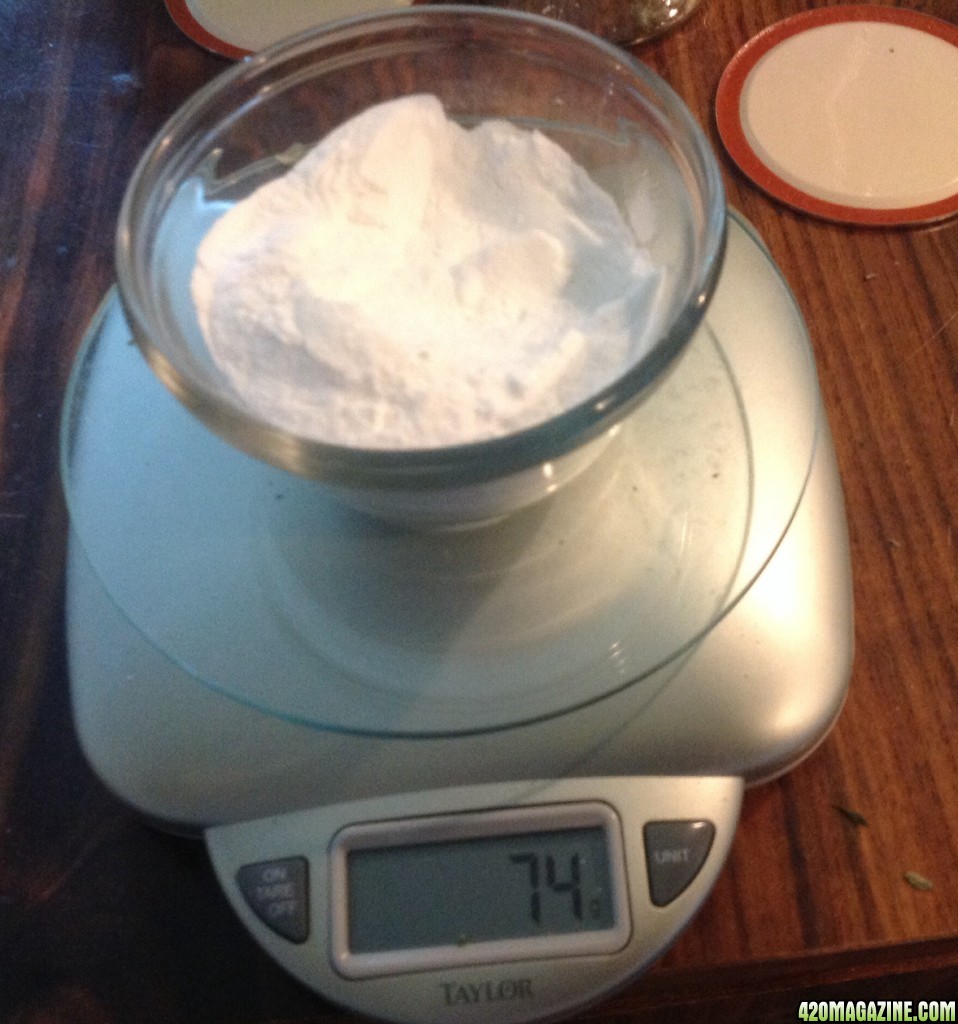
Agsil gets diluted to a 7.8% solution and used at a rate of 5ml/gallon H2O.
Begin by weighing out the Agsil16H. I use a half gallon drench, split between the pots so they get a quart each.
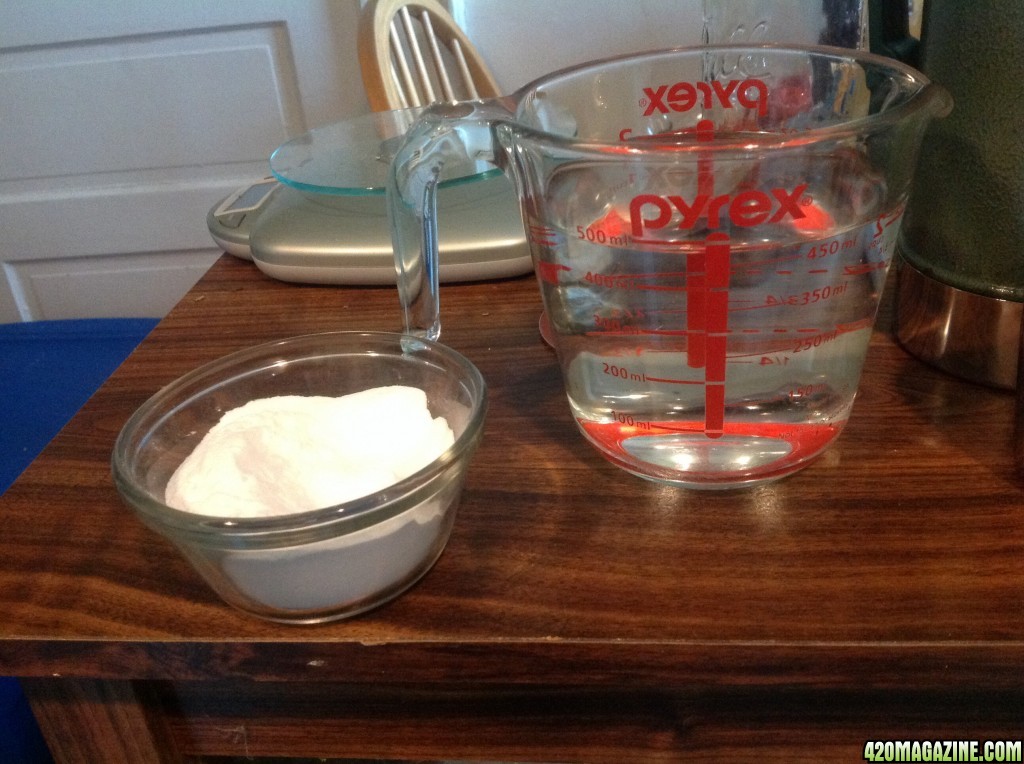
Add to good water (I used distilled).
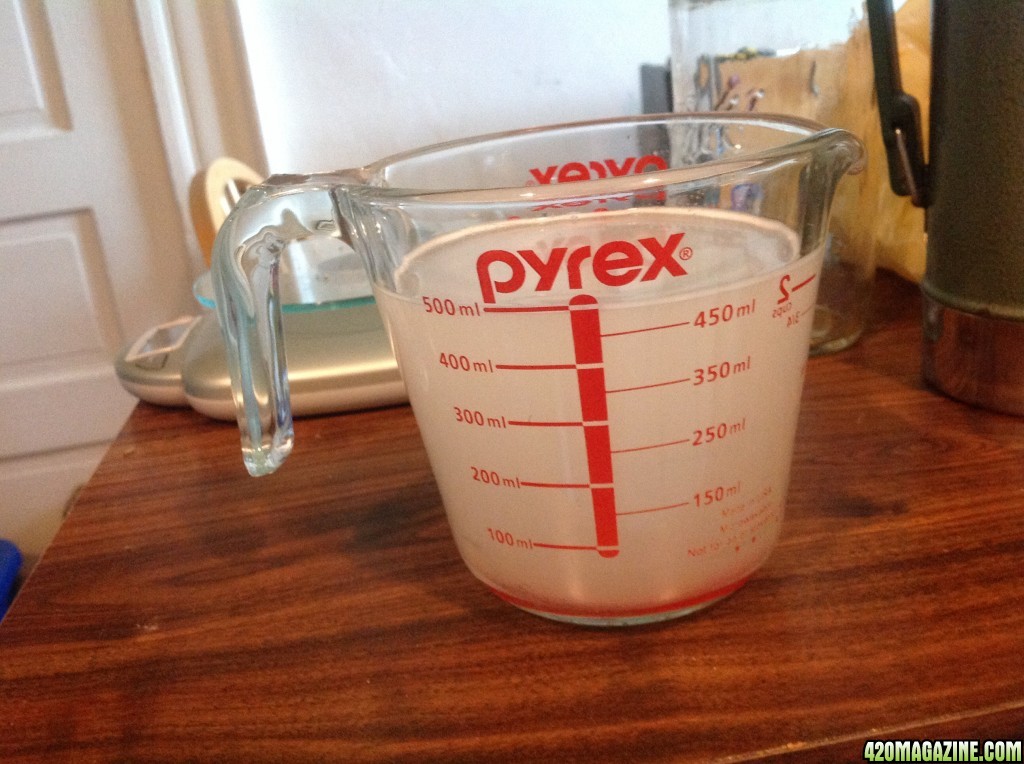
Mix thoroughly.
Close up tight for storage. Shake before using.
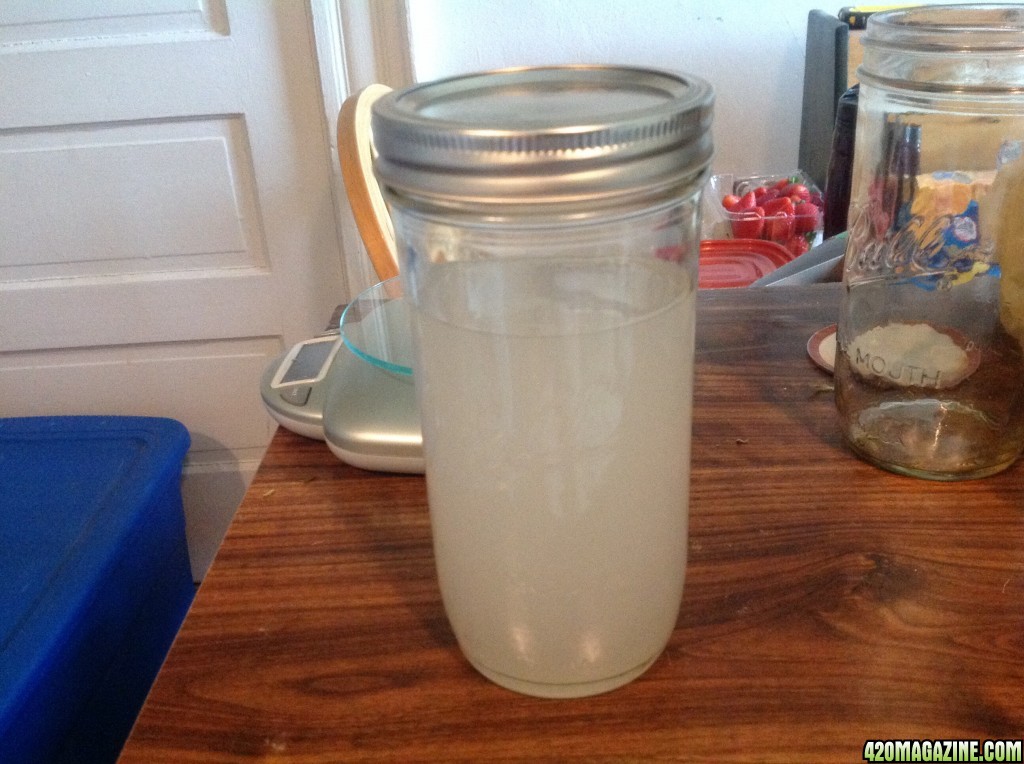
Today's drench was 2.5 ml of Agsil, 1/8 cup aloe vera water and 1/4 cup coconut water added to 1/2 gal of good water.
Ahhh. It feels good to finally begin to practice the full range of responsible soil management in these LOS pots. The Agsil benefits the soil, and by association the plant in so many ways. I knew from the beginning supplies would have to be purchased as money permitted, which was one of the reasons I went with the Clackamas Coot-style soil mix. Its a powerful enough mix to get you through that initial run with water only with absolutely no deficiencies to worry about. I can tell you it worked for me.
Silica - The Hidden Cost of Chemicals
A major mineral is missing in many soils and most soil tests do not even monitor its presence. This mineral can increase stress resistance, boost photosynthesis and chlorophyll content, improve drought resistance, salt tolerance and soil fertility and prevent lodging. lt can also reduce insect pressure, frost damage and destructive disease while lowering irrigation rates, neutralizing heavy metal toxicity and countering the negative effects of excess sodium. If I were to tell you that this same missing mineral can increase root growth, boost yield and enhance crop quality, you could well ask, "how could we have overlooked something so important?" and you would be correctIt has been a serious oversight. The mineral in question is silicon, and science is rapidly revealing the scope and scale of our silicon neglect.
Poverty in a Sea of Abundance
Silicon is not classed as an essential nutrient, but, in response to a wealth of new findings highlighting the importance of this nutrient, that status may soon change. Silicon is the second most abundant mineral on the planet. It is everywhere. Clays are alumina silicates and sand is largely silicon, so how could there be a shortage of silicon? The answer lies in the form of silicon that enters the plant. Plants uptake silicon as silicicacid and this is what is missing in the soil. Something we have done in conventional agriculture appears to have compromised the conversion of insoluble silicon into the plant available form. It may reflect a mineral imbalance or we may have knocked out some of the soil microbe species that solubilise this mineral. It is not yet understood what drove the widespread deficiency but we do know that a healthy, disease suppressive soil should contain 100 ppm of monosilicic acid (as measured in a soil analysis) and very few soils come anywhere near that mark!
Little was known about the multiple roles of silicon until recently. It was known to be present in every soil but it was only when it became less plant available that it was realized that there may be a link between this loss and a host of growing problems. During the last decade, silicon seems to have become "flavor of the month" in the soil science community. Researchers have delved more deeply and hundreds of papers have been presented at the International Silicon Conferences in Brazil and South Africa. This neglected mineral is now emerging as a key player in proactive pest and disease management and the production of nutrient dense food. If you are not yet aware of the silicon story then this article should serve to fill some gaps.
In Conclusion
Proactivity is the essence of the biological approach. If you understand how plants protect themselves, then you provide the necessary components to maximise that process and minimize the need for chemical intervention. In this context, silicon is an essential pre-requisite for proactive pest and stress management and should be an integral part of every good nutrition program.
Agsil gets diluted to a 7.8% solution and used at a rate of 5ml/gallon H2O.
Begin by weighing out the Agsil16H. I use a half gallon drench, split between the pots so they get a quart each.
Add to good water (I used distilled).
Mix thoroughly.
Close up tight for storage. Shake before using.
Today's drench was 2.5 ml of Agsil, 1/8 cup aloe vera water and 1/4 cup coconut water added to 1/2 gal of good water.
Ahhh. It feels good to finally begin to practice the full range of responsible soil management in these LOS pots. The Agsil benefits the soil, and by association the plant in so many ways. I knew from the beginning supplies would have to be purchased as money permitted, which was one of the reasons I went with the Clackamas Coot-style soil mix. Its a powerful enough mix to get you through that initial run with water only with absolutely no deficiencies to worry about. I can tell you it worked for me.
- Thread starter
- #124
Daily Update: Dark Devil Auto
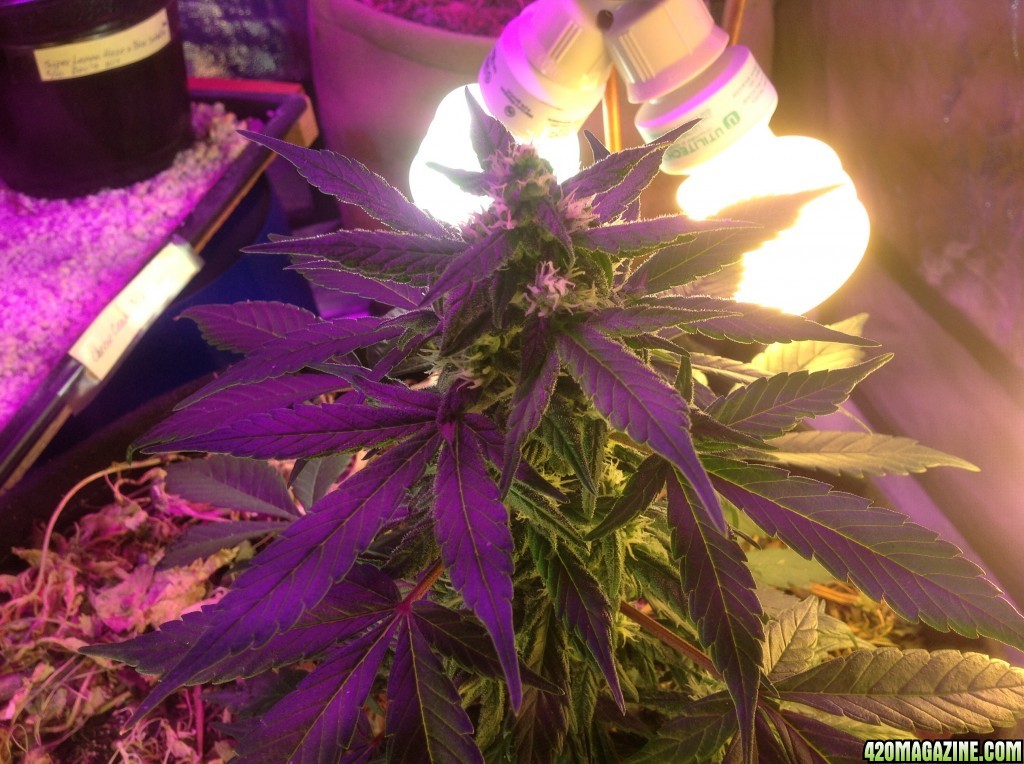
Here's my little Pixie Devil. 
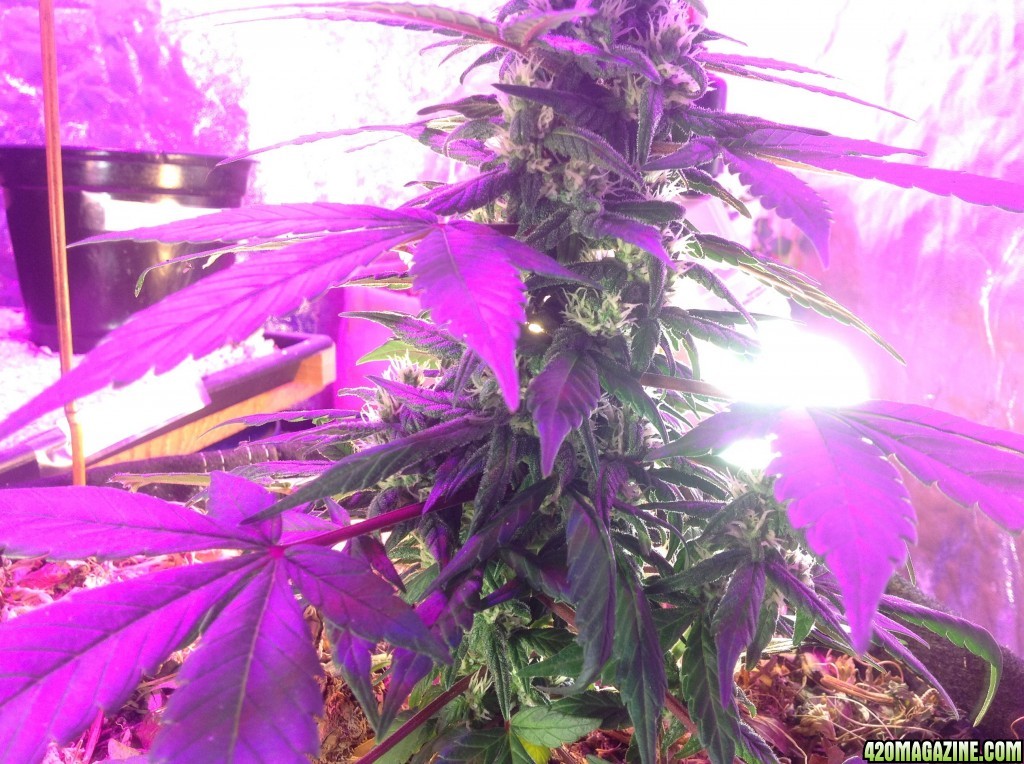
She's still holding steady vertically. She may not get any taller under this light schedule. Kind of the perfect size for a 7 gallon perpetual pot, don't you think?
Before we get to the rest of Devil's glamour shots,
WE HAVE A WINNER!
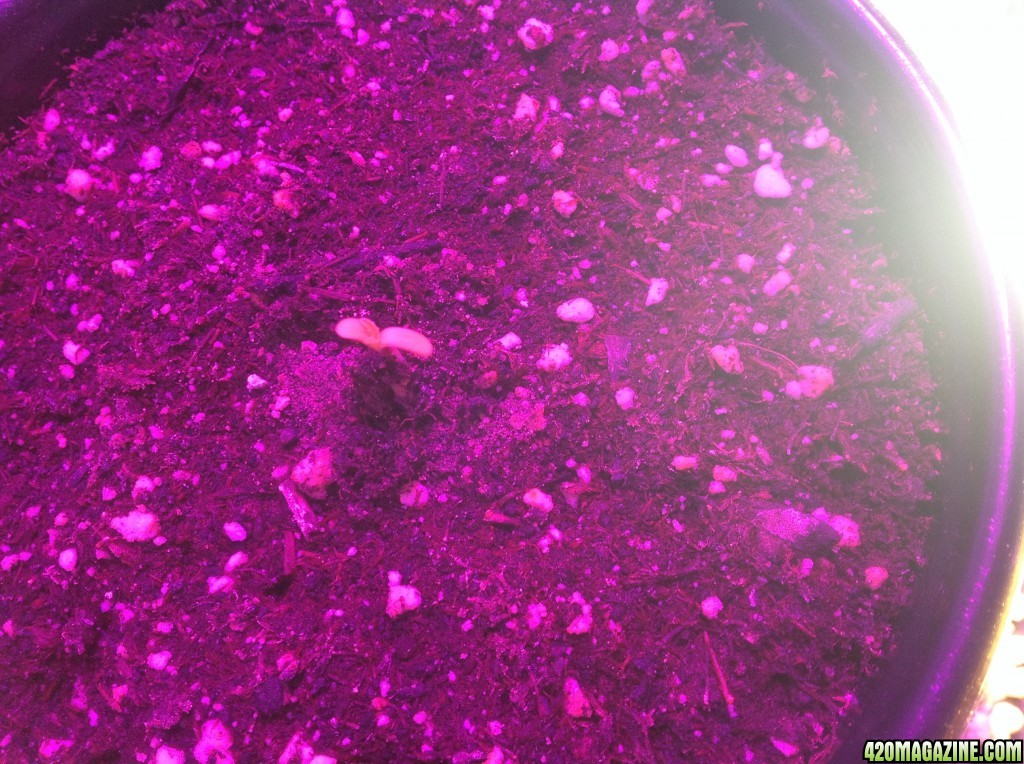
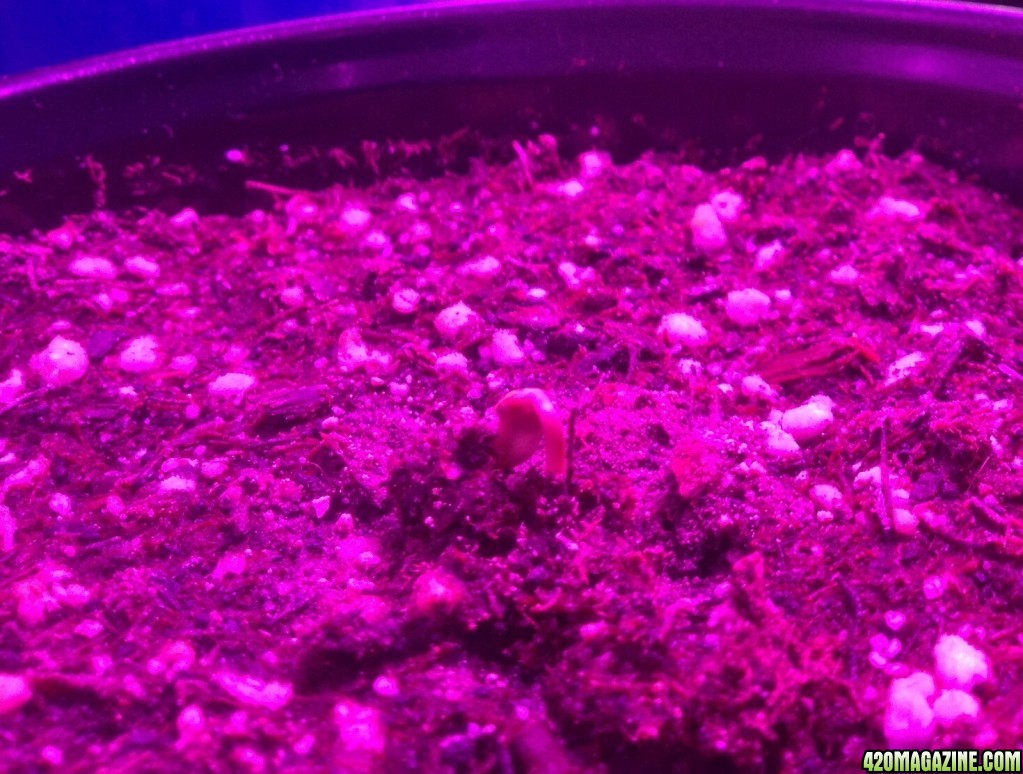
First seed out of the soil solution is.....
Auto Destroyer. (I love it when the plan comes together. )
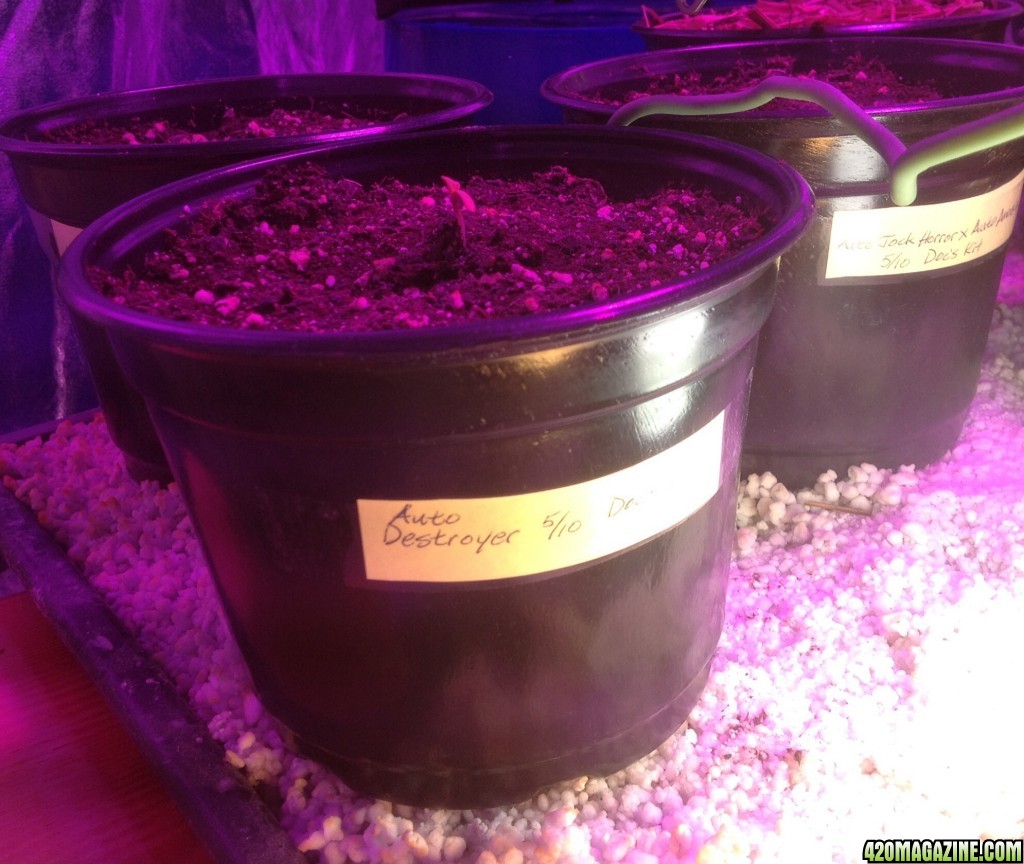
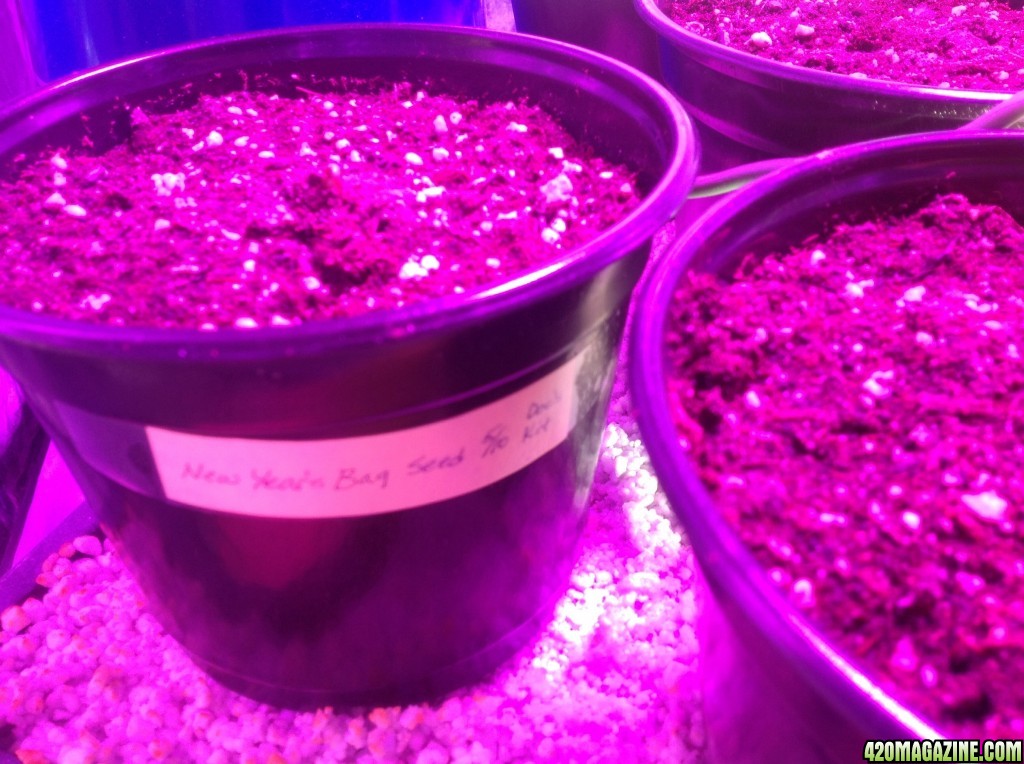
Coming in a close second, and also in the HiBrixBlend is one of the New Year's Bag seeds.
Right behind them and nestled with her Cannabis sister is Cheese Candy.
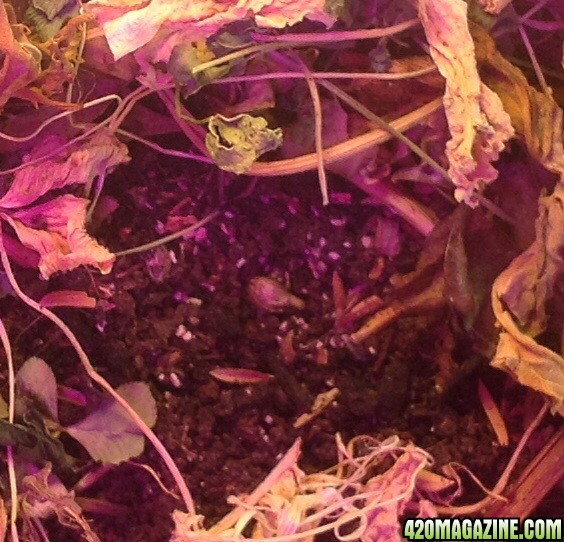
I was so relieved to have this one come up because it's the one Dale chose. Whew!
Three up, six to go. There's a sense of incredible relief to have them pop up. You plant that seed and trust that the drive to live will overcome any potential obstacles, but life comes with no guarantees, does it? We have a grow underway. WooHoo!!!!!!
Now, back to our little Devil.

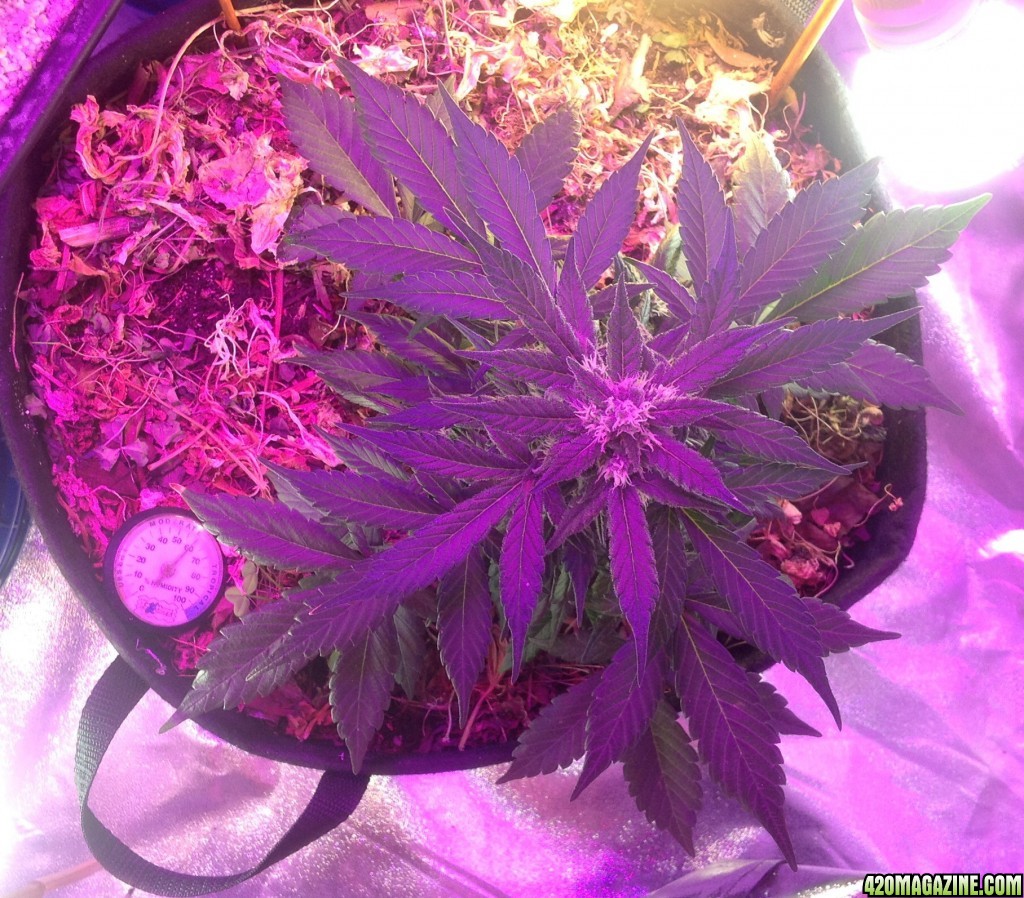
It's time to reconfigure the lights to get more reds in there. I pulled all the CFLs and made adjustments to placement and strength. Here's how she looks under the LED alone. Dark and Devilish.
Two of the 5000K were replaced with two 40W 2700K. That brings us to 172W of CFL illuminating her from three sides. The daily 1/4 turn of the pot sees to it that all areas get that lighting benefit. From this point on she should be packing it on and building the trichomes. We're somewhere around 20-30 days out from harvest. With 11/13 lights, it's hard to tell. Keep good records Girl.
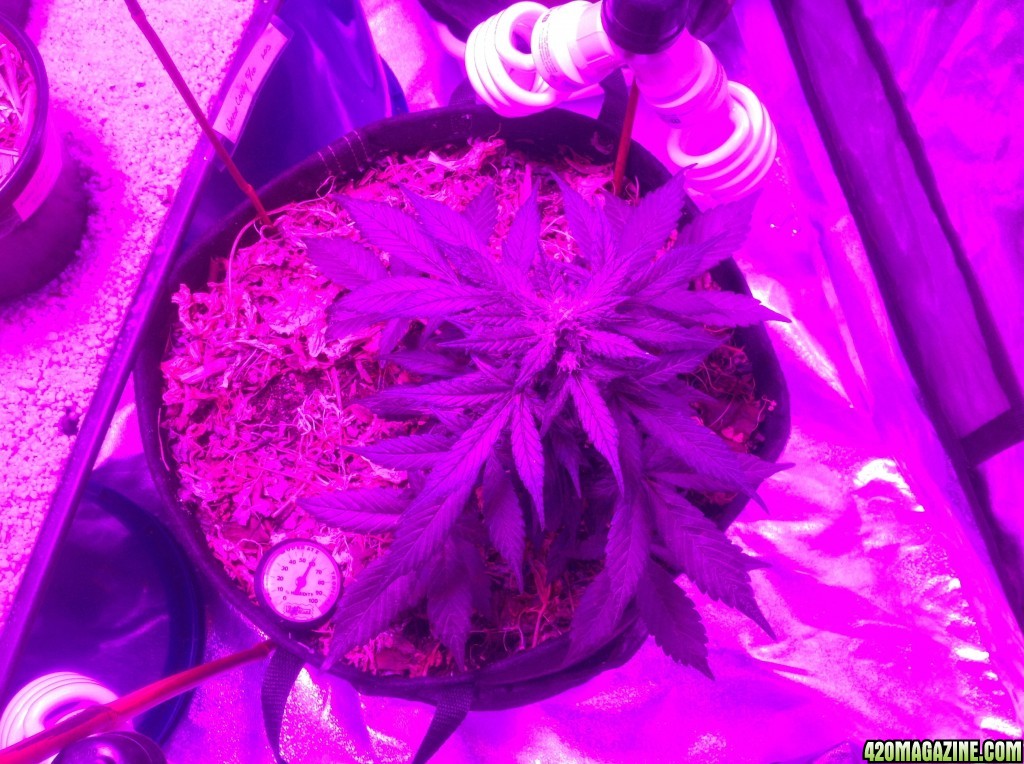
Brightness! I think she likes it.

In two days I'll drop in a couple more 40W bulbs and we can watch her frost up. You all up for that? I thought so.
I don't see any indications of light or airy bud development going on here, do you? Absolutely no light getting through. I'm looking forward to the beefing up process.

The beautiful way the trichomes catch the light, making the leaves sparkle like jewels. Tell me again why I waited so long to grow?
Having nivek in the gallery drives me to artistry when taking these pictures. Having scrubby as well has me looking for leaf porn. This one killed two birds with one stone.

Look at the turgidity of those petioles. Praying to the light. What a beautiful sight. What caught my eye was the trichome development happening on the underside of the leaves. Wow!
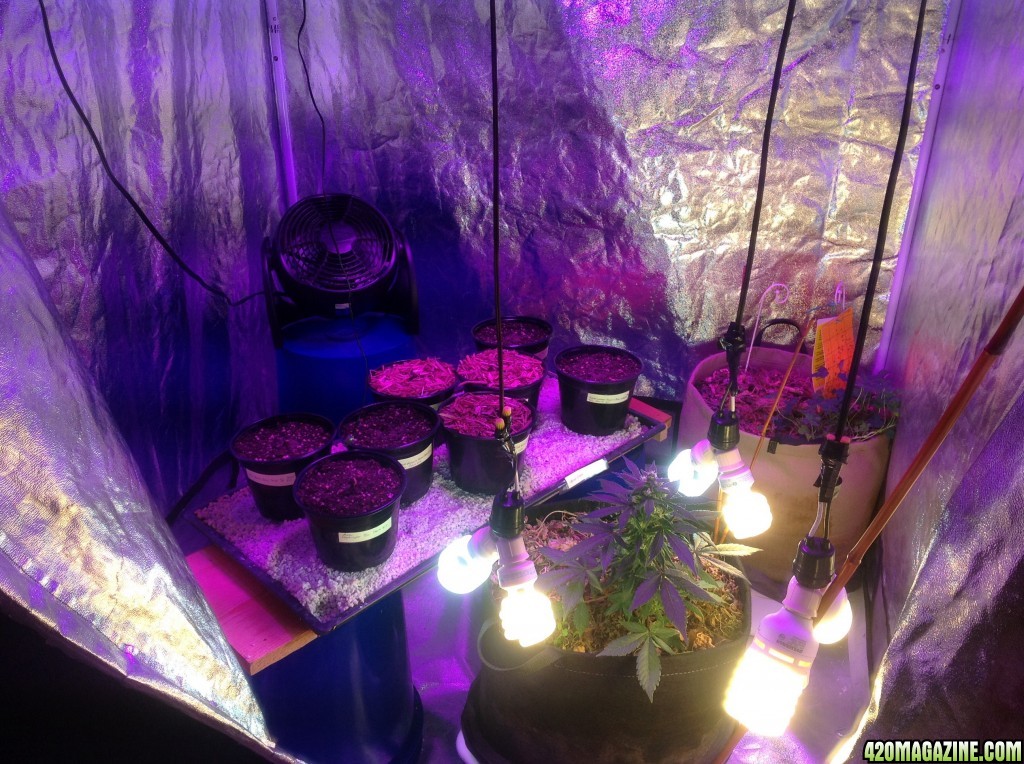
The ventilation/filtration system is being shipped, and should be here any day between now and next Tuesday. What a relief that will be. More planning is needed for additional lighting and shelving to hold the SWICK trays. Almost complete. HA! Likely story.
One last glance before I close it up.
Have a splendid day everyone. It's actually chilly here today and I had to break out the jeans again. So typically May in the 'Burgh. I'm still at home, waiting for the landlord to install new carbon monoxide detectors. Good guy, our landlord. He maintains a clean, quiet and secure building and is always proactive with upgrades. Making his mother proud, and since she's one of the building tenants it's not like she wouldn't notice if he slacked off. He keeps us safe, and I like that.
Get out there and spread extra joy today. Every little bit helps smooth the path for someone else. I'll be seeing you around the threads. Going to try to get some reading done on how roots grow in soil.
Oh yeah! I need to dig out the vent covers to set the kit pots off the SWICK! Or do I?...... Yes, this run, I think I'll try my best to learn to control the wet/dry cycle. If anyone cares to chirp up: How long do you think I could safely keep them on the SWICK, or should I lift them as soon as they pop? Looking for some insight here. Thanks in advance.
Ok guys. Out there. Joy. You know what to do.
Here's my little Pixie Devil.
She's still holding steady vertically. She may not get any taller under this light schedule. Kind of the perfect size for a 7 gallon perpetual pot, don't you think?
Before we get to the rest of Devil's glamour shots,
WE HAVE A WINNER!
First seed out of the soil solution is.....
Auto Destroyer.
(I love it when the plan comes together. )
Coming in a close second, and also in the HiBrixBlend is one of the New Year's Bag seeds.
Right behind them and nestled with her Cannabis sister is Cheese Candy.
I was so relieved to have this one come up because it's the one Dale chose. Whew!
Three up, six to go. There's a sense of incredible relief to have them pop up. You plant that seed and trust that the drive to live will overcome any potential obstacles, but life comes with no guarantees, does it? We have a grow underway. WooHoo!!!!!!
Now, back to our little Devil.
It's time to reconfigure the lights to get more reds in there. I pulled all the CFLs and made adjustments to placement and strength. Here's how she looks under the LED alone. Dark and Devilish.
Two of the 5000K were replaced with two 40W 2700K. That brings us to 172W of CFL illuminating her from three sides. The daily 1/4 turn of the pot sees to it that all areas get that lighting benefit. From this point on she should be packing it on and building the trichomes. We're somewhere around 20-30 days out from harvest. With 11/13 lights, it's hard to tell. Keep good records Girl.
Brightness! I think she likes it.
In two days I'll drop in a couple more 40W bulbs and we can watch her frost up. You all up for that? I thought so.
I don't see any indications of light or airy bud development going on here, do you? Absolutely no light getting through. I'm looking forward to the beefing up process.
The beautiful way the trichomes catch the light, making the leaves sparkle like jewels. Tell me again why I waited so long to grow?
Having nivek in the gallery drives me to artistry when taking these pictures. Having scrubby as well has me looking for leaf porn. This one killed two birds with one stone.
Look at the turgidity of those petioles. Praying to the light. What a beautiful sight. What caught my eye was the trichome development happening on the underside of the leaves. Wow!
The ventilation/filtration system is being shipped, and should be here any day between now and next Tuesday. What a relief that will be. More planning is needed for additional lighting and shelving to hold the SWICK trays. Almost complete. HA! Likely story.
One last glance before I close it up.
Have a splendid day everyone. It's actually chilly here today and I had to break out the jeans again. So typically May in the 'Burgh. I'm still at home, waiting for the landlord to install new carbon monoxide detectors. Good guy, our landlord. He maintains a clean, quiet and secure building and is always proactive with upgrades. Making his mother proud, and since she's one of the building tenants it's not like she wouldn't notice if he slacked off. He keeps us safe, and I like that.
Get out there and spread extra joy today. Every little bit helps smooth the path for someone else. I'll be seeing you around the threads. Going to try to get some reading done on how roots grow in soil.
Oh yeah! I need to dig out the vent covers to set the kit pots off the SWICK! Or do I?...... Yes, this run, I think I'll try my best to learn to control the wet/dry cycle. If anyone cares to chirp up: How long do you think I could safely keep them on the SWICK, or should I lift them as soon as they pop? Looking for some insight here. Thanks in advance.
Ok guys. Out there. Joy. You know what to do.
Sorenna
Well-Known Member
How exciting that your seeds are popping! 
Cant wait to watch this movie. The credits alone are awesome.
Cant wait to watch this movie. The credits alone are awesome.
- Thread starter
- #126
How exciting that your seeds are popping!
Cant wait to watch this movie. The credits alone are awesome.
I'm so glad we met. You share my joy of laughter, and I laugh all the time when I'm in your company. Nice.
I have a dear friend in Phoenix who calls me every morning on her morning commute so we can fill the air with laughter to prepare her for the challenges of the day. Such a sweet medicine.
- Thread starter
- #127
Had to change my avatar. I needed green leaves in there. Ahhh, feels better now.
- Thread starter
- #128
A friend and I were talking about the idea that in order to feel great joy one must experience deep sorrow. In most peoples lives it goes in cycles, a stage of joy, a bit of a break, a spell of sorrow or pain and another break to catch your breath. My life used to run like that too. I could always count on a bit of what we laughingly refer to as "normal time", filled with the quiet drudgery of daily life. God, I long for that.
Somewhere around two years ago we entered a stage where joy and sorrow exist as huge entities in my world, sharing the path, existing concurrently. It's a constant slam from one side to the other. I honestly can't tell you how I'm surviving it. I sat next to his bed today, trying to get lost in the threads as a balm for the quiet fear rising up, creating that dull roar between my ears. He has another wound on the right leg, just above that god-awful ulcer. His hemoglobin count is dropping precipitously, and will soon require hospitalization and a transfusion. He has developed an MRSA infection at his dialysis catheter site. No pathway yet exists to bring him home. It's a constant battle against hopelessness.
This sucks. So lost right now.
Need to find my way back to a more hopeful attitude quickly. Geez, I was doing so well there.
- Thread starter
- #130
Glad to have another of my favorite wordsmiths on board Ranger. Three of nine up, and I expect to see more action by morning. I do believe this perpetual approach will work out nicely in this sweet tent. It's going to be quite a ride, but there should be almost no stress involved in the growing process. All I need to do is stay on schedule. Well that, and mastery of the wet/dry cycle. LOL!
OG13
New Member
.....using the wet/dry cycle, requires an attentive gardener. Do you find that plants dry at different rates, or do they behave pretty consistently as a group? I guess what I was asking is do you find you treat them as a group or as individuals?
I treat them as a group since I am NOT perpetual. They are all at the same relative stage plus or minus a week (got one right now that is almost 2 weeks ahead of another). They are getting different feedings due to the cat drench, but will return to a similar feed "schedule" shortly. If one needs more or less water it gets it. I guess if you are going perpetual, you will need to spend more time and attention versus if you just have a clone army going.
I think the only reason using doc's kit might be a little confusing is that his thread is 500 pages and it's pretty overwhelming lol. I'm trying to get a schedule down with high brix before I order the kit and get rolling with it. I think I can manage it now, finally. I'll be watching to see how you do, Sue. I like seeing what everyone is doing with the kit!
Very few people ever said it was confusing till Sue came along. Everyone mostly says its easy, autopilot, boring....etc. Sue seems to have convinced others it's confusing which really bothers me.
If someone read my "In the Lab" thread, they'd find most techniques described in tutorial form, including the watering styles, etc.
Instead of following someone who has exactly ONE grow on their resume and letting her teach you how to use my kit----and she's doing things I don't recommend especially for a brand new grower and a first time user of the kit----please read journals of those who have been using it for a long time.
Again, the only time I ever hear how about how confusing it is is when Sue is talking. Everyone else talks about how simple it is.
It's one long, steady attack on a fantastic product and on me personally.
Mornin SS and Gang....yes Doc...I feel your pain...it must be very ,very frustrating at times with all the research ,work, and never ending questions you answer on a daily basis.Personally I've found the "KIT" instructions to be very ,very clear and consise. If growers are having a tough time with the "kit's" instructions I would suggest they take a few minutes....that's all it takes ,a few minutes to go over to "in the lab" and read a little...it's all there, and is easy. It's growing plants for heavens sake ,not building the space shuttle.It's not that hard to figure out...is it?Have a great day gang....cheers.

Mornin SS and Gang....yes Doc...I feel your pain...it must be very ,very frustrating at times with all the research ,work, and never ending questions you answer on a daily basis.Personally I've found the "KIT" instructions to be very ,very clear and consise. If growers are having a tough time with the "kit's" instructions I would suggest they take a few minutes....that's all it takes ,a few minutes to go over to "in the lab" and read a little...it's all there, and is easy. It's growing plants for heavens sake ,not building the space shuttle.It's not that hard to figure out...is it?Have a great day gang....cheers.
Yep. And if a person thinks it's confusing, perhaps they should read the journals of the last few POTM, POTY, NOTM, NOTM journals who all use my kit and who never said it was confusing! Oh....You're one of them Duggan! You won POTM on your first try, didn't you?
If you want to be confused, follow those who claim to be confused. If you want simple, turn off the noise, read the directions and ask questions from people who have been using the kit successfully for a couple years.
My system is SIMPLE and reliable. First time growers are growing world-class weed on their first try and they aren't saying it's confusing. All that crap is here.
As far as I'm concerned, this thread is nothing more than false advertising.
Yes Doc...I won POTM using your kit... and have another entry this month. I'de like to mention here that since I found you and the "kit", my life in my garden now is stress free and I no longer worry if plants will survive till the end or if they will provide me with the BEST produce the particular strain can provide. Sweetsue ,if I may suggest....leave Doc's work alone until you have some experience with it. Your simple instructions are only going to confuse growers more.You have enough going on around your place don't you? Enjoy the results you'le get using the "kit" Sue.....Doc has literally made it his life....don't mess with it! Cheers eh!
TheBoogyman
Creme de la Creme Photos: Feb 2017
I didn't really mean to offend. If you're new to growing and stumble across a 500 page thread dedicated to HiBrix growing with your kit, you may feel a little overwhelmed lol. Since I've found ALL the directions and documented the way you(Doc Bud) does things, I feel much more confident.
Let me be more clear, the only thing that is somewhat confusing about using the kit is the math that you may have to involve. I'm not the greatest math whiz out there, so sometimes I have difficulty grasping some of the directions but I've since figured it out. I also browse this forum when I'm pretty medicated so I tend to over do things in my head")
don't worry, doc, I see your results and I see everyone who is using the kit's results. They speak for themselves! That's why I am asking all these questions so I can completely prepare myself for the switch to a different type of growing.
edit: the math is somewhat confusing to ME, maybe not other people. I am speaking for MYSELF only.
Let me be more clear, the only thing that is somewhat confusing about using the kit is the math that you may have to involve. I'm not the greatest math whiz out there, so sometimes I have difficulty grasping some of the directions but I've since figured it out. I also browse this forum when I'm pretty medicated so I tend to over do things in my head
don't worry, doc, I see your results and I see everyone who is using the kit's results. They speak for themselves! That's why I am asking all these questions so I can completely prepare myself for the switch to a different type of growing.
edit: the math is somewhat confusing to ME, maybe not other people. I am speaking for MYSELF only.
Why are we blaming Sue for other people's confusion? If they find it confusing their not doing their homework. Period. The information is out there. What does the confusion of others have to do with Sue? This is her journal, her findings, her mistakes. If people are reading it for face value and expecting they can apply the same variables to their grow, they've got another thing coming.
I don't think it's fair to say that the confusion has only been here since Sue showed up. There's always been some confusion or questions (hense the 477 pages of the Q&A thread). The difference is Sue is asking her own specific questions, while others try and apply the same info to their own grows. New growers using the Kit need to do their own homework. You can't simply rely on watching other journals and think you'll get a solid idea of the product. HOMEWORK! Not Sue is to blame for the confusion. If someone has a question head over to DOC'S High Brix Q&A. Start at the beginning and take a few minutes to do a little research. If you have questions, ask in the thread rather then someone who is still learning themselves!
I respect each and every one of you but I feel that our direction has gotten a bit misguided.
I didn't really mean to offend. If you're new to growing and stumble across a 500 page thread dedicated to HiBrix growing with your kit, you may feel a little overwhelmed lol. Since I've found ALL the directions and documented the way you(Doc Bud) does things, I feel much more confident.
Let me be more clear, the only thing that is somewhat confusing about using the kit is the math that you may have to involve. I'm not the greatest math whiz out there, so sometimes I have difficulty grasping some of the directions but I've since figured it out. I also browse this forum when I'm pretty medicated so I tend to over do things in my head
don't worry, doc, I see your results and I see everyone who is using the kit's results. They speak for themselves! That's why I am asking all these questions so I can completely prepare myself for the switch to a different type of growing.
edit: the math is somewhat confusing to ME, maybe not other people. I am speaking for MYSELF only.
Here's how to do the math. All you need to do is ask someone who has been using it for a long time.....and I fit that description.
1. Click the link in my signature: In The Lab
That link will bring up these instructions:
Updated Instructions: October 2014
The Kit:
The End User will need the following:
3.8 cu ft bale of ProMix HP myco, or Sunshine #4 or Promix BX myco. Perlite can be added to the BX in order increase porosity for indoor growing.
20-40 pounds of organic worm castings that show an NPK of zero K. (1-1-0)
A proper growing environment, basic gardening skills, 7 gallon pots and a sprayer capable of putting out a fine spray.
The Products:
Drenches
Growth Energy: This product increases soil energy and provides vegetative growth energy and bulking of fruit and flowers once formed.
Transplant: This product, being organic, slightly favors reproductive growth of seeds, flowers and fruit. It is used to feed the microbial colony in the soil mostly, but it also boosts reproductive growth.
Cat Drench: This product increases soil energy, highly favors reproductive growth and provides cations and the ammonia form of nitrogen, which strongly stimulate fruiting and flowering, as well as seed production.
All drenches are mixed at 1/2 ounce per 6 plants(30 sq. feet of garden space for those in raised beds) Applications up to 1.5 oz can be applied without harm, but very few plants require this much. Heavy feeders might try .75 oz before mixing stronger.
Another practice some container growers are finding helpful is to include 1/4 strength Transplant with every watering.
Foliar Sprays:
Brix: Sprayed every week to 10 days, this product encourages reproductive growth and essential oil and resin production. Brix foliar should not be skipped, even if the plants look perfect.
De-Stress: This product helps plants heal, deal with stress and provides a broad spectrum of trace minerals. This can be sprayed 1-2 times per week when there are signs of plant stress. If the plants look "perfect" there is no reason to spray with De-Stress. Also, mixed at 50% strength it helps high brix clones root much faster.
Both foliar sprays are mixed at 1oz per quart of RO. Use Brix immediately after mixing. De-stress can be stored in the refrigerator for up to a week.
Soil Amendments
Amendment: this product is mixed into the bale of Promix, watered, and allowed to "cook" in a barrel for a minimum of 30 days in order to get the soil ready for planting. Please note that the most recent version of amendment has the old "conditioner" added to it already!
Re-Charge: This product is similar to Amendment, but has a few additions and ommisions. It is designed to be top dressed during the 3rd week of the bloom cycle. Outdoors, apply re-charge when buds have set. It's best to scratch it into the top layer of soil and gently water it in to avoid soil compaction.
Roots!: This is a microbial inoculate. A light dusting on rootballs during transplanting and a small amount at the bottom of the hole where seeds are planted is the proper use for this product. 1 Tablespoon per transplanted cutting sprinkled in and around the hole is perfect. More can be used when transplanting from the Veg area to the Bloom containers. Water with 1/4 Transplant for the first application of Roots!.
Tea: This is a liquid humate product loaded with beneficials. It is mixed with each feeding at the rate of 2.5 mil per 6 plants (30 square feet)
So, how does all this work together?
Upon acquiring the Promix HP myco, the worm castings and enough plastic barrels to contain 60 gallons of soil:
Carefully and thoroughly mix the following:
Amendment
Promix
Worm castings.
Place the above dry mix into barrels and water with 3-5 gallons of water. Stir it, mix it, turn it over....and let it sit covered for one month. Temps must be no lower than 62 degrees and no higher than 85 degrees. Lower temps can take another week to "cook" while higher temps might be ready sooner. 1 month is usually spot on.
Once the soil has cooked, it's now time to plant!
Seeds:
Using a gallon sized container of newly cooked High Brix soil, make sure the soil is still slightly moist from the barrel. Not soaking wet....but moist.
Using a pencil, or chopstick or a non-functioning vape pen, make a divet in the soil about 1/4 inch deep. Add a small amount of ROOTS! in and around this hole, in which you deposit the seed and lightly cover with surrounding dirt. Gently water with 1/4 strength Transplant if needed to keep the soil moist, but not wet.
Clones:
Pretty much the same as seeds, but use enough ROOTS! to completely dust the roots and put a small amount at the bottom of the hole. Water with 1 pint of water, or 1/4 strength Transplant drench.
Upcanning of larger plants:
Vertically score the roots, dust all roots with ROOTS!, place some in the bottom of the hole, gently position rootball and soak the medium with water and 1/4 strength Transplant.
Water All seeds, all newly transplanted clones and newly tranplanted vegging plants with 1/4 strength Tranpslant
Use of Foliar Sprays:
Spray Brix and De-Stress 1 time weekly, not on the same day! De-Stress can be sprayed twice a week if the plants continue to exhibit signs of stress.
Mix each spray at 1 oz per quart of RO, using a fine mist try to get the underside of the leaves.
Using Drenches:
Tea: All drenches are "served" with 2.5 mils of Tea. No execptions.
In High Brix growing, drenches do far more than feed the plant. They signal the plant to grow or re-produce, and they keep the biology in the soil happy and productive. This is where the magic happens! Water with straight water plus 1/4 strength Transplant between drenches with one exception.*
Growth Energy: used nearly exclusively in veg. This is where strong stems and healthy leaves come from. It is also used during the latter half of the bloom cycle to bulk up fruit and flowers. Mix at 1/2 oz per 6 plants. Stronger doses can be used if needed, but generally you'll just waste product. Finishing the growing cycle on Growth Energy results in a sweeter produce.
Transplant Should be used during the bloom phase alternating with Growth Energy. It is used at 1/2 oz per 6 plants (30 square feet.) Some growers have found that essential oil and resin production can be increased by using 1/4 oz of Transplant evenly distributed to every plant with each and every watering....whether with a drench or with just plain water. Please note, this does not mean 1/4 TO EVERY PLANT, but 1/4 oz divided equally to all plants.
**Cat Drench: This is used right when buds set. It is strongly reproductive in effect and if used at the wrong time will result in stunted growth and lower yields. Used at the proper time, unprecedented resin formation takes place. It is used twice in a row (no water in between applications). Using Cat Drench late in bloom may increase certain flavors and smells, but it also results in a more "gamey" flavor in produce.
These are the basic instructions for using the kit! A few pointers:
When in doubt about which drench to use, use Growth Energy.
If the plants seem weak and need a boost---almost never happens unless you made a mistake or there has been some environmental issue or circumstances beyond your control---try this:
1 oz. Transplant per gallon of water with 6 mils of Tea. Feed a solution with this composition to all the plants. It will re-colonize the roots and get things back on track. Do not do this if you aren't having any problems.
OK....here's the math.
Use of Foliar Sprays:
Spray Brix and De-Stress 1 time weekly, not on the same day! De-Stress can be sprayed twice a week if the plants continue to exhibit signs of stress.
Mix each spray at 1 oz per quart of RO, using a fine mist try to get the underside of the leaves.
Mix 1 ounce per quart of water. That can also be read "mix one half ounce per pint of water." Or, a person could mix one quarter ounce per cup of water.....simple math. If this confuses someone, I'm at a loss to explain it any further.
Drenches. Instructions say this:
Using Drenches:
Tea: All drenches are "served" with 2.5 mils of Tea. No execptions.
In High Brix growing, drenches do far more than feed the plant. They signal the plant to grow or re-produce, and they keep the biology in the soil happy and productive. This is where the magic happens! Water with straight water plus 1/4 strength Transplant between drenches with one exception.*
Growth Energy: used nearly exclusively in veg. This is where strong stems and healthy leaves come from. It is also used during the latter half of the bloom cycle to bulk up fruit and flowers. Mix at 1/2 oz per 6 plants. Stronger doses can be used if needed, but generally you'll just waste product. Finishing the growing cycle on Growth Energy results in a sweeter produce.
Transplant Should be used during the bloom phase alternating with Growth Energy. It is used at 1/2 oz per 6 plants (30 square feet.) Some growers have found that essential oil and resin production can be increased by using 1/4 oz of Transplant evenly distributed to every plant with each and every watering....whether with a drench or with just plain water. Please note, this does not mean 1/4 TO EVERY PLANT, but 1/4 oz divided equally to all plants.
**Cat Drench: This is used right when buds set. It is strongly reproductive in effect and if used at the wrong time will result in stunted growth and lower yields. Used at the proper time, unprecedented resin formation takes place. It is used twice in a row (no water in between applications). Using Cat Drench late in bloom may increase certain flavors and smells, but it also results in a more "gamey" flavor in produce.
What the directions say is 2.5 mils of Tea.....and 1/2 ounce per 6 plants. Those who have read the beginning part of the directions will no doubt have noticed this phrase:
A proper growing environment, basic gardening skills, 7 gallon pots and a sprayer capable of putting out a fine spray.
What this means is that the directions recommend growing 6 plants in 7 gallon pots. That's about how much soil a bale of Promix HP produces AND it's the legal limit on plant counts for the majority of growers.
So, again, from the instructions......2.5 mils of Tea plus 1/2 ounce (or more) drench for 6 plants.
Math: 6 plants take 1/2 ounce.....so 3 plants (in seven gallon containers per directions) take 1/4 ounce.....a single plant therefore would use basically 1/8th ounce of drench and .5 to 1 mil of Tea. It doesn't need to be exact! IN FACT the directions even mention this:
All drenches are mixed at 1/2 ounce per 6 plants(30 sq. feet of garden space for those in raised beds) Applications up to 1.5 oz can be applied without harm, but very few plants require this much. Heavy feeders might try .75 oz before mixing stronger.
Another practice some container growers are finding helpful is to include 1/4 strength Transplant with every watering.
So, if applications up to 1.5 oz can be applied without harm....and you're growing one plant....why not just make it easy and use 4 or 5 mills of drench per plant? No big deal, is it?
So, from now on here's the math:
5-7 mill drench per plant. 1 mill of Tea per plant.....or 2.5 for all 6.
Now, about dunking veg plants.
Page one of "In The Lab" (same thread directions are found)
In The Lab
Watering Technique for Vegetative Growth
Vegetative growth is all about preparing the plant to bloom. Isn't that what it's all about, the bloom? Who cares how nice they look in veg....we want the finished product, period.
Having said that, the single most important thing to achieve prior to blooming is a robust, very large root system. I want a gallon sized rootball, nearly rootbound, when I transplant and bloom. Here's how I do it:
We'll assume the reader is using proper soil, good water, and is in a proper environment.
Back in my Hempy days, I learned very fast that it takes a week or so for the roots to grow about 10 inches down to the bottom of the pot. The plants really took off once those roots hit the moist reservoir at the bottom of the pot.
It's the same deal with soil. Most of the moisture is in the "perched water table" at the bottom of the pot.
1.)Soak the medium at the first transplanting of fresh, rooted clones into soil. Water very light again a few days later, just to moisten the top of the medium. Do not soak it again.
2.)Do not water again until the plants look like they're starting to droop. Give them a good watering at this point.
3.)Again, wait until they're starting to droop for lack of water (probably now a good 8-10 days after transplant) and this time place the pots in a tub of water and really soak the roots. As they drain, tilt the pots this way and that to try to pour off as much of the perched water table as possible.
4.)Again wait till they droop and this time give them a good feeding, making sure to add beneficials being careful to soak them.
By letting them dry out we're forcing the roots to really work at finding moisture and they'll quickly fill the pots, which is what we want. The growth you see up top will be far less spectacular, but there will be one important gain that experienced growers will appreciate:
The plants will be smaller with tighter internodes. This is because all the energy has been put into the roots, not the foliage.
At this point, the leaves will really take off, but the plant will be root bound pretty bad, so if you're trying to do a 2 plants SCOG or grow montrous trees, a second veg transplant will be needed. I like to prune up these small plants, take cuttings and put them into bloom pretty fast.
One of the worst problems you can have is a great big mass of green leaves with a substandard root system. Plants like that simply can't keep up with the demands of flowering their roots aren't up to the task.
On the other hand, having great roots and not so much foliage (you'll still have lovely leaves, just not as many) means the plant isn't wasting energy just trying to feed what's already there, or desperately trying to grow roots....it has all kinds of spare energy to concentrate on blooming!
Instead of doubling in size, my plants quadruple in size sometimes. The leaf to calyx ratio is better.....fewer leaves, more buds.
And best of all, there are so many roots that it makes it very hard to overwater and drown the roots.
Roots! That's the most important thing to accomplish for a vigorous bloom. These simple techniques aren't the ONLY way; they may not even be the best way....but they certainly work consistently.
Next up: watering techinique in bloom.
Oh....what about the drenches in Veg? Where is the spreadsheet? Well, use the exact same formula you use for blooming plants or you can add another metric if you wish....4-5 mils per plant is just fine.
I can literally prepare a soil drench in under 30 seconds. I do it all the time.
Please don't make this confusing folks. It's really not.
Would it be possible for someone to write (again) a very short description of, or link to-
High Brix- what it is?
what 'the kit' is?
and how to go about getting it/starting out? - for dummies/me?
I hope I didn't contribute to this by asking these questions. I fully 100% admit to Not having done my Hi brix homework yet- but I haven't started growing this way yet and was looking for the starting point. I love homework of this sort. Maybe Sue read more into my question than I actually meant by it and was tiptoeing a bit - not wanting to try and summarize a subject she's new with (?) It's a subject I'm hugely looking forward to. I haven't heard anyone saying Hi Brix is confusing and I thought the posts on this thread were very helpful.
I read the 200 page Heisenberg tea thread. 200 pages doesn't mean that making the tea is confusing in any way.
I'll be reading through every page about Hi Brix too, when the time comes. But hundreds of pages of reading can look daunting when you only have a few minutes in a busy day and just want to know what people mean by 'tea'. Know what I mean? I feel bad that Sue's thread is being labelled as false advertising. I see nothing but people excited about Hi Brix, and keen to learn. I'm sure that the quest for understanding is an unstoppable force and no 'false advertising', if it exists, could possibly get in the way of that.
TheBoogyman
Creme de la Creme Photos: Feb 2017
Thanks doc for taking the time to make that post. I have all that info screenshotted and stored on my phone for quick reference. I only avoid asking you questions directly because you get these questions constantly so I try to find it on my own/through others.
I think I pretty much have all the instructions and information I need for using your kit so now I just need to order one, most likely Friday this week or Tuesday next week.
One more quick question while you're here, doc. The kit comes with enough to grow 6 plants in 7 gal containers from start to finish, correct? Is there any leftovers for clones, etc? Like the destress spray and Roots!?
edit: haha, the math is pretty easy! I don't know why I was over complicating it so much. Big thanks for the extra help, doc. boogyman's gonna be growing some hibrix pot soon enough
Similar threads
- Replies
- 4K
- Views
- 191K
- Replies
- 5K
- Views
- 178K
- Replies
- 260
- Views
- 24K
- Replies
- 282
- Views
- 41K