

Ramblinrose1965
Well-Known Member
WOW great photo!
How To Use Progressive Web App aka PWA On 420 Magazine Forum
Note: This feature may not be available in some browsers.
WOW great photo!
Thank you my friend! That plant was a very good photo student. ;-)WOW great photo!
")
Ms Ground asked me to post my powdery mildew pics, which I had only put in my thread since they were relevant. But in case someone actually wants to see them, here goes!
Top left is what it looks like in the early stages:
And the snow drift bottom left is what it looks like when it's full blown:
And since this is a show-your-work thread, this is how I take my macro pics:
That's a mic stand, but the holder broke off so it's just electrical tape holding the scope on:
I have new mic clip coming tomorrow so I'm hoping that makes it easier to get good angles on the flowers. If I get some good pics that come close to the ones you folks are posting, I'll drop a few here.
It's pretty handy since you can change the angle and length and then rotate the boom to get different spots on the buds, but having a clip will make it much easier.Hey now!!! That is something I don’t even think about using an old boom mic stand!!!
Great info! This will help dramatically with blurry macros.It's pretty handy since you can change the angle and length and then rotate the boom to get different spots on the buds, but having a clip will make it much easier.
This is the one I bought so I didn't have to worry about which mic it would fit:

Excellent explanation of your process! Wouldn't using a rail change the size of the subject in each frame and make it so you have to resize each to get them to layer correctly?This allows you to move the camera closer instead of using the focus. The resulting stacked images are much better
Yes, it will create different size images. I would usually have to crop once PS was done with alignment and merging to get the areas that have correct focus only in the final image.Excellent explanation of your process! Wouldn't using a rail change the size of the subject in each frame and make it so you have to resize each to get them to layer correctly?
nice set up & picsI'm watching my trichome color progression daily on my plants, so this morning I thought I would take a quick pic or two and show you how my set up is with my DSLR. I'm not saying these are the best shots by any means, I just felt it a good opportunity to explain my set up and process.
First thing I do if I am shooting with the buds still on the plants is turn off any fans or moving air. When shooting macro shots that close to things, any moving air will move your subject on you and the result is blurred image. You want it as still as possible.
Then I inspect my subject for anything distracting, pet hair..dust ball...dead or dying leaf....anything that will distract from the subject. As you can see in the second closer photo, there is a stray piece of plant matter, and a couple of spots that could have been cleaned off my lens before I started.
I see so many photo entries for contests where the photo could be vastly improved by just removing "clutter". Things all around the subject that cause the viewer to look away from the subject. Either move in for a tighter shot to fill the frame with the subject yet keep it focused, crop the image, or remove all of the things around it that can distract the viewer before taking the shot.
Anyway.....on to my set up. LOL
My camera is attached to a sturdy tripod with heavy bean bags on the bottom feet to keep it sturdy. I have my macro lens (Meike) and a Raynox Macro lens attached to that.
I have a remote shutter release, it's attached to the camera input, and glued to the tripod with museum putty. The remote is sitting on top of the camera in the pic. I keep it in my hand and shoot as I go, not touching the camera unless I'm adjusting focus.
If I want to get as much of the bud or subject in focus as possible, I do photo stacking. At the close range we are shooting, the area of focus is extremely limited, (called Depth of Field, or DOF). I focus on the very front of the subject, a leaf sticking out or pistil, whatever is closest to the lens. Take a shot, then re-focus in very tiny increments moving backward with the focus, trying not to move the camera or subject in any way until I've shot all the way to the back of the subject.
Then the photos are transferred to my PhotoShop program as layers and I choose align the layers, then choose auto blend the layers.
Because this is not a photoshop tutorial, I will leave it at that. There are many free photo editing programs out there that do a great job.
Ideally, when using the stacking method, it would be best to use what they call a focusing rail. This allows you to move the camera closer instead of using the focus. The resulting stacked images are much better, but trying to use that with a plant in the way is bothersome and frustrating. I would imagine you could find a way to attach one of the microscope cameras to to a rail like this. I have this one, and a cheaper version from Amazon. Just type in Focusing rail and you will see several.

I also use the mini LED flashlight to get light on the area I am focusing on. Oftentimes, for a better photo color impact, I will use gel filters over either the camera lens or the flashlight. I don't like the color cast of room lights and grow lights when shooting a photo.
Last but not least a diffuser over the LED light or lights that are being used to keep the bright harshness down. (the clear circular one in the photo, I tape over the LED flashlight) Softer/diffused lighting keeps it from having blown out bright areas and highlights. Moving the light farther away to spread it out a little helps too.
I hope this helps some of you. I'm off to do some more trichome inspections. These plants are moving fast now.
Sounds like you have do just as much work with the rail (moving the camera and resizing each frame) compared with racking the focal point, but if PS does the post work for you then I guess it's AI's problem!Yes, it will create different size images. I would usually have to crop once PS was done with alignment and merging to get the areas that have correct focus only in the final image.
I use the manual focusing in increments for plants and buds because the focusing rail is cumbersome to use on them. But, often times I will have an area that is "ghosted" in the final image, which doesn't happen with the rail.
The focusing rail did an excellent job when I used to take photos of gems in a pile or spread out, but again...I had to crop a bit more than I wanted once the alignment and merge was done in PS.
Does that make sense? I should have explained that in my post.
Edit: Some cameras have built in focus stacking/bracketing. I've never tried it on mine, I'm accustomed to doing the manual thing and go from there.
I edited my original post to say you can also use a focusing rail, instead of ideally it's best. I just wanted to throw that option out there.
PS isn't as much of a perfect program as they want people to believe. There have been a number of times when I've wanted to burn it....but I don't want to burn my computer up either.Sounds like you have do just as much work with the rail (moving the camera and resizing each frame) compared with racking the focal point, but if PS does the post work for you then I guess it's AI's problem!
 For the most part it does what I need, when it's not being a b*tch.
Yes, it will create different size images. I would usually have to crop once PS was done with alignment and merging to get the areas that have correct focus only in the final image.
I use the manual focusing in increments for plants and buds because the focusing rail is cumbersome to use on them. But, often times I will have an area that is "ghosted" in the final image, which doesn't happen with the rail.
The focusing rail did an excellent job when I used to take photos of gems in a pile or spread out, but again...I had to crop a bit more than I wanted once the alignment and merge was done in PS.
Does that make sense? I should have explained that in my post.
Edit: Some cameras have built in focus stacking/bracketing. I've never tried it on mine, I'm accustomed to doing the manual thing and go from there.
I edited my original post to say you can also use a focusing rail, instead of ideally it's best. I just wanted to throw that option out there.

You have followed my footsteps. I had the darkroom, enlarger and all of that equipment. It was so much fun, I really miss it...but the digital age took over. I resisted for years, but finally had to give in.A good DSLR is something I'd love to get. Back in the 70s my mom got both me and my dad Canon AE-1 35mm film cameras for Xmas one year. Since then I've acquired a bunch of different lenses, filters etc and even use to develop my own films and do my own printing with an enlarger that could make poster sized prints.
I still have the camera but sold the darkroom gear decades ago. My sister gave me dad's one so have two of them now. With an adaptor I should be able to use my lenses on a Canon DSLR in manual mode only which suits me fine as I used to take most of my pics manually. I would only use the auto mode when I knew I would be needing to take shots quickly but for something like plant pics manual would be great. Then you can use the proper f-stops to shorten the depth of field down to just the spot you want in your pics and get rid of the clutter. A few years ago at a roadside swap meet in BC I picked up a full set of 4 macro rings for the Canon that I haven't even tried yet.
My 20.1mp little digi cam takes good enough shots at hi-rez so I can take a few pics then blow them up on the computer to examine the trichs etc but forget about manual control. One feature it does have is manual white balance so I can pre-adjust it so pics I take under HPS light look like natural light pics.
I see someone has another passion other than growingI'm watching my trichome color progression daily on my plants, so this morning I thought I would take a quick pic or two and show you how my set up is with my DSLR. I'm not saying these are the best shots by any means, I just felt it a good opportunity to explain my set up and process.
First thing I do if I am shooting with the buds still on the plants is turn off any fans or moving air. When shooting macro shots that close to things, any moving air will move your subject on you and the result is blurred image. You want it as still as possible.
Then I inspect my subject for anything distracting, pet hair..dust ball...dead or dying leaf....anything that will distract from the subject. As you can see in the second closer photo, there is a stray piece of plant matter, and a couple of spots that could have been cleaned off my lens before I started.
I see so many photo entries for contests where the photo could be vastly improved by just removing "clutter". Things all around the subject that cause the viewer to look away from the subject. Either move in for a tighter shot to fill the frame with the subject yet keep it focused, crop the image, or remove all of the things around it that can distract the viewer before taking the shot.
Anyway.....on to my set up. LOL
My camera is attached to a sturdy tripod with heavy bean bags on the bottom feet to keep it sturdy. I have my macro lens (Meike) and a Raynox Macro lens attached to that.
I have a remote shutter release, it's attached to the camera input, and glued to the tripod with museum putty. The remote is sitting on top of the camera in the pic. I keep it in my hand and shoot as I go, not touching the camera unless I'm adjusting focus.
If I want to get as much of the bud or subject in focus as possible, I do photo stacking. At the close range we are shooting, the area of focus is extremely limited, (called Depth of Field, or DOF). I focus on the very front of the subject, a leaf sticking out or pistil, whatever is closest to the lens. Take a shot, then re-focus in very tiny increments moving backward with the focus, trying not to move the camera or subject in any way until I've shot all the way to the back of the subject.
Then the photos are transferred to my PhotoShop program as layers and I choose align the layers, then choose auto blend the layers.
Because this is not a photoshop tutorial, I will leave it at that. There are many free photo editing programs out there that do a great job.
When using the stacking method, you can also use what they call a focusing rail. This allows you to move the camera closer instead of using the focus. The resulting stacked images are much better, but trying to use that with a plant in the way is bothersome and frustrating. I would imagine you could find a way to attach one of the microscope cameras to to a rail like this. I have this one, and a cheaper version from Amazon. Just type in Focusing rail and you will see several.
I also use the mini LED flashlight to get light on the area I am focusing on. Oftentimes, for a better photo color impact, I will use gel filters over either the camera lens or the flashlight. I don't like the color cast of room lights and grow lights when shooting a photo.
Last but not least a diffuser over the LED light or lights that are being used to keep the bright harshness down. (the clear circular one in the photo, I tape over the LED flashlight) Softer/diffused lighting keeps it from having blown out bright areas and highlights. Moving the light farther away to spread it out a little helps too.
I hope this helps some of you. I'm off to do some more trichome inspections. These plants are moving fast now.
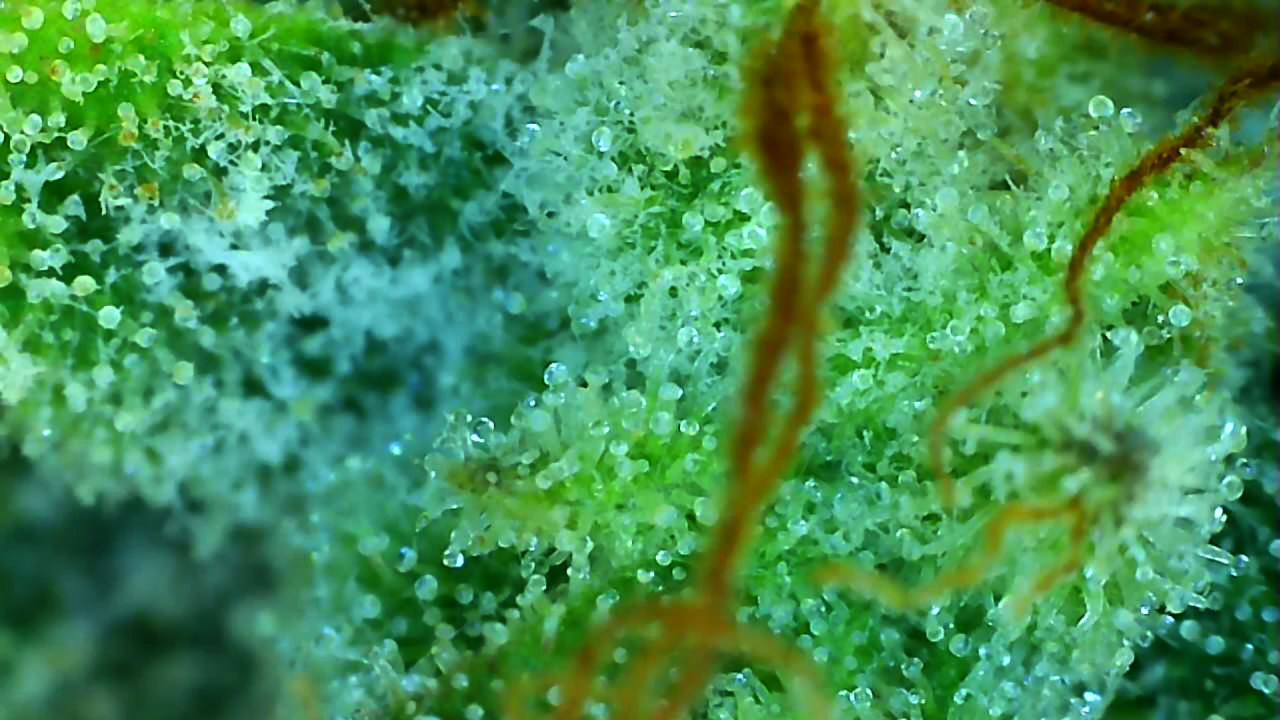
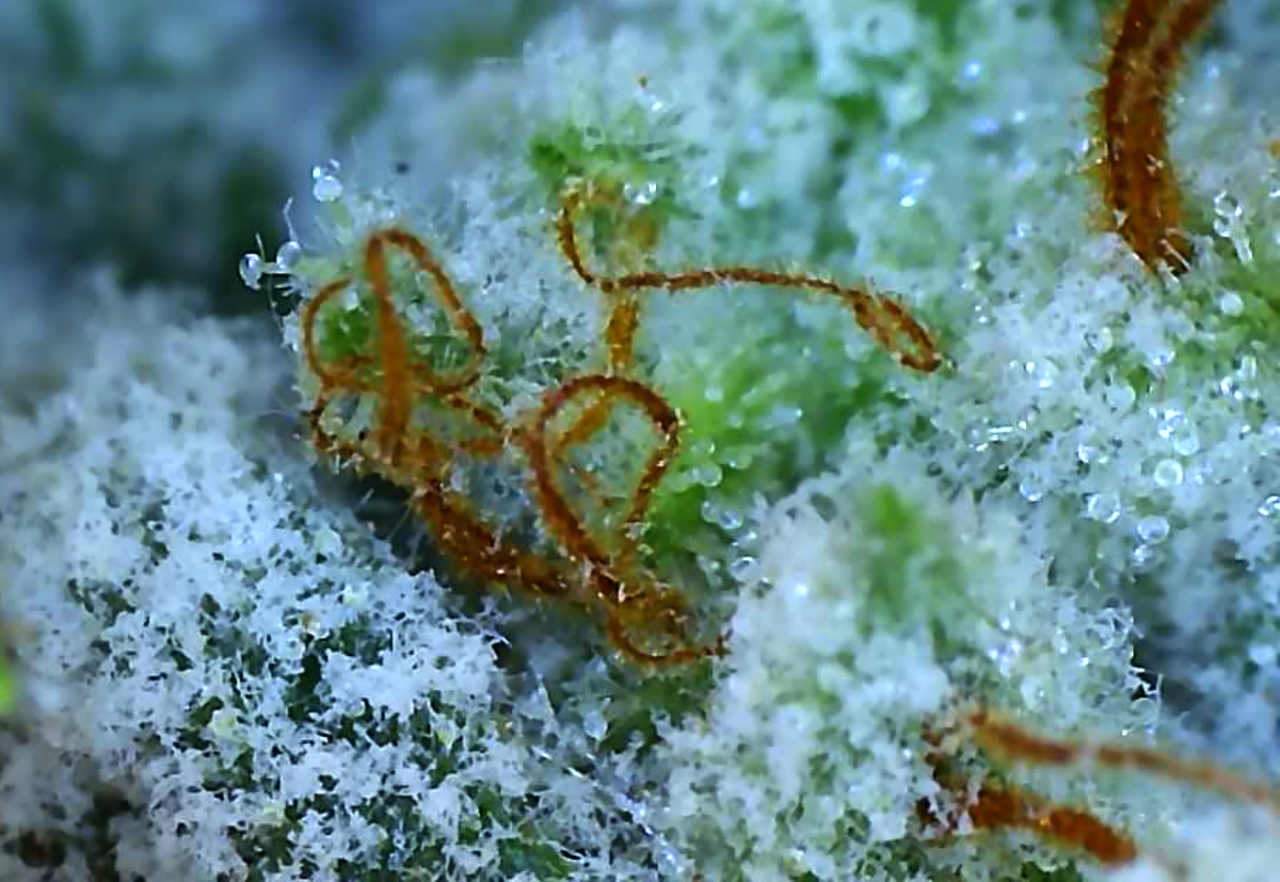
Black Domina grown under hps a few years ago. One of the parents of Black Sugar.  Photos taken using the inexpensive usb microscope camera that's so hard to keep focused.
Nice!Found these while looking for other photos.
 BD hps.jpg")
Black Domina taken a few years ago with inexpensive usb microscope camera.
 BD hps.jpg")
Black Domina taken a few years ago with inexpensive usb microscope camera.
 BD hps.jpg")
Black Domina taken a few years ago with inexpensive usb microscope camera.
 BD hps.jpg")
Black Domina taken a few years ago with inexpensive usb microscope camera.