

Thanks Azimuth!Could also be mealy bugs. Those can be dealt with with a Q-Tip dipped in iso and wiped off. Those tend to hide in the cracks and crevasses so you need something small to get in there.
If you see it again, take a few close-ups so we can have a better look.
Navigation
Install the app
How to install the app on iOS
How To Use Progressive Web App aka PWA On 420 Magazine Forum
Note: This feature may not be available in some browsers.
More options
You are using an out of date browser. It may not display this or other websites correctly.
You should upgrade or use an alternative browser.
You should upgrade or use an alternative browser.
SIP Club - Getting Hydro/Coco Results In A Soil Based Medium
- Thread starter Azimuth
- Start date
CBDMed
Well-Known Member
Hey Azi! Sorry I have not been around much! I love this thread, it is just that work is on overdrive!
Thanks for turning me on to SIPs! Even with my soil woes (half-strength soil), the girls are now at least TWICE as big as they were, before SIPs! (In fact I can't wait until I get my soil tested, adjusted, and re-cooked! I am hoping for plants at least twice as big!)
Thanks again!

Thanks for turning me on to SIPs! Even with my soil woes (half-strength soil), the girls are now at least TWICE as big as they were, before SIPs! (In fact I can't wait until I get my soil tested, adjusted, and re-cooked! I am hoping for plants at least twice as big!)
Thanks again!
- Thread starter
- #763
Looking good, el G. You've got the makings of a good haul there! 
Fenderbender
Well-Known Member
From 6 #736 to 8 days old quite the difference.. in fact my friend's who planted two weeks ago don't look much further along than this, there's a more developed second layer but the first leaves haven't reached this size yet.. he started in a little seedling pot and no perlite and no rhizotonic.
I'm gonna make a journal where I document the rest of this first sip trial.

I'm gonna make a journal where I document the rest of this first sip trial.
Aloha friends of the SIP world. It seems as if I have made a deal in blood with Azi and next Spring I will try to run an actual SIP container for one of my plants in my tents.
Until then, let's just check out my two tents, currently in my OG self-feed water reserve 5gl pots. We have 5 strains and a total of 8 plants between the 4x4 and 3x3.
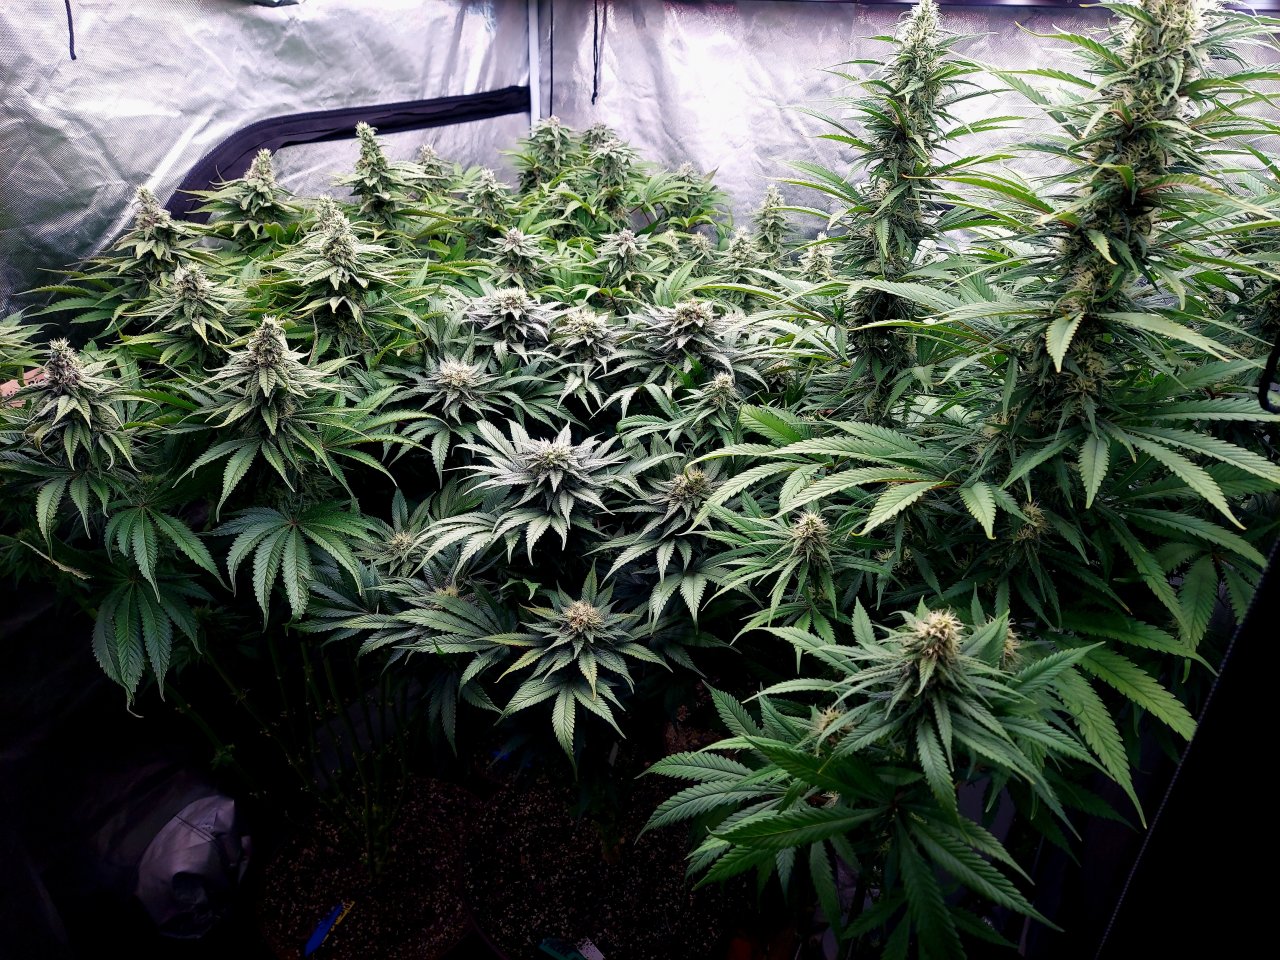
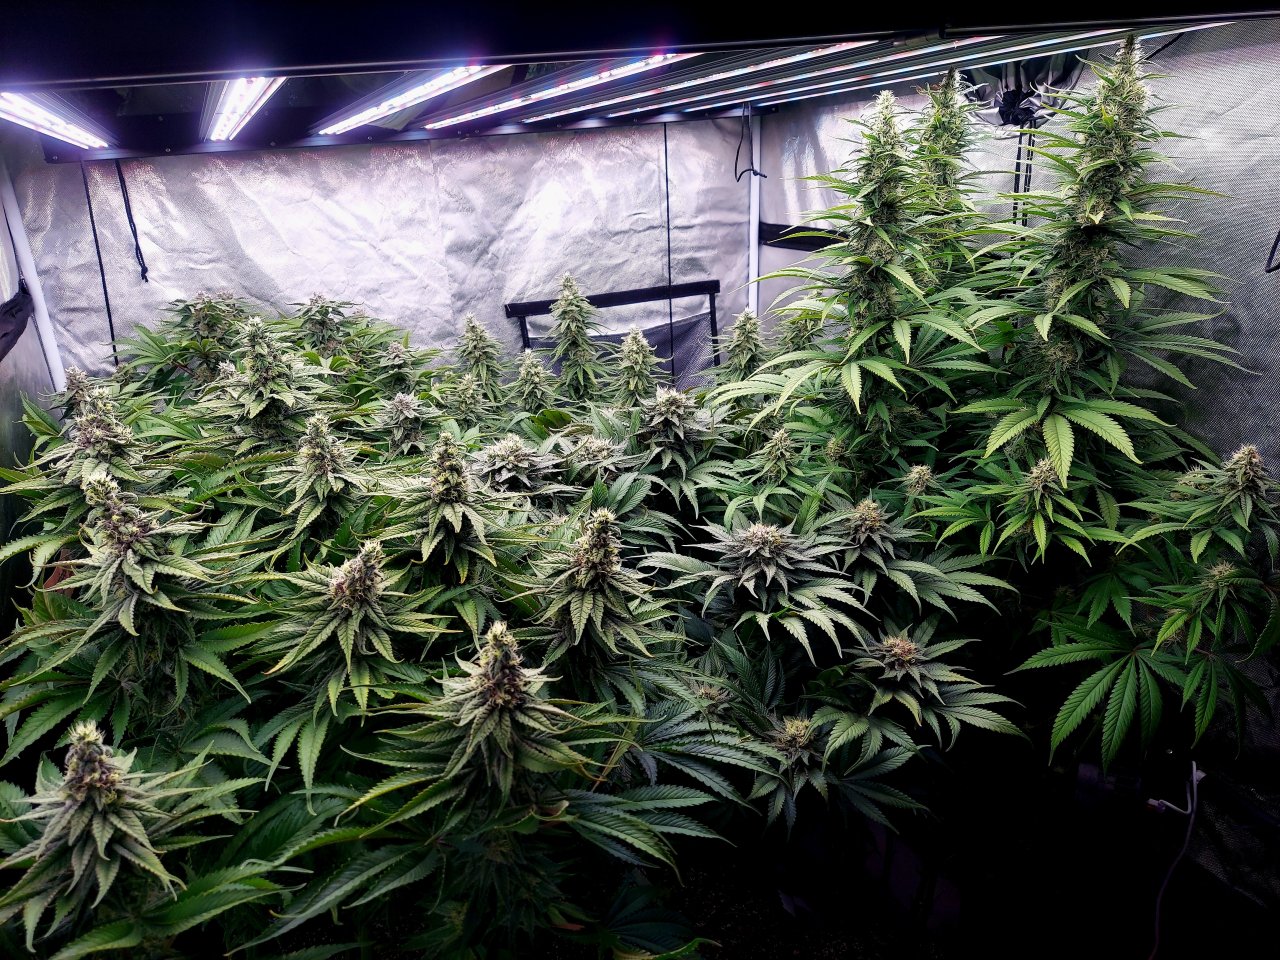
Until then, let's just check out my two tents, currently in my OG self-feed water reserve 5gl pots. We have 5 strains and a total of 8 plants between the 4x4 and 3x3.
Zombie Death-Grow Journal
4 strains, 5 photoperiods under the @Cultiuana CT-720
DAYS 85/86 DAY 28 FLOWER...
DAYS 85/86 DAY 28 FLOWER...
Big Bull-Grow Journal
That's a Load of Bull Split Tent Grow
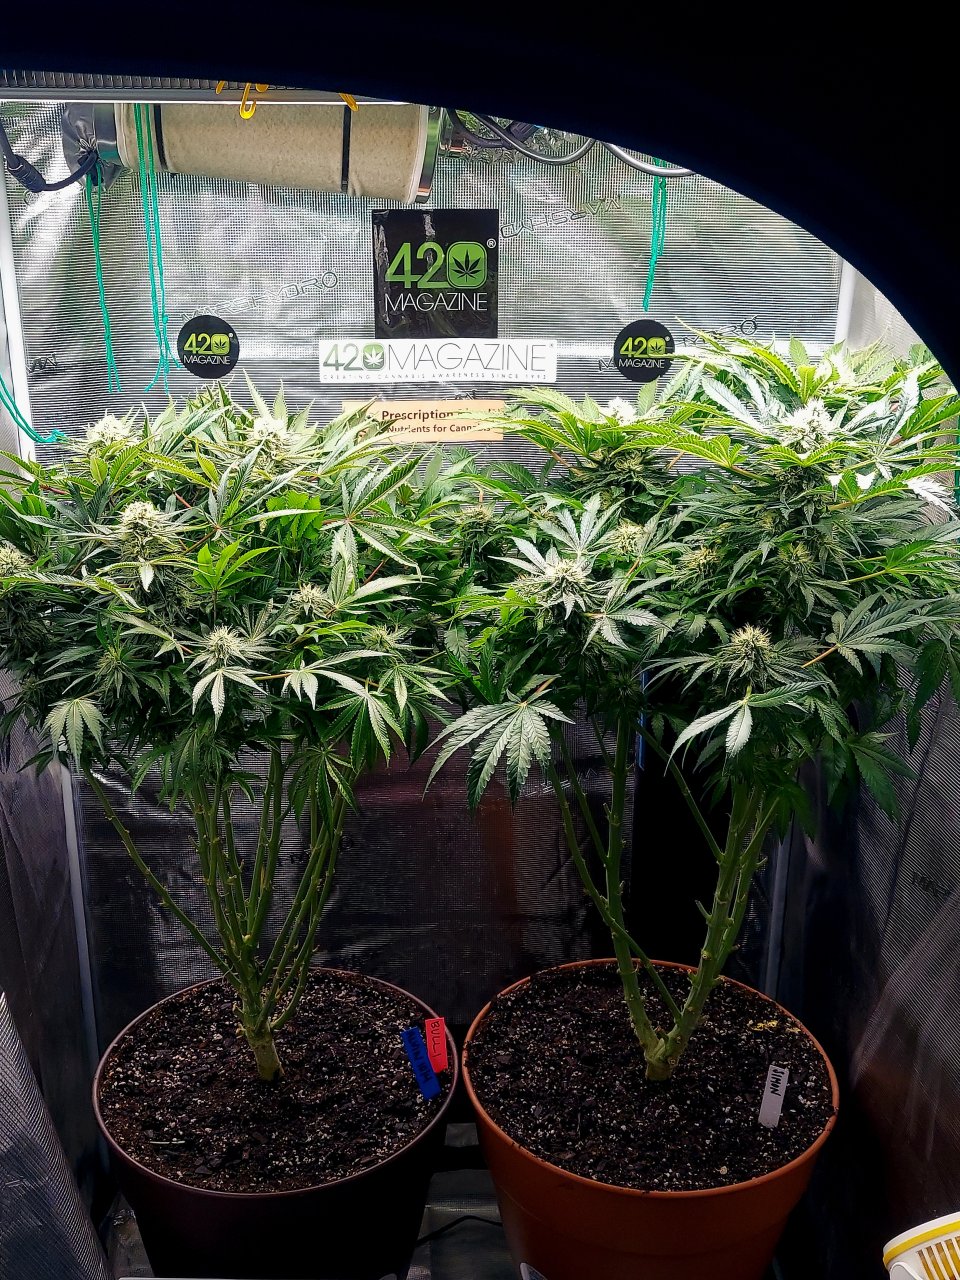
DAY 85/86 DAY 28 FLOWER
Black Domina x Early Pearl x Skunk...
DAY 85/86 DAY 28 FLOWER
Black Domina x Early Pearl x Skunk...
Big Bull-Grow Journal
That's a Load of Bull Split Tent Grow
DAY 86/87 DAY 29 FLOWER
Black Domina x Early Pearl x Skunk...
DAY 86/87 DAY 29 FLOWER
Black Domina x Early Pearl x Skunk...
Big Bull-Grow Journal
That's a Load of Bull Split Tent Grow
DAY 86/87 DAY 29 FLOWER
Black Domina x Early Pearl x Skunk...
DAY 86/87 DAY 29 FLOWER
Black Domina x Early Pearl x Skunk...
Sirius Black and Zombie Death-Grow Journal
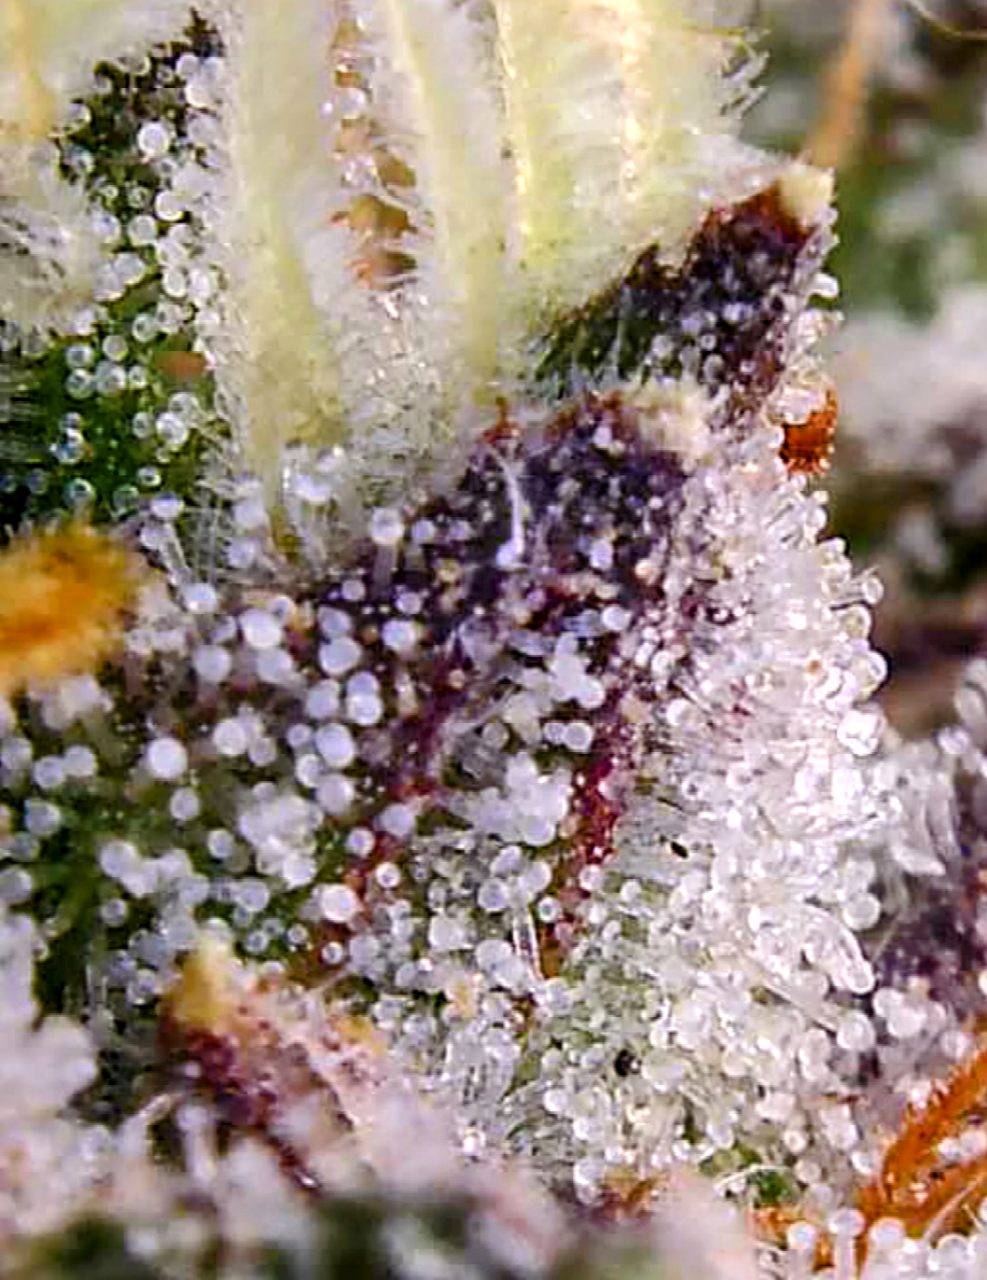
Trichomes, scoped with gooseneck held digital microscope
@Weed Seeds Express Sirius...
@Weed Seeds Express Sirius...
Cultiuana CT-720 Winter Grow 22-23
4 strains, 5 plants Day 30 Flower
@Weed Seeds Express Sirius Black, Kannabia Gelato-K...
@Weed Seeds Express Sirius Black, Kannabia Gelato-K...
smokesbetter
Well-Known Member
Krissi Those are some very nice looking Plants ! 
- Thread starter
- #768
Not gonna lie, growing is pretty fun when they start growing so fast that they surprise you. But you're not even past the transition phase yet. Wait until you get 3-4 weeks in. Just be careful at that point when you open the tent.From 6 #736 to 8 days old quite the difference.. in fact my friend's who planted two weeks ago don't look much further along than this, there's a more developed second layer but the first leaves haven't reached this size yet.. he started in a little seedling pot and no perlite and no rhizotonic.

Exellent. Link it back here when you do so we can follow you over.I'm gonna make a journal where I document the rest of this first sip trial.
- Thread starter
- #769
Aloha, @Krissi Carbone . And, yes, it is true, I'm not above doing whatever I have to to get more growers on this SIP trainAloha friends of the SIP world. It seems as if I have made a deal in blood with Azi and next Spring I will try to run an actual SIP container for one of my plants in my tents.

 .
. 
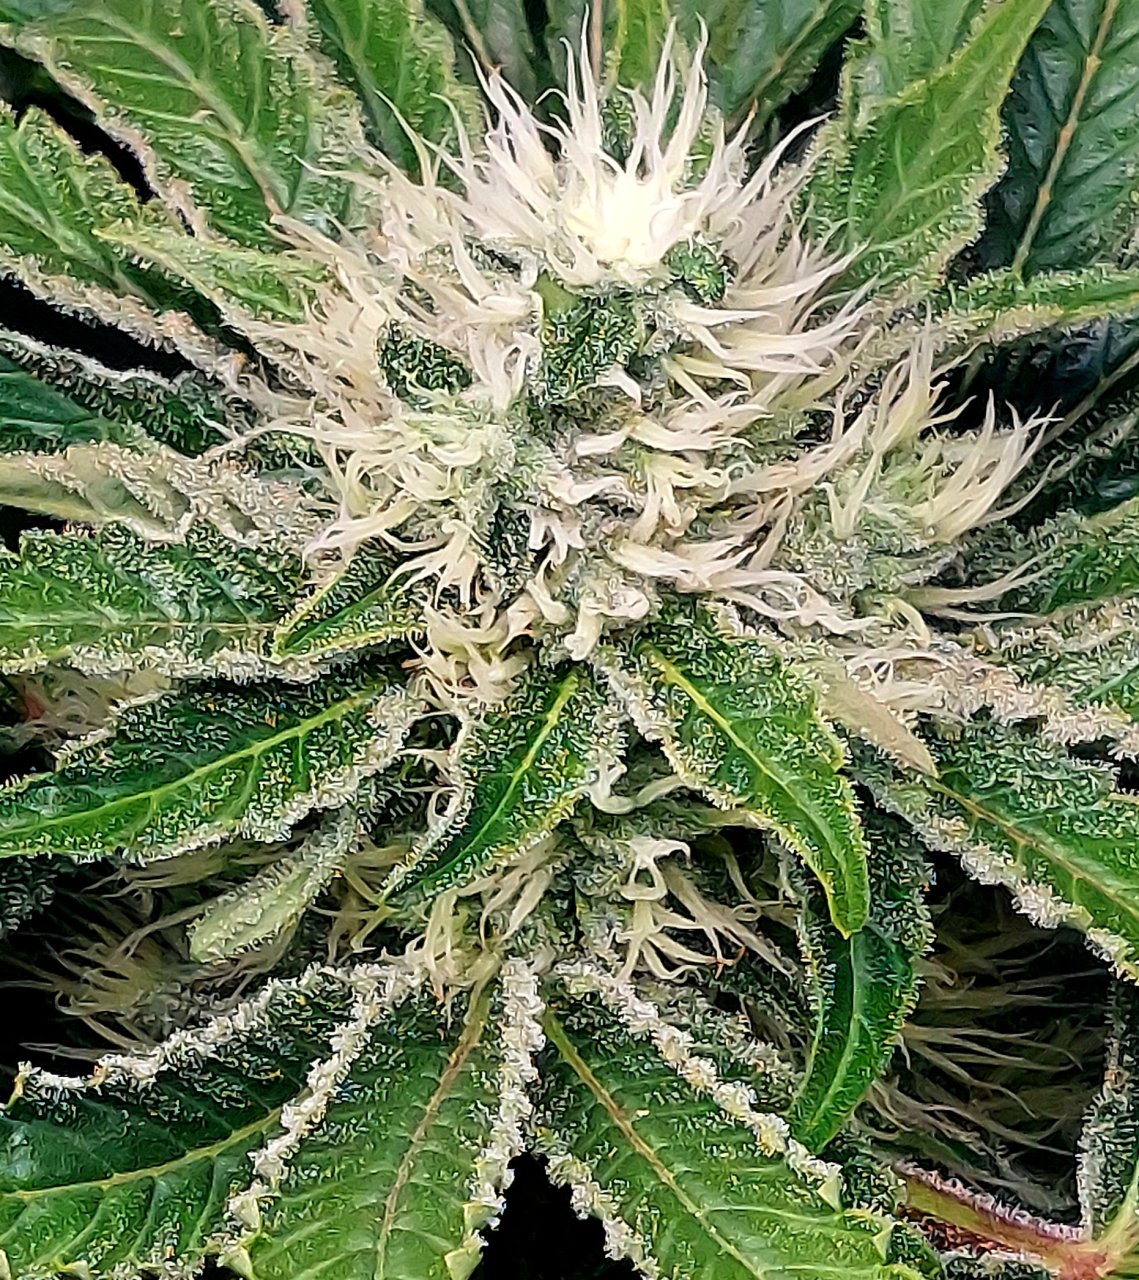
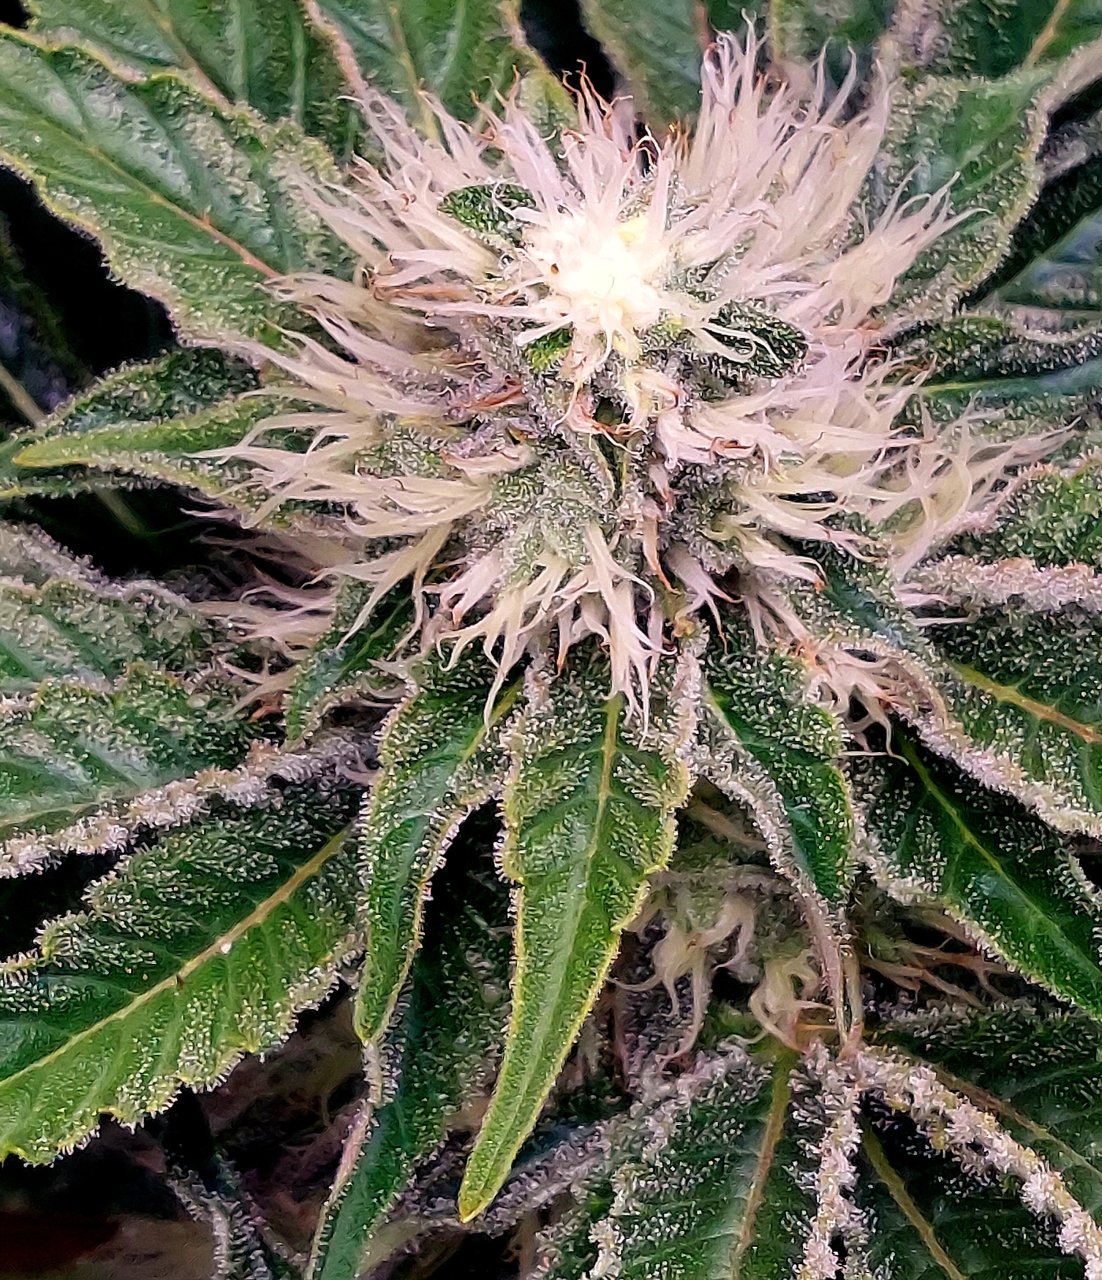
Interesting leaf edge frost on that Big Bull. I've not seen it confined to the edges like that before.

And, as Yoda once said, "Do, or do not. There is no try."
And of course you'll kill it as usual with your @Prescription Blend nutes and you've already got experience with at least a cousin type pot. Maybe give one of your auto's a go. I've long maintained that SIPs should be the ideal pot structure to grow auto's in.
You done good Sir...keep the Choo Choo going brotherAloha, @Krissi Carbone . And, yes, it is true, I'm not above doing whatever I have to to get more growers on this SIP train
Aaah yes, she is lovely. Both plants are caked in the same fashion-incredible Indica strain.Interesting leaf edge frost on that Big Bull. I've not seen it confined to the edges like that before.
A SW fan? Yesssss!!!And, as Yoda once said, "Do, or do not. There is no try."
I shall consider it, especially considering a quick auto grow between Feb and May if I think I can pull it off. If not, come May, I'll join the DIY SIP world for a plant and with that said, I'll run my one auto I always run amongst my photos in one and see what I can do!And of course you'll kill it as usual with your @Prescription Blend nutes and you've already got experience with at least a cousin type pot. Maybe give one of your auto's a go. I've long maintained that SIPs should be the ideal pot structure to grow auto's in.
Twalte
Well-Known Member
Hello @Azimuth. great thread! Thanks for pointing me to this sip thread and the Quadlining thread. This sip system is all new to me.
Hi Sip enthusiasts, I’m currently using the wick and reservoir system from AC Infinity and it’s working nicely for me. I think the next step in experimenting for me is the sip method. I see two possibly comparable store-bought solutions. The Octopot and the Grobucket insert by GroTech. Has anyone tried both? Are there other systems I should be considering?
I’m leaning to the Grobucket since it’s included in page 1 of this thread, but i could easily be talked into trying the Octopot instead. Since I only grow two mature plants at a time, it’s not a huge difference in cost by the time you purchase buckets.
I am a soil grower using GH Flora series nutrients and I plan to stick with soil if that makes a difference in choosing a system.
- Thread starter
- #772
Welcome to SIP Club, @Twalte ! Glad to hear the recommendations are of interest. Both have helped the quality and quantities of my grows immensely.Hello @Azimuth. great thread! Thanks for pointing me to this sip thread and the Quadlining thread. This sip system is all new to me.
@ReservoirDog is the only one I know of with any experience with the Octopot system and his may be just research based. That said, he has indicated that there is a ton of great information on growing with them on their site and seem to be a very reputable company. He has cited their reserach as the basis for many of the practices he employs in his grows so they certainly know what they are talking about.Hi Sip enthusiasts, I’m currently using the wick and reservoir system from AC Infinity and it’s working nicely for me. I think the next step in experimenting for me is the sip method. I see two possibly comparable store-bought solutions. The Octopot and the Grobucket insert by GroTech. Has anyone tried both? Are there other systems I should be considering?
Both seem to be about the same size in terms of container size with Octopot being what looks like 1 gallon bigger, but that might be misleading in that the GrowBucket has the reservoir built in which takes up some of the soil space while Octopot seems to have the entire container available, with the reservoir placed entirely below it.I’m leaning to the Grobucket since it’s included in page 1 of this thread, but i could easily be talked into trying the Octopot instead. Since I only grow two mature plants at a time, it’s not a huge difference in cost by the time you purchase buckets.
Noone on this thread has indicated they are using Octopot yet so you would be a trailblazer, but the concepts are entirely the same. I don't think you'd go wrong with either one.
Shouldn't make any difference. Both should work great for you. Let us know what you decide.I am a soil grower using GH Flora series nutrients and I plan to stick with soil if that makes a difference in choosing a system.

AspenCultivator
Well-Known Member
Hey SIP club! I wanted to share some build pics of a DIY bucket I made a few days ago. I'm currently growing 2 alaskan purples that are just taking their sweet time. Because of that I dropped 3 blueberry seeds and already have 2 of them above the surface. If I can get the blueberries to pass the alaskan purple, the blueberries will go into the sip buckets. Here's how I made them:
Material List:
5 gallon bucket
5 quart mixing bucket
1/2" PVC pipe (9" for each bucket)
1/2" slip x 1/2" male NPT PVC fitting
I started by drilling 7/32 holes in the side of the 5 quart mixing bucket. Note the holes drilled near the rim (at the bottom). Since this bucket will be inverted inside the 5 gallon bucket, there needed to be holes so it doesn't 'seal' against the bottom of the bucket. The rim will be cut off in a later step. With the rim cut off, this bucket allows for exactly 1 gallon of water and leaves a 1" air gap.

Next is drilling holes in the bottom (top) of the res bucket.

And using a 7/8" forstner bit drill out a hole for the 1/2" adapter.

Adapter installed.

And now the rim can be cut off. I just used a pair of kitchen shears and it cut very clean and easily.

You can see here when the bucket is inverted it doesn't seal against the bottom of the 5 gallon. The holes there allow the water to interface with the soil media at the very bottom of the 5 gallon bucket.

I cut some 1/2" PVC pipe so it sticks about 3/4" above the rim of the 5 gallon bucket. This happened to be 9". I also measured the height of the res bucket and determined my overflow hole needs to be 5-1/4" up from the bottom of the bucket. I used a 1/4" bit, which you can see on the right side of the following picture:

Next I used some black duct tape and taped up the outside of the 5 gallon bucket.

The final step was designing and 3D printing a clip that would hold the 1/2" fill tube closer to the rim of the bucket.


And it's done! I'll be filling the area directly in front of the overflow hole with perlite and/or hydroton and the rest with soil, so water can travel from the res and out of the overflow hole.
I want to say thank you to everyone that has participated in this thread and shared their build pics. It made understanding this system a lot easier! I can't wait for my new Blueberries to get bigger and see what they can do in these buckets.
Material List:
5 gallon bucket
5 quart mixing bucket
1/2" PVC pipe (9" for each bucket)
1/2" slip x 1/2" male NPT PVC fitting
I started by drilling 7/32 holes in the side of the 5 quart mixing bucket. Note the holes drilled near the rim (at the bottom). Since this bucket will be inverted inside the 5 gallon bucket, there needed to be holes so it doesn't 'seal' against the bottom of the bucket. The rim will be cut off in a later step. With the rim cut off, this bucket allows for exactly 1 gallon of water and leaves a 1" air gap.
Next is drilling holes in the bottom (top) of the res bucket.
And using a 7/8" forstner bit drill out a hole for the 1/2" adapter.
Adapter installed.
And now the rim can be cut off. I just used a pair of kitchen shears and it cut very clean and easily.
You can see here when the bucket is inverted it doesn't seal against the bottom of the 5 gallon. The holes there allow the water to interface with the soil media at the very bottom of the 5 gallon bucket.
I cut some 1/2" PVC pipe so it sticks about 3/4" above the rim of the 5 gallon bucket. This happened to be 9". I also measured the height of the res bucket and determined my overflow hole needs to be 5-1/4" up from the bottom of the bucket. I used a 1/4" bit, which you can see on the right side of the following picture:
Next I used some black duct tape and taped up the outside of the 5 gallon bucket.
The final step was designing and 3D printing a clip that would hold the 1/2" fill tube closer to the rim of the bucket.
And it's done! I'll be filling the area directly in front of the overflow hole with perlite and/or hydroton and the rest with soil, so water can travel from the res and out of the overflow hole.
I want to say thank you to everyone that has participated in this thread and shared their build pics. It made understanding this system a lot easier! I can't wait for my new Blueberries to get bigger and see what they can do in these buckets.
That's a nice clean build Aspen!Hey SIP club! I wanted to share some build pics of a DIY bucket I made a few days ago. I'm currently growing 2 alaskan purples that are just taking their sweet time. Because of that I dropped 3 blueberry seeds and already have 2 of them above the surface. If I can get the blueberries to pass the alaskan purple, the blueberries will go into the sip buckets. Here's how I made them:
Material List:
5 gallon bucket
5 quart mixing bucket
1/2" PVC pipe (9" for each bucket)
1/2" slip x 1/2" male NPT PVC fitting
I started by drilling 7/32 holes in the side of the 5 quart mixing bucket. Note the holes drilled near the rim (at the bottom). Since this bucket will be inverted inside the 5 gallon bucket, there needed to be holes so it doesn't 'seal' against the bottom of the bucket. The rim will be cut off in a later step. With the rim cut off, this bucket allows for exactly 1 gallon of water and leaves a 1" air gap.
Next is drilling holes in the bottom (top) of the res bucket.
And using a 7/8" forstner bit drill out a hole for the 1/2" adapter.
Adapter installed.
And now the rim can be cut off. I just used a pair of kitchen shears and it cut very clean and easily.
You can see here when the bucket is inverted it doesn't seal against the bottom of the 5 gallon. The holes there allow the water to interface with the soil media at the very bottom of the 5 gallon bucket.
I cut some 1/2" PVC pipe so it sticks about 3/4" above the rim of the 5 gallon bucket. This happened to be 9". I also measured the height of the res bucket and determined my overflow hole needs to be 5-1/4" up from the bottom of the bucket. I used a 1/4" bit, which you can see on the right side of the following picture:
Next I used some black duct tape and taped up the outside of the 5 gallon bucket.
The final step was designing and 3D printing a clip that would hold the 1/2" fill tube closer to the rim of the bucket.
And it's done! I'll be filling the area directly in front of the overflow hole with perlite and/or hydroton and the rest with soil, so water can travel from the res and out of the overflow hole.
I want to say thank you to everyone that has participated in this thread and shared their build pics. It made understanding this system a lot easier! I can't wait for my new Blueberries to get bigger and see what they can do in these buckets.
Gidorah
Well-Known Member
Nice 3D printed piece! Looks like a nice set up.
- Thread starter
- #776
That's awesome, @AspenCultivator ! Nice clean build and you snuck a couple of upgrades in there. And 3D printed parts? Are you kidding? Wow.The final step was designing and 3D printing a clip that would hold the 1/2" fill tube closer to the rim of the bucket.
I wonder if you could design the dome part....

AspenCultivator
Well-Known Member
That's a nice clean build Aspen!
Nice 3D printed piece! Looks like a nice set up.
That's awesome, @AspenCultivator ! Nice clean build and you snuck a couple of upgrades in there. And 3D printed parts? Are you kidding? Wow.
I wonder if you could design the dome part....
Thanks everyone! It was easy due to everyone documenting their builds in this thread.
The dome specifically would be limited to 200mm (7.87") in diameter, would that be big enough for a 2 gallon? You'd also have a 15+ hour print time for something you can accomplish just as cheaply and easily as you have before using strainers or food containers with holes drilled.
- Thread starter
- #778
It would be perfect. The inside base of the 2 gal is 8" exactly I believe.The dome specifically would be limited to 200mm (7.87") in diameter, would that be big enough for a 2 gallon?
Yeah, but without the cool factor.You'd also have a 15+ hour print time for something you can accomplish just as cheaply and easily as you have before using strainers or food containers with holes drilled.

- Thread starter
- #779
I got 2 of the 8 to root, and should have had 3, but we had overnight guests for the holiday and I filled the reservoir on that last one and couldn't check on it for a couple of days and the extra wetness seems to have done it in.SIP Cloning Experiment, Round Two.
This one's for @Gee64 . I didn't have any luck in round one using SIP containers in my normal cloning process where I cover the clones with a vented dome to keep humidity in. That caused them all to rot fairly quickly and that ended that.
This round I'll try rooting clones in my 9oz SIPS but without the dome. I have 4 cups with just the overflow holes and four with additional holes above the overflow holes all around the cup which is how I do my 1L SIPS. Assuming I get some to root, I want to test whether air holes higher up help or hurt the rooting process.
I've taken cuttings from 3 strains, and I'll stick 2 ACDC (a CBD plant), 2 Le Creme (a CBG plant) and 4 Northen Lights 5's splitting them each between the two cup styles.
I'll do them ResDog style and filled the reservoirs tonight to let the soil absorb the water and plan to stick the cuttings tomorrow (they are soaking overnight in tap water). I'll strip all of the lower leaves and trim all of the remaining ones to make it easier to tell if there's been any new growth, dunk them in aloe leaf and stick them in the SIP on a heat mat dialed to about 80*F.
With any luck I'll have me a Christmas present or a Happy New Year.
Ding. Ding.
I lost two in the first week I think because of the wetness and another two the next week that also looked overwatered so I stopped filling the reservoir and let the rest dry a bit, or at least be not so wet.
One of the aloe rooted a couple of days before the Clonex plant which I thought was interesting, so at the very least aloe got it done.
I'll redo the experiment at some point with better control over the environment but I think rooting in a true SIP environment in 9oz cups struggles with the wetness.
I'm going to try the bubble cloner type and see how that works for me. Sounds like it does better in cooler temps and I think think water roots might help shorten the normal transition time, but that's all theory at this point.
But I'd call rooting in a SIP a fail since the two I got to root were only able to survive in less wet conditions after I stopped filling the reservoir.
Twalte
Well-Known Member
Shouldn't make any difference. Both should work great for you. Let us know what you decide.
@Azimuth,
Thank you for the very informative reply. I placed an order for two of the Octopots. The 6 gallon nutrient reservoir and 6 gallon soil capacity was a big selling point to me. The ability to leave them alone for up to 10 days is helpful, not that I would. I’ll post my experience with the Octopots in March when my tent opens up for new plantings.
Much thanks to you and everyone else for posting your experiences on this thread.
Similar threads
- Replies
- 694
- Views
- 39K
- Replies
- 399
- Views
- 51K
- Replies
- 95
- Views
- 4K