THC Bomb & WW/Skunk - CFL Hood/Veg HPS/Flower

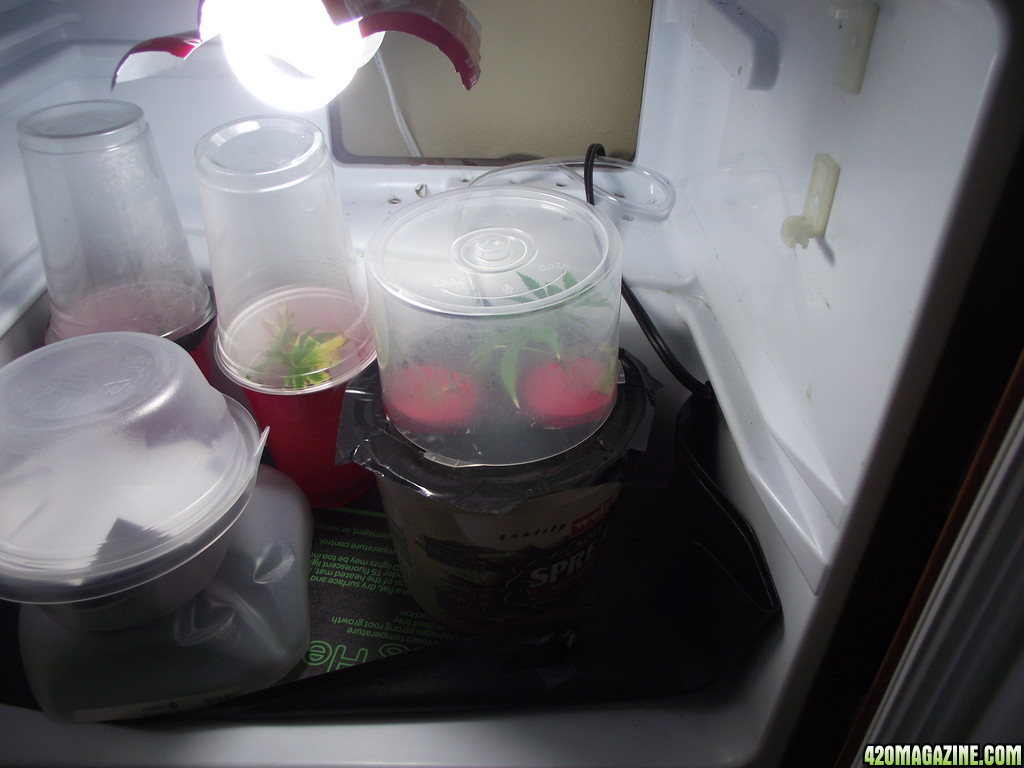
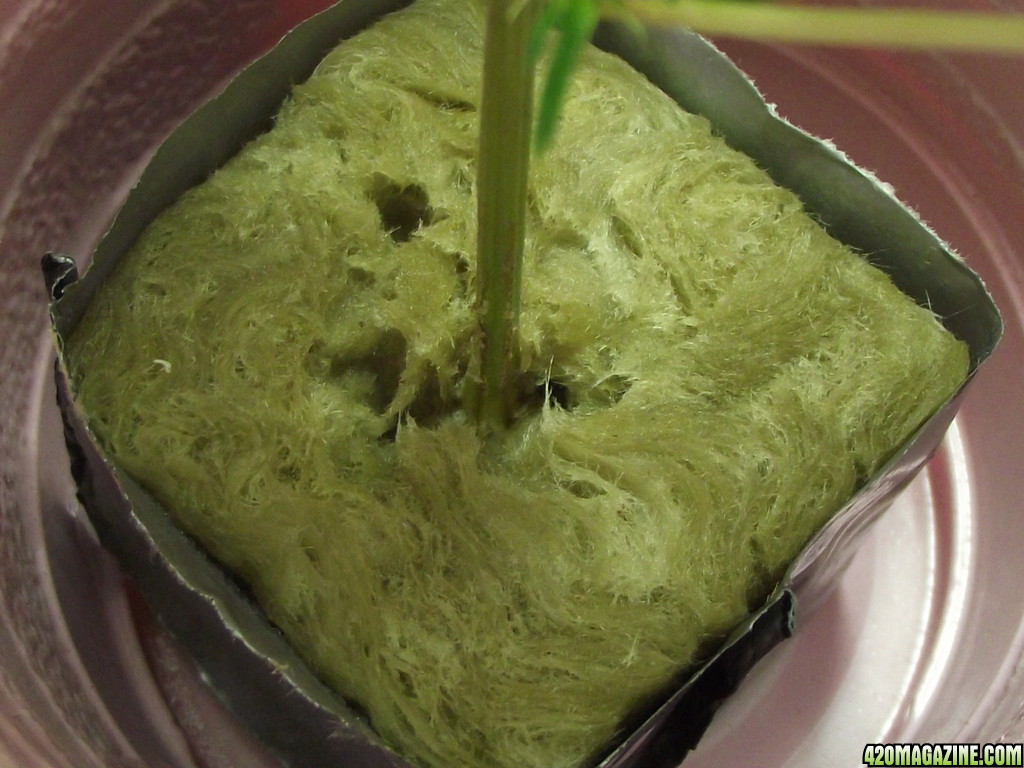
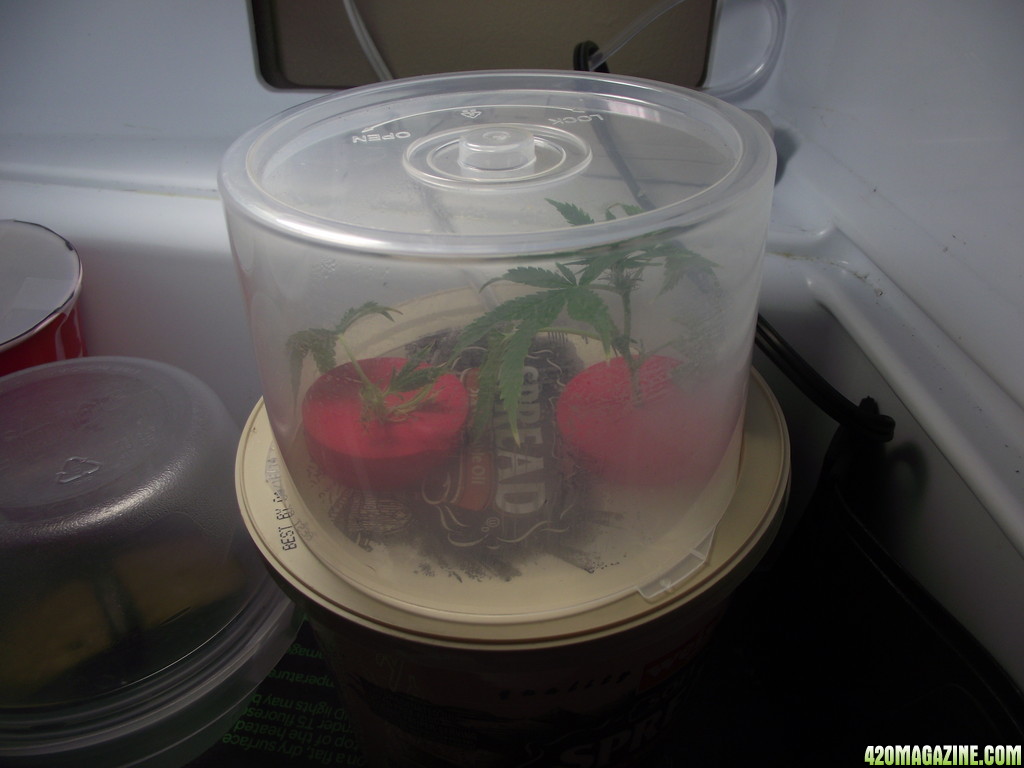
its perfectly possible to root flowering clones, i do it all the time. it gives the same results as letting a flowering plant reveg,
if i dont want to reveg a plant but want to grow it next time round ill take clones with small buds on them and clone these the same as regular veg stage clones, i find the rooting time is about the same, i dont take lots of clones now as all seem to live so when i want to take clones i just take 1 off each plant i want to clone and they all seem to root with no problems,

i also find that rooting hormones dont speed the rooting process up by much, ive took clones with no rooting gel and clones with rooting gel and both root and grow at about the same rate, if i had to pick the quickest method then id say use rooting hormone but using it only cuts a day or 2 at the most off of the rooting time.

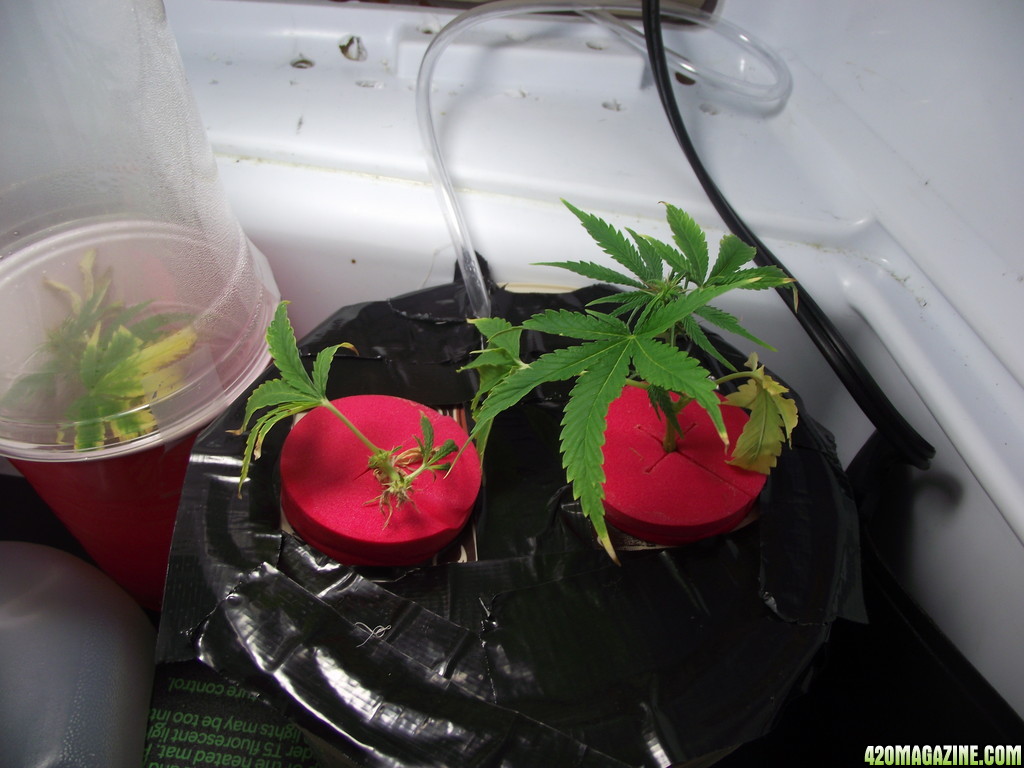
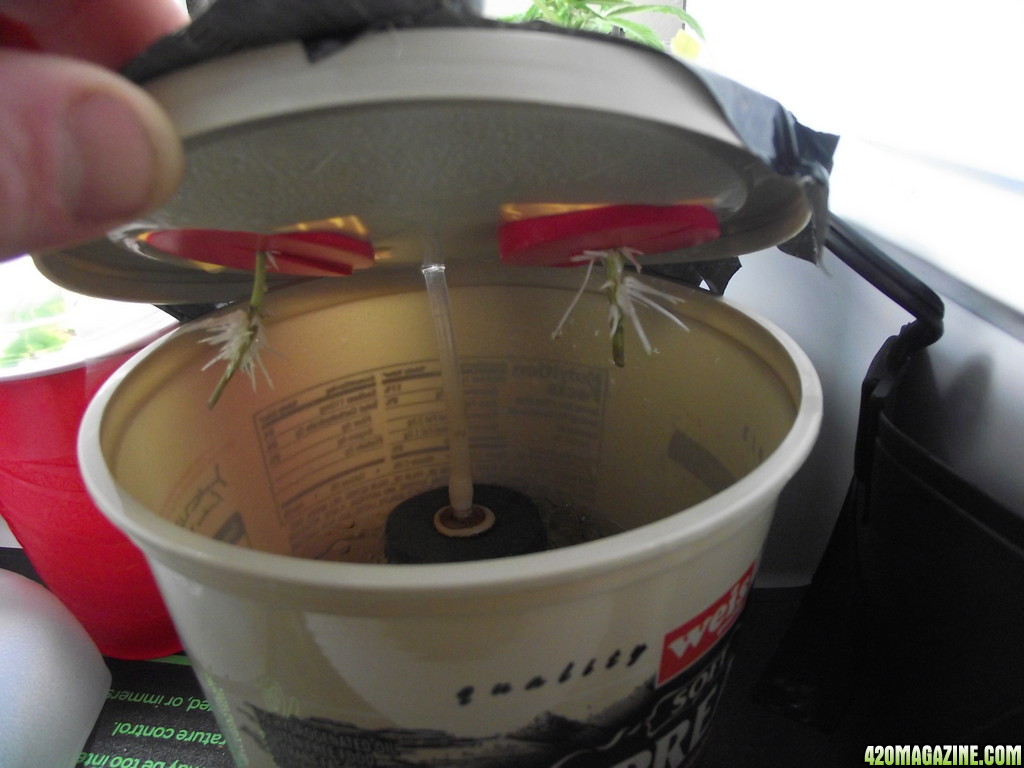
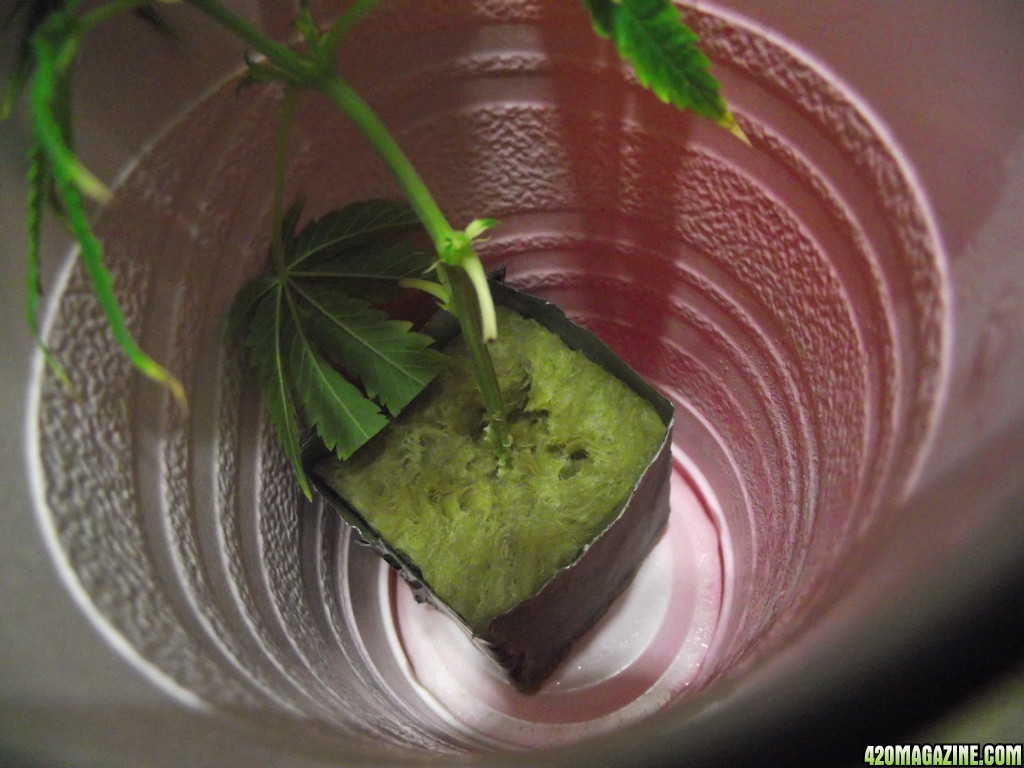
so you should be ok with the clones, you will just end up with monster cropped plants if their far enough in flower, works exactly the same as a reveg plant so you should end up with some crazy growth,
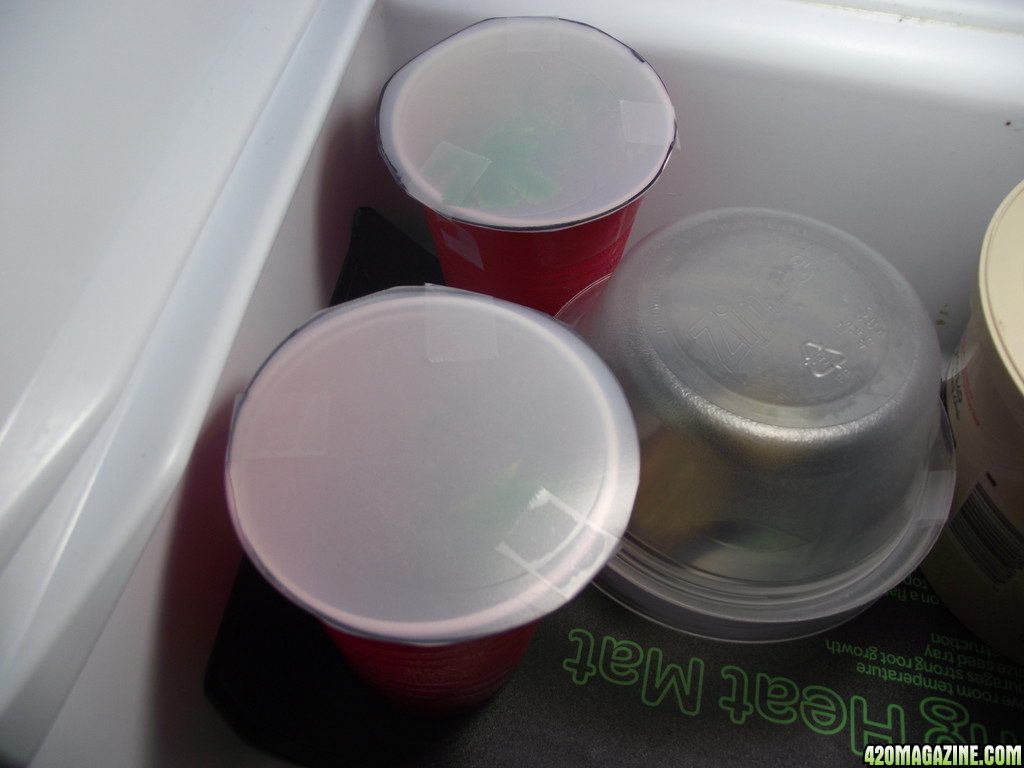
i find that week 1 you will notice no change with the clones
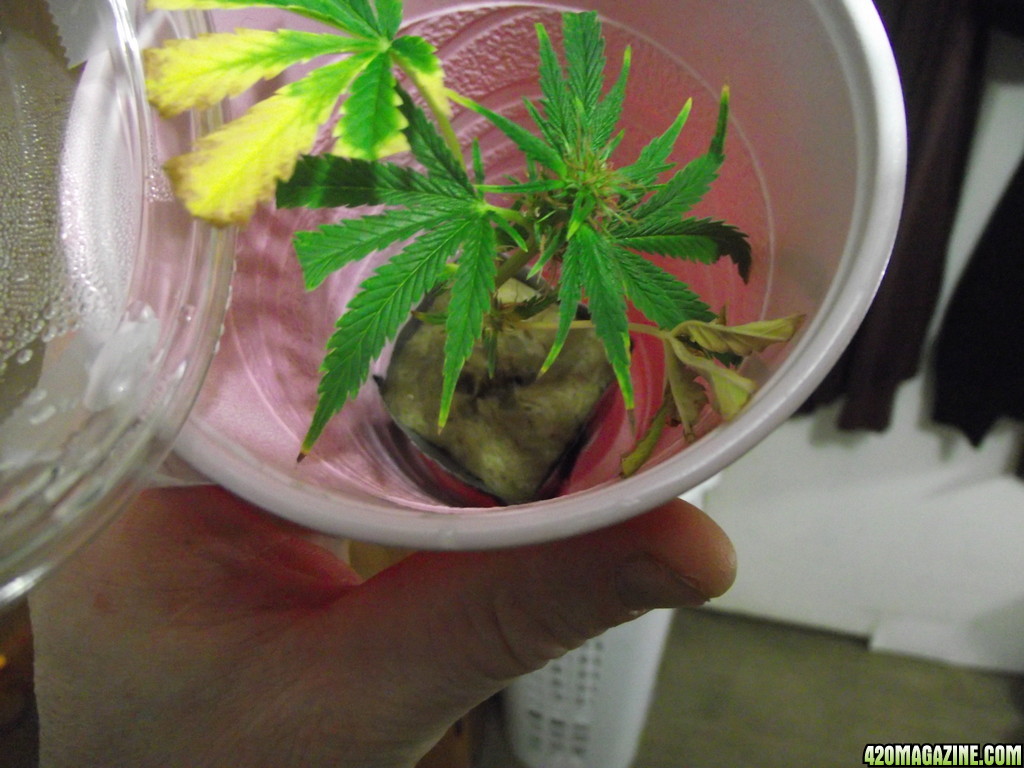
week 2 you may notice tiny leaves start poking out the budded areas but this can take up to 3 weeks depending on how long they take to root, if it was a revegged plant it would show new growth at around week 2 of been back in veg but growth will be deformed with curled up leaves,
then week 3 onwards the clones are back in veg and regular leaves will start forming,

sorry if this has been said already but im page behing in everyones journals so having to skip pages to try and get caught up,
 
That's fine DP and thanks for sharing. Since I have your attention, mind sharing how long it took for your WW/Sk#1 to flower? I tried to research it, but the closest I came was a strain called Widow Skunk which I think is one and the same. Those reviews put flowering time to 9-10 weeks. Also, if these reveg clones root, I will try to keep one to be earmarked for the outdoors this spring. I think it would do well outdoors.
 
buds are merging together, so maybe this is what b.real meant? last night i started to brew a 2 part gro, 3 part micro and 5 part bloom solution. my target PPM is 700 to compensate for PPM decrease. i will let it aerate for 72 hours to see if the majority of the ph swing happens in the separate 5 gal bucket making it easier to make adjustments before being added to the grow res.
 
Another real quick DIY project that I think some of you CFL users might like. Soda can CFL reflector, not much else to say;

DSCF17623.JPG
DSCF17632.JPG
DSCF17641.JPG
DSCF17654.JPG

That is so simple! I blogged that one in the DIY lighting folder on my blog. Thanks for that idea!
 
Happy to have helped canna! Hope someone in a bind can make wonderful things happen with the idea.

Just a small update about what's going on in the Mini Fridge. I planted the 2 Pineapple Chunk seeds that were germing for about 3 days in paper towels. The solution used consists of 1/2 gallon distilled water, 5ml Aqua Shield, 4ml Flora Blend and a few drops of Rapid Start. The Rapid Start was not part of The Capn's germination recipe, but I just wanted to be different I guess, plus I figure 3 drops can't hurt that much. Even after 3 days of germinating, the tap roots from each seed never made it out of the shell more than about 1/16". I was hoping to get a fairly long tap root just to give me assurances that the root will branch out into the cube, but it is what it is. The THC Bomb seeds started the same way, so I hope these Pineapples don't go down that road as the THC Bombs didn't germ.

After mixing up next week's res last night, I cut apart one of the jugs to make translucent discs to be taped to each solo cup with a clone inside. This freed up the other 2 bowls I was using as lids and I put the newly planted seeds in a bowl and taped the other to the top. I now have 3 separate domes in there, each can be opened independently to better suit the needs of the growth. I am hoping the use of the plastic from the jug allows enough light to pass through. Worst case scenario is I find a material that is more clear and do the same thing. To err on the side of caution, I will get on that asap.

Here's pics;

DSCF17916.JPG
DSCF17924.JPG
DSCF17933.JPG
 
That is so simple! I blogged that one in the DIY lighting folder on my blog. Thanks for that idea!
That is way cool!! Now I need to hunt down the largest cans I can find. Arizona Tea is large, ah, large beer cans! Thanks for posting! Reps to you!:thumb:
 
Update - Flower Day 28 - Alive Day 78,

Hey, what's poppin 420! 2 1/2 days ago I mixed up 5 gallons of nutrient solution with a slight increase in PPM. I wanted to aerate the solution for 72 hours, but b/c the res last night was depleted below the minimum pump level, I added some jug water and also a gallon of the solution I had aerating. this sufficed for only a single day and the very first feeding tonight, the halo only gave a few spurts, so I knew I had to fill my res tonight. So I skipped the first feeding and gave her a generous dose of Heisenberg Tea that matured tonight. The new res however was having severe PH issues as expected, hence my want of another day to deal with that, I did however get it into the optimal range in just over an hour and topped the old nutes with 4 more gallons of new. The girl must be eating and drinking good to have gone through 5 recirculating gallons in less than a week herself. Also, after discussing the matter privately with AG, I decided to give 1 more ml of CaMg as I strongly believe I lose a lot of PPM from the sugars in that product being dissipated by aeration and that frothy material that collects on the waterline. B/c CaMg is an organic Calcium Magnesium additive, the organics are to break down into these 2 Macro elements. However, with no other organics to jive with, I believe that a lot of the product is wasted. Today alone, I pulled off the mixing res, probably about a pint to a quart of dense thick froth that did have considerable weight to it. So IMO, I was literally throwing away my nutes. Also, after adding that 4 gallons to my res a solo cup full at a time, I noticed quite a bit of gunk floating around on the bottom. I pulled out as much nutes as I felt comfortable with and tossed away what is shown in the below pics. I have since cleaned the mixing res and filled it back up with tap water and that is getting aerated right now. I am pretty sure I will be finishing the rest of this grow with tap water as I simply cannot keep up on the water demands anymore save for the 1 gallon of distilled needed to make the weekly Tea. I will research the CalMag levels of my tap water and ask questions later on how much supplemental CaMg I'll need to add.

I also unleashed the tied down tops to let them stand back up and uncover some leaves. This allows me to move shit around w/o touching anything as the plant does the rest. I will tie them back down again in a few days, just wanted to mix it up a bit. Temp is holding to around 90º F at canopy level, though I think my digital thermometer is unreliable as it barely feels like 80º.

I might catch hell for this, but every day since 21 days, I have been removing about 2 immature flowering branches from the underside of the canopy and the occasional dead leaves. In my defense, I misplaced knowledge of when it is appropriate to remove all of these unwanted growths. Airflow, however is improving nicely.

Very good news, after a brief talk with one of my room mates, he said I can steal his sliding closet doors which would be a major come up for me. So tomorrow I will get to work on putting those doors on my closet and start prepping to remove my entire grow cabinet. I will see if I can do all that during this grow, but worst case scenario, I finish as is and have the whole closet for my Pineapple Chunks that are in cubes waiting to sprout. Heck, an even better idea would be to leave my cabinet as is and use it for vegging plants, while the upper 2' room could be used for cuttings and seedlings. Lots of possibilities, all free!

Here's the pics;

Week_5_Flower.JPG
DSCF18054.JPG
DSCF18043.JPG
DSCF18033.JPG
DSCF18024.JPG
DSCF18013.JPG
DSCF18004.JPG
DSCF17994.JPG
DSCF17986.JPG
DSCF17974.JPG
DSCF17966.JPG
DSCF17956.JPG
 
90º/92º, but like I said, I think that my meter is inaccurate. I now have the door open with a larger floor fan blowing up from below. This will replenish CO2 and help raise out some heat for the last hour of lights.
 
The closet is looking lush Sky.;)
Its been a couple of weeks since I checked in on your grow, and you can really see the difference. Nice DIY pop can/CFL hood. +reps my friend.
 
Great news gang, I will have to read back to confirm, but I believe I took these cuttings on day 22 of flower and this is I think day 30 and I have confirmed roots on all 4 monster cuttings. The bubbler roots just happened last night as I forgot to tape off the lid until yesterday, but seeing them today made me give a closer look at the rock wool cuttings and those also have shown rooting, one even on the stem above the cube. Unfortunately, still no show from either of the 2 Pineapple Chunk beans I have in RW cubes. I soaked them in paper towels for a little over 72 hours, then transplanted once I figured the tiny little tap roots aren't coming out any further. I turn on the heat mat for the 6 hours of lights off each day and the monsters were content.

I have more great news, I was able to locate most of the funds I'll need to get the rest of my closet worked in. I will work hard the next few days to make that transition quick and get this flowering plant out Into the Great Wide Open! So I will then have a mini fridge for incubation, a small upper space that can be used for veg, my current flower room which I'll use for larger veg and the main space I will use for flower. I will try to make it so that the space face each other inside the closet and hopefully I can spring for panda film to cover the access facade. I'll get a variable speed controller for my 400 CFM fan and get that running and cooling. Also will be using the air cooled hood that came with the HPS kit, I will be building a variation of my inner wall ducting design to control light v. air flow, a while back I bought a 4" carbon filter from the orange hardware store and will be including that as well. It seems that all of my pieces will finally be able to be brought together and if I can hold it all together long enough, will get me more weight and more consistency as perpetual harvesting will now be well within my reach. The current flower space could even be used to transition from veg to flower to allow a closer turnover time in the main flower area as that area would determine my turnover rates. These last few days have been a little depressing, in part due to this drought, but now I'm seriously tickled pink that I have so much good news because in my life, it could be raining pink and I'd get hit with a dink. The profane version sounds way funnier, but I don't want to offend any ladies or sensitive men.

The kiddos;

DSCF18152.JPG
DSCF18162.JPG
DSCF18173.JPG
DSCF18183.JPG
DSCF18203.JPG
DSCF18242.JPG
 
Nice. I still have not had any luck with rooting my clones in the EXACT replica of your DIY bubble cloner. And I have now come to the conclusion as to why I have not been successful: not being able to maintain warm temperatures in the bubbler! I need to get myself a better way to heat my clone space, so I think a heating mat is in order.

PS. I will be in contact Sky ;)
 
My man AG. Just say the word if you need an application. DCS LOL
 
I never want to accept anyone's app. I must run the only club on earth that doesn't want members.
 
I'm doing well for cloning, well rooting anyways, for rooting I am 10/10, but maybe I should start a CGS "Can't Germinate Society" as 2 of my THC Bombs and 2 Pineapples that have similar characteristics of the T Bomb germ process, the shell cracks, a tiny tap root (maybe 1/32"-1/16" long) and I leave it in water last time, in paper towel this time and that tap didn't lengthen, so I put the seeds tap root down into rock wool. AG, during the daylight hours, I turn the mat off as the 20watt CFL keeps it pretty warm in that little mini fridge, and the entire back is off too. that's my wall that appears discolored, not the backing of the fridge so it breathes good too. When it's lights off, I push the fridge against the wall to be flush.

Back in 92 when I first got into growing, my buddy and I used to germinate many seeds in a regular wash cloth that is very moist to the lower side of damp. I'd put that on the bottom of a butter bowl, and place the bown into a 10 gallon fish tank with the heater on high. The bowl would of course float, but I'd put a board on top to weigh it down. Back then we had no idea what 'hydroponics" was and we tried growing germinated seeds by cutting up couch cushions into cubes, slicing through the center to open it like a neoprene, and those cubes would be inserted into a floating piece of styrofoam with cube holes cut out. Under that was plain tap water in a very clear tank is a well lit closet, lit by random flood lights that fell off a truck. We tried to incorporate every stoner folk lore "truth about growing" but only the soil ones survived after the germ process. We also did a few in soil that just stretched till they became top heavy, then toppled and died. Yes old Skybound has killed hunderds of canna plants in his crazy younger years. Wish I woulda kept at it though, life would likely have taken several much more favorable directions and roads.
 
>>>the shell cracks, a tiny tap root (maybe 1/32"-1/16" long) and I leave it in water last time, in paper towel this time and that tap didn't lengthen, so I put the seeds tap root down into rock wool.

>>>The Rapid Start was not part of The Capn's germination recipe, but I just wanted to be different I guess

That sucks. The root should continue to grow (in the paper towel) until the cotyledon leaves come out of the seed, and even beyond that. So, you know the problem was before it got to the rockwool. Hard lesson learned. Well at least next time you know to stick to the recipe.

 
Skybound- here are the picture you said were ok to post on your journal of the leaves I think are showing nutrient burn. Thank you again for letting me post theese here.
image6521.jpg
image6522.jpg

I have already assumed its nute burn. I flushed for 48 hours straight with 5.8 tap water. And have redone my Rez tonight and am now sitting at 922 ppm I have been running 1200 to 1500 since my last two weeks in veg. I am starting to notice the tips of some of the other leaves are doing the same thing. The leaves are crunchy and dry and crumble upon squeezing them.
image6523.jpg
.
Again Skybound thank you for letting me post theese here. If anyone else has input feel free to chime in and thank you in advance.
I'm in the middle of the sixth week of flower and using advanced nutrients, with a mix of t5 and led lights.
 
Aside from the burn, everything looks good, right? I see lots and lots of sugar on her leaves so you'll get lots of good cooking ingredients!
 
Back
Top Bottom