

Navigation
Install the app
How to install the app on iOS
How To Use Progressive Web App aka PWA On 420 Magazine Forum
Note: This feature may not be available in some browsers.
More options
You are using an out of date browser. It may not display this or other websites correctly.
You should upgrade or use an alternative browser.
You should upgrade or use an alternative browser.
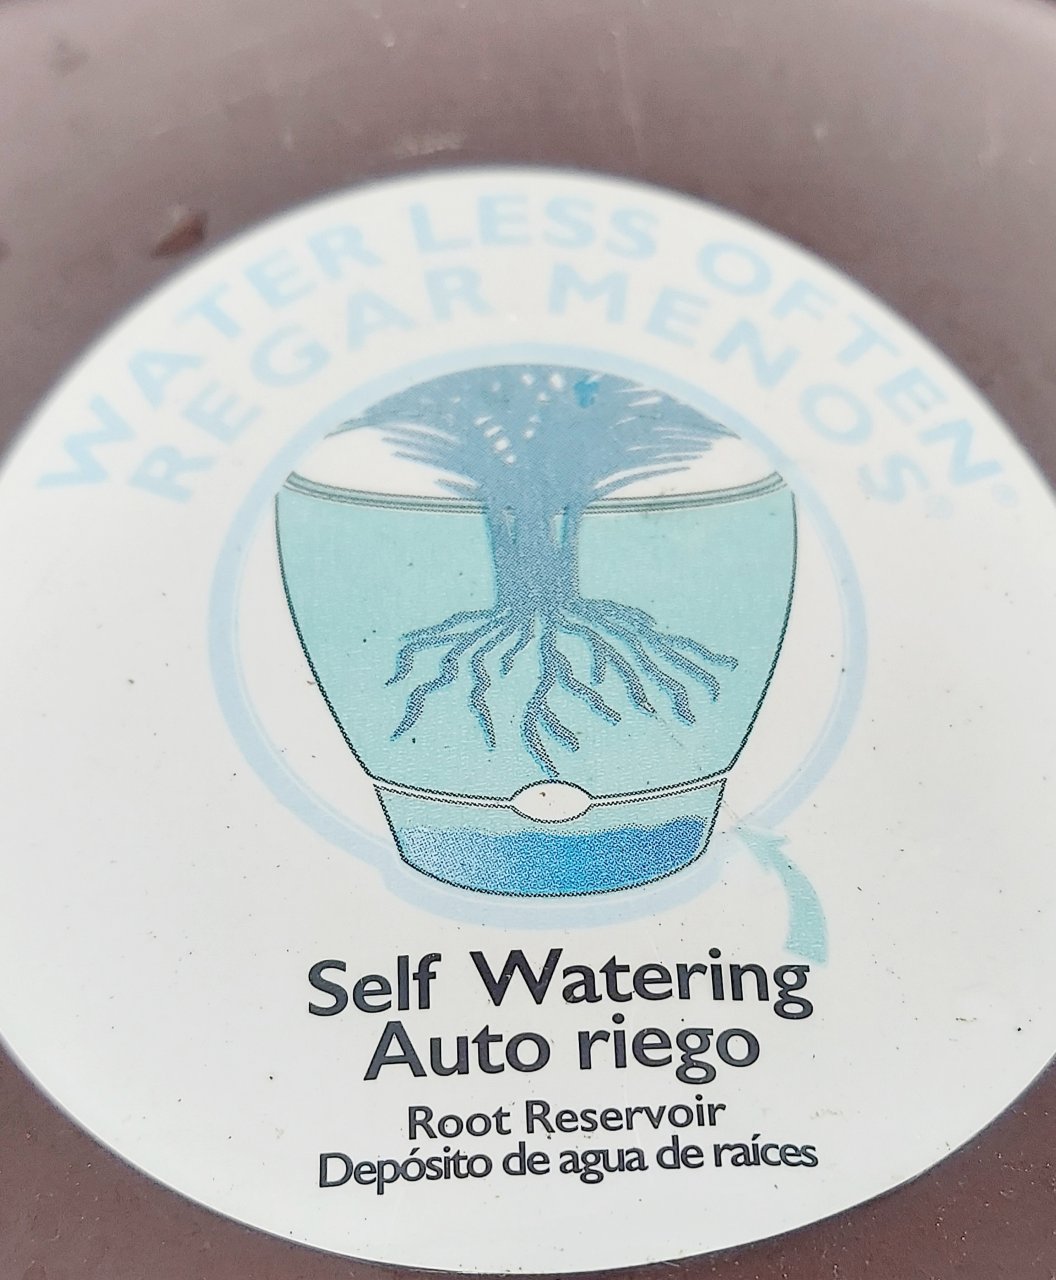
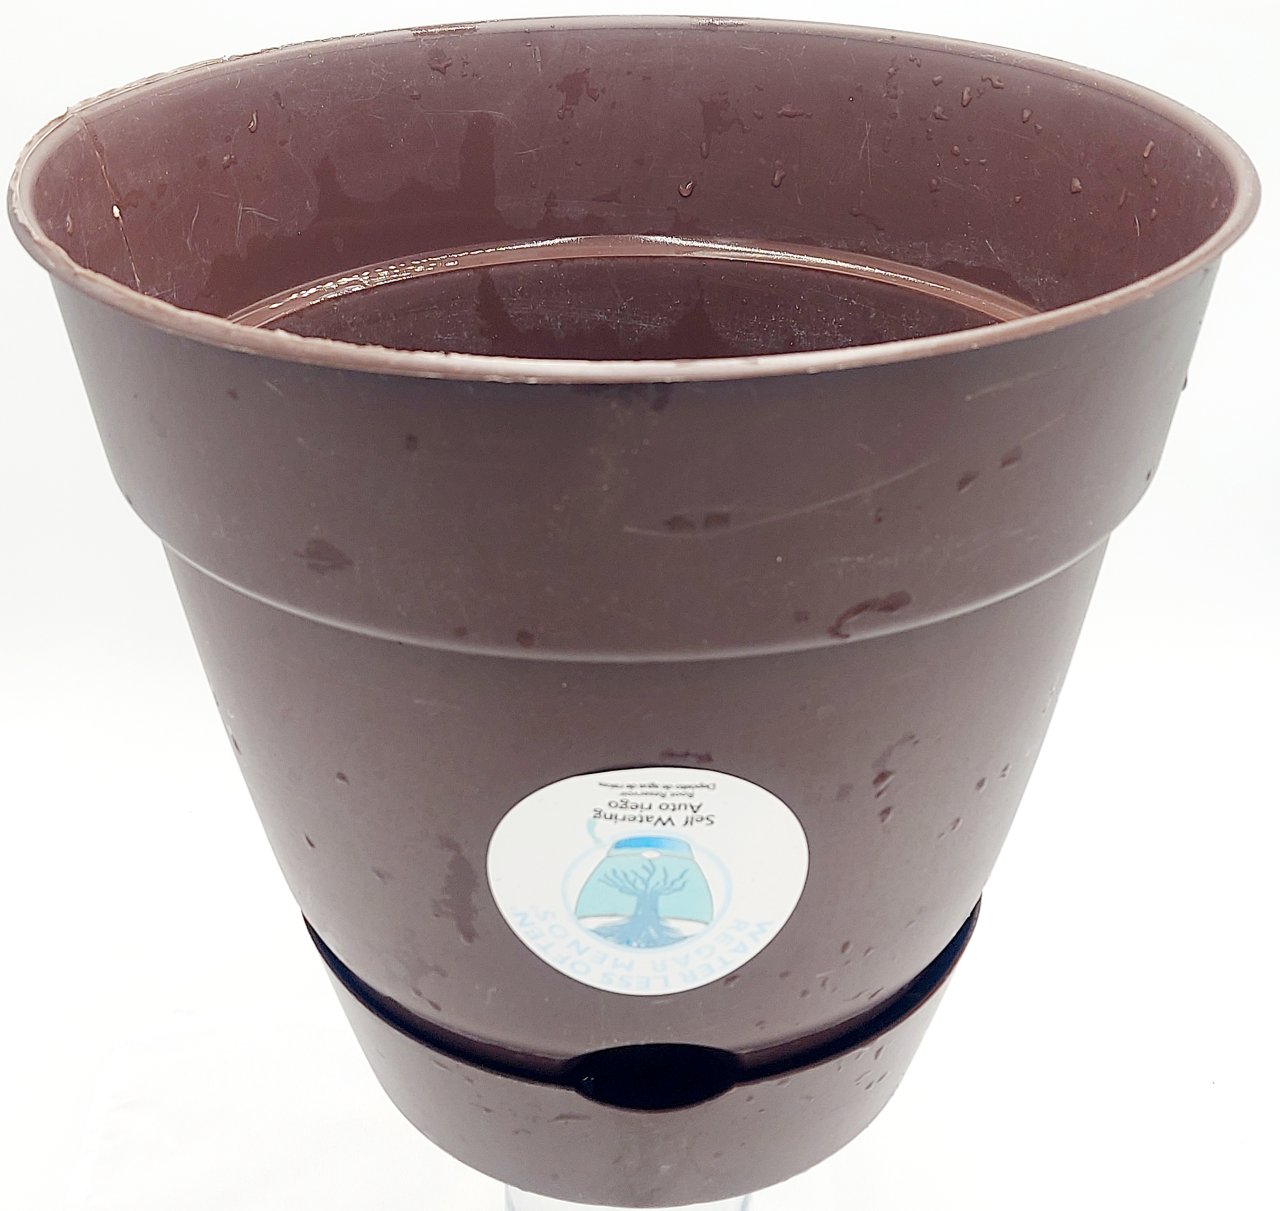
SIP Club - Getting Hydro/Coco Results In A Soil Based Medium
- Thread starter Azimuth
- Start date
ReservoirDog
Well-Known Member
My current best practices for running my 10 outdoor veggie SIPs for two years, and my current indoor 420 run, is to either plant seed directly into a SIP that has a 1/4-1/3-full SIP reservoir, or start in a small grow bag first. To direct-sew water seed in once, but only once as this reduces overall moisture level but preserves the moisture gradient, and do not refill reservoir past 1/3 full at least before Nodes 3 -5 have grown. A cloche can be deployed if you struggle to maintain above 65% RH around your large pots. I prevent seedling stretch by having a bright light up in their faces at moment they break soil, but, for this and for other reasons listed below, I do not direct-sew cannabis but rather have developed a SIP-hybrid seedling program I follow.Thanks, Em!
I just plant the seed into its final container but I think it's best not to get the media too moist at first. Doing so makes the plant droopy and with that 'overwatered' look. I find it takes 2-3 weeks for any new plant to get adjusted to these things and I like to start seedlings or newly planted clones in the final pot but treat it like any other pot, ie lightly watered from above to let the plant get established.
One could start them off in a smaller pot and then transplant but then the 2-3 week clock starts and so I like to start them in their final pot. Once they get established I water thoroughly from above one time to get the wicking process started and then move on to mostly bottom watering through the fill tube.
The roots these things produce are mostly the small feeder roots so time spent in a smaller pot building the larger water seeking roots is essentially wasted since the plant won't need them in the SIP. I figure I'd rather start them out working on the roots they will be using right off.
But, I'm with you. Planting a seed in an already moist pot seems to take them a bit of extra time to get established.
This is my go-to, most recommended method: I plant germ'd seed into a perforated, non-woven, cloth nursery bag about 4-5 inch diameter and 8 inches deep (you can customize depth by folding down the edge or cutting). Placed in a cup or bowls these can be lightly bottom watered to establish a moisture gradient from day one to ensure a plant's hydrotropic root development response immediately (this simply means that a plant chooses different root types and layouts based on the moisture level at various depths, just as it does in nature where moisture gradients are the norm). This, smaller, "pot" size gives you much more finite control over this moisture gradient and can make it easier to temporarily place your seedlings in ideal high-RH environments if your veg space struggles.
As a breathable cloth pot, these 'mini-smart pots' encourage dendritic root formation - that is, air pruning and subsequent branching off from the pruned root by a new root, as opposed to the constant curling and wrapping undertaken when they meet the plastic borderline of a traditional pot.This has been scientifically been shown to improve plant health, reduce veg times and increase yields. I like how easily this setup can be bottom watered, allowing the plant to take advantage of its genetic disposition favouring a moisture gradient between the pot's wetter bottom and the soil's drier surface, preventing the necessity of growing a root 'ball' with feast or famine traditional container grow methods.
After 3-5 nodes exist, drop the seedling, still in the perforated cloth bag, into ready-made hole in SIP with the reservoir filled no more than 1/2, preferably 1/3 only but if your res is small and you fear it emptying and dry-out before you can next water, a little extra over 1/3 full should be ok. We want the plant to recognize the moisture gradient of our SIP and such gradients are more pronounced and noticeable to young roots when the reservoir is initially kept under 1/2 full. This is only for a few days to a week. I add my mycs, frass, and fulvic acid, all activated with sprayable beneficial microbes, at the time of transplant. I renew the bennies and fulvic weekly with a small drench two weeks after transplant and every week hence. In my personal experience this has worked better, leading to a larger plant, more quickly than either direct sewing or traditionally watered (draught'n'drown) seedlings.
- Thread starter
- #23
I've long maintained that SIPs are probably the ideal pot set-up to use for autos for most growers since it makes proper watering automatic. Looking forward to you proving that true!They're autos, so they should veg 4-5 weeks. If things go well, I have some space opening in tent #2 shortly where I can move 2 plants to.
Perhaps in January or February I'll see if I can fill an entire tent with 1 plant under a SCROG and a SIP. The Tropicana Cookies Purple Auto from @Expert Seedbank seems like a great candidate. She stretches like crazy and yields great too. It looks like they redid the write up on her. I am almost certain that when I bought it, the THC claims we're 20+. They've since decreased the projected THC, but all I can say is that it kicks like a mule. It's probably the hardest hitting strain I've grown in 8 years. If it's truly not the THC content that drives her, it's all about the terp profile.

- Thread starter
- #24
Thanks for this RD. I guess you've stated this before in your thread, but it seems like we are more in synch with small plants than I thought. The bottom line seems to be less moisture at the beginning until a few roots get established can speed the adaptation period for the roots to form those that benefit from our soil mixes that stay more moist than is typical for most growers.My current best practice for running my 10 outdoor veggie SIPs for two years, and my current indoor 420 run, is to either plant seed directly into a SIP that has a 1/4-1/3-full SIP reservoir. Water seed in once, but only once as this reduces overall moisture level but preserves the moisture gradient, and do not refill reservoir past 1/3 full at least before Nodes 3 -5 have grown. A cloche can be deployed if you have rh struggles around these large pots. I prevent seedling stretch by having a bright light up in their faces at moment they break soil, but, for this and for other reasons listed below, I do not direct-sew cannabis but rather developed a SIP-hybrid seedling program I follow.
This is my go-to, most recommended method: I plant germ'd seed into a perforated, non-woven, cloth nursery bag about 4-5 inch diameter and 8 inches deep, (you can customize depth by folding down the edge or cutting) that can be lightly bottom watered to help establish that plant's hydrotropic response to a moisture gradient from day 1. This, smaller, "pot" size gives you much more finite control over this moisture gradient and the surrounding environmental conditions, esp. RH%. As a breathable cloth pot, these mini-smart pots encourage dendritic root formation (that is, air pruning and subsequent branching off from the pruned root of a new root, quickly and efficiently developing root mass) but can also easily be bottom watered, allowing the plant to take advantage of its genetic disposition to a moisture gradient between pot's wetter bottom and soil's drier surface, and prevents the necessity of growing a root 'ball' with feast or famine traditional container grow methods.

After 3-5 nodes exist, drop the seedling, still in the perforated cloth bag, into ready-made hole in SIP with reservoir filled no more than 1/2, preferably 1/3 but if your res is small and you fear it emptying before you can next water, a little extra over 1/3 full should be ok. We want the plant to recognize the moisture gradient of our SIP and such gradients are more pronounced and noticeable to young roots when the reservoir is initially kept under 1/2 full. This is only for a few days to a week. I add my mycs, frass, and fulvic acid, all activated with sprayable beneficial microbes, at the time of transplant. I renew the bennies and fulvic weekly with a small drench two weeks after transplant and every week hence. In my personal experience this has worked better, leading to a larger plant, more quickly than either direct sewing or traditionally watered (draught'n'drown) seedlings.
Good stuff.
- Thread starter
- #25
*** DIY SIP Designs ***
For those interested in building their own SIP to experiment with I thought I'd offer some simple design options. Keep in mind there are several different ways to build these things and I've tried a few and they all seem to produce about the same end result: great plants.
There are a few simple design principles that all of the various designs share, and essentially those are soil above, a water reservoir below and an air gap in between, and typically a fill tube to allow you to by-pass the soil to fill the reservoir. How those things are accomplished is up to the builder. I make the air gap/water reservoir by establishing a void in the bottom of the container that soil is packed densely around which forms the wicking mechanism to kept the rest of the soil in the pot constantly moist, but on a bit of a gradient, wetter at the bottom, less so as you move up the pot. This is similar to what is found in nature since water drops in the soil due to gravity so there is usually more water the deeper you go.
I've built them in various sizes ranging from Solo Cups, to 1L take-out containers, to 2 and 5 Gallon (8 and 20L) buckets and up to 17 gallon (65L) tubs. Here's how I do them:
Solo Cups
This version is a bit of a compromise since creating the void is hard to do with such a small container so it's built a bit differently than the others.
For this size I make a small hole with a soldering iron or drill bit about 1 inch/25mm up the side from the bottom of the cup.
Then I put either small hydroton clay balls or perlite/pumice in the bottom up to a level about 1.75"/45mm and then top with soil. Since the hydroton/perlite layer is higher than the overflow hole, there is a bit of an air gap satisfying the design requirement. There is not as much air as in the other design options, but as I said, this one is a bit of a compromise.
Given the lack of real estate to work with I don't even bother with a fill tube, but rather water by sitting the solo cup in a slightly larger tub of water to fill the reservoir from below through the overflow hole. I usually put a second hole slightly above the overflow hole which seems to assist with filling the reservoir more quickly by allowing a vent for the air being displaced by the increasing water level.
That's it. If you use clear cups you'll be able to see the roots develop but be sure to slide it into an opaque cover cup since the roots won't develop as well if exposed to light.
1L Take-out Container
This is probably the smallest size I would take to flower but is large enough for a respectable harvest (relatively speaking).
For this one you'll need two containers. The first is the 1L container and the second is some sort of small food grade plastice cup/container where the diameter of the rim is slightly smaller than the bottom of the 1L container. I use small single serving applesause containers that fit perfectly. This will make the reservoir void by making a bunch of small holes in it and placing it upside down in the bottom of the 1L container.
I make an overflow hole in the 1L container about 1 inch/25mm up from the bottom but make sure it is at least 1/2"/12mm below the height of the cup that makes up the void to ensure I have an air gap. Up to double that amount is preferable.
Then I make a bunch of small holes in the smaller container (I use a soldering iron) and place it upside down in the 1L container. Put your soil mix in so that it surrounds the inner cup but try to leave a void between it and the overflow hole to help with air flow. I've built this size both with and without a fill tube so that's a preference decision.
Be sure to pack the soil around the inner cup firmly to help with the wicking process, but fill the rest of the container with soil firmed like you would for a normal pot.
2 Gallon/8L or 5 Gallon/20L Buckets
Same basic design as the 1L version, just larger containers. I get my buckets from Lowes in the States because they are a deep, dark blue which helps shade the roots from light better than lighter or white colored ones.
For the container that creates the void I've used food grade plastic food containers like salad bowls or food storage containers as well as pasta strainers. Same rules here, try to find a container where the upper rim is slightly smaller than the lower width of your bucket.
I do use fill tubes for these so first I make a larger hole in the bottom of the inner container (which will be on top when we flip it to install it) that is slightly larger than my fill tube. I use the white PVC plumbing pipe (1/2"/12mm) and make my hole with a 7/8"/22mm hole saw which is the outer diameter of the pipe.
I actually make two holes, one each on opposite sides of this inner container. Then I use two fill tubes with the idea that there will be a better chance at air flow with this set-up than there would be with a single entry to a cave-like void you'd get with a single fill tube. No science to back this, I just feel like it is a better design.
I also like to have my fill tube stop just after entering the void to ensure air flow even when the reservoir is full so I cut off a small stub piece from the fill tube and attach it back with a coupler which holds it up when installed since the coupler is a larger diameter than the pipe and won't fit through my hole. ResDog has his fill tubes bottom out in the reservoir but makes holes all along its length to accomplish the same thing.
Then I make my overflow hole in the outer bucket making sure it is at leat 1"/25mm below the top of my void container for the air gap, and then make a bunch of small holes in the inner container to try to maximize air and water flow from this inner cup into the surrounding soil. I also make holes on the bottom (what will be the top) of the inner cup to get air to the roots once planted.
Then fill the pot with your soil mix and be sure to pack the soil around the inner cup firmly to help with the wicking process, but fill the rest of the container with soil firmed like you would for a normal pot.
I use a funnel I cut from the top of a water bottle to make pouring water into the fill tube a bit easier. I use a plumbing fitting (called a bushing) to attach a 1" coupling to the 1/2"pipe and the neck of the bottle slides into it nicely. I'm right handed so I like to position the fill tube just to the right of my overflow hole. This makes it easier to watch for run-off as I'm filling the reservoir than it would if it were on the oppositie side of the bucket.
17G/20L Plastic Tub
This design is a bit different from the buckets. The tubs I used for my outdoor vegetable garden are rectangular and I use perforated landscaping drainage pipe layed flat to make the reservoir/air gap. I used 3 sections of 4"/100mm pipe that fit perfectly laid side-by-side but 2 sections of 6"/150mm pipe would work just as well and give you a larger reservoir.
I capped the pipes off with the cover that came with my 1L containers to keep soil out of the pipes. I cut the cover slightly so it would snap between the ribs of the drainage pipe. Then I made my overflow hole about 1"/25mm below the top of the pipe.
Next I installed a 1"/25mm fill tube by cutting a hole in one of the pipe sections and then filled around the pipes with my soil mix being sure to pack it well around the pipes to ensure good wicking. The rest of the tub was filled with my mix firmed like I normally do.
-Or- If using cloth pots, you can simply lay them on the soil that covers the pipes. I'd probably put a good inch or two of soil over the pipes to account for any settling, although there shouldn't be much of that if you've packed it well.
*******
So, that's about it. pretty simple but very effective.
ResDog and Emilya use a slightly different design for their tubs and hopefully they'll post their versions to show some options for those wanting to build their own.
And finally, here's another design option which is a video posted originally by @GreenFingaz which shows a common version found on YouTube:
CBDMed
Well-Known Member
Hi Azi. I am not sure how much help I will be. I am still trying to learn the basics.
(I was planning on reading more than posting, but you said to post...)
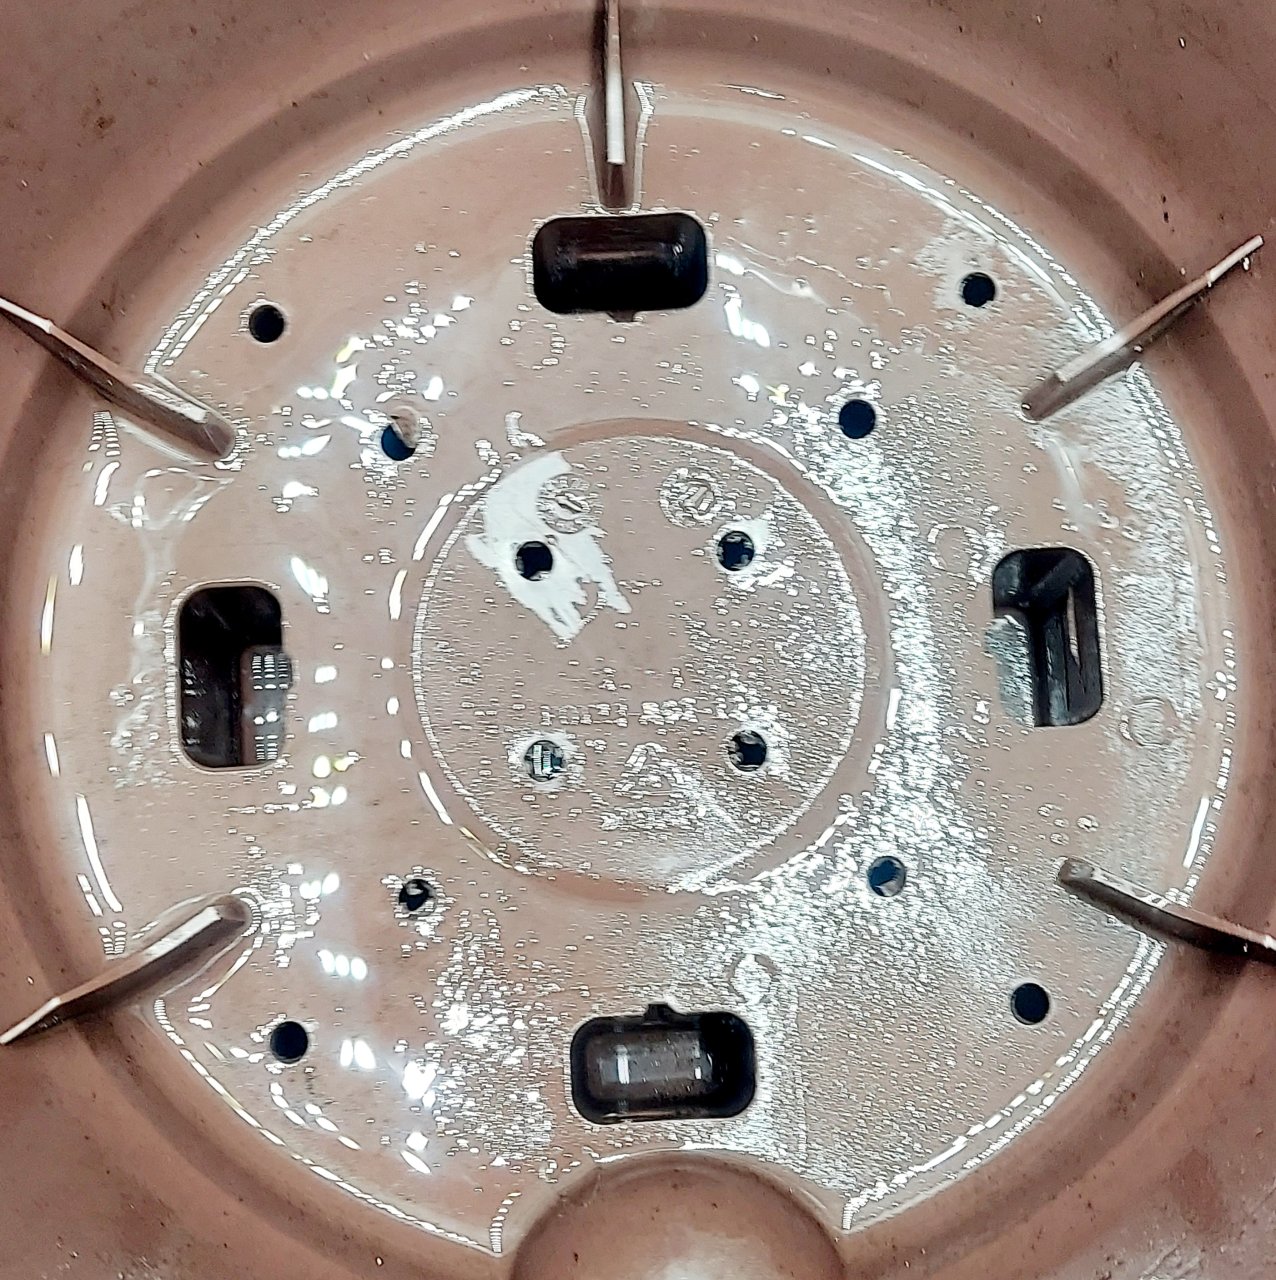
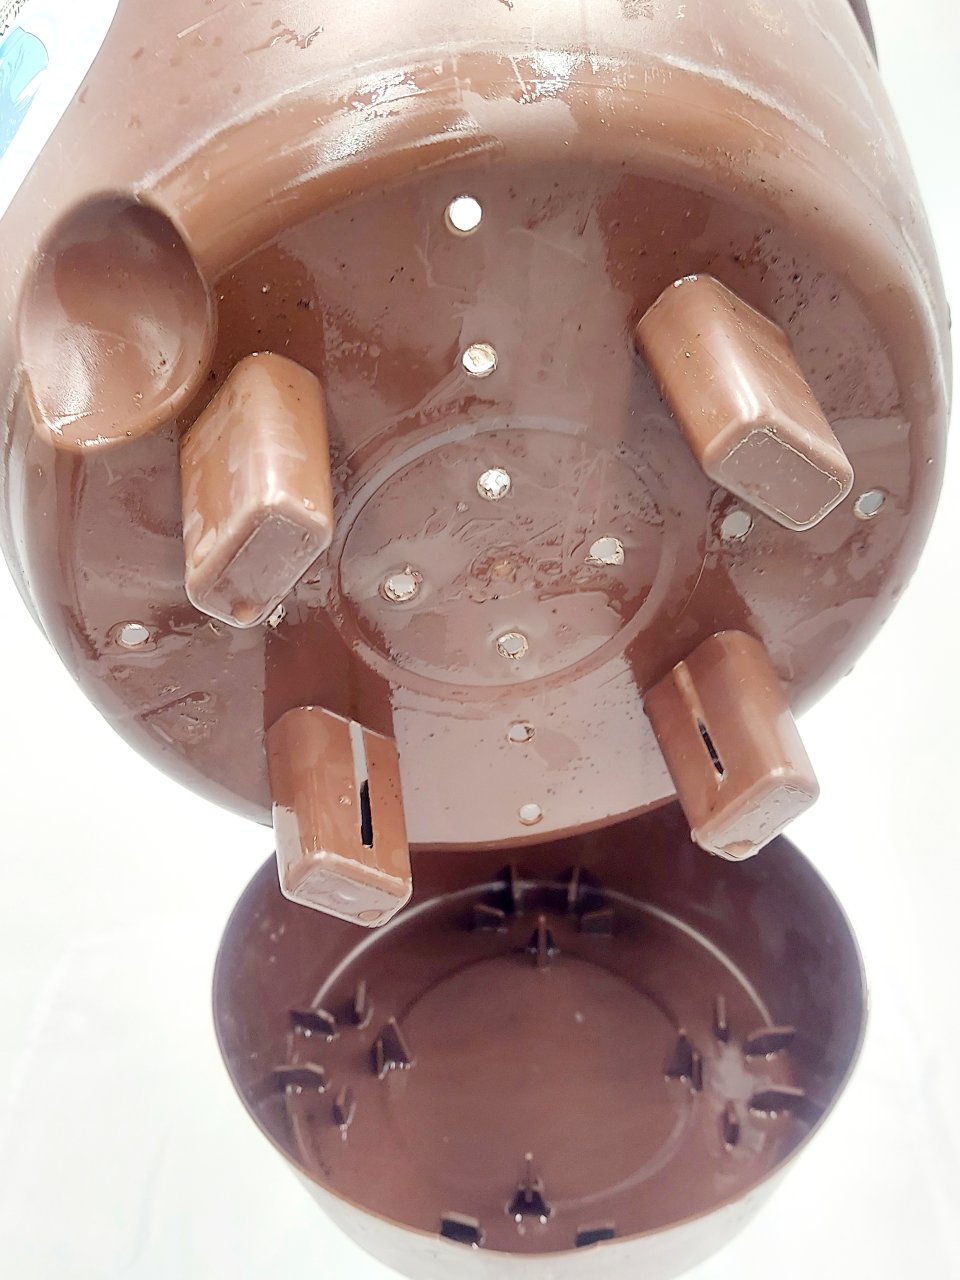
I am basically using the standard commercial 5g SIPs that @Buds Buddy is using. (He heard about them from @Krissi Carbone.)
The short version is I am using Subcool's supersoil mixed with an extra 15% worm castings, and then 50% rice hulls, for extra aeration.
(@Bill284 was talking layers of Perlite, and then @ReservoirDog said something about massively boosting aeration that clicked...so I added maybe 15% worm castings, and then mixed that 50-50 with rice hulls, and recooked.
So I have the 5g SIPs filled with it this 50-50 mix.
Then I dug out about a Solo Cup's worth of supersoil, and backfilled with a local organic soil mix, and sowed direct.
The seeds are all auto fems at this point.
The seeds came up 20 for 20, despite the fact that I messed up, and the room was way too cold!
@InTheShed advised putting everything on heat mats, and eventually I had to dig for five of them, but they all came up.
Six are still on daily hand sprayer bottle, but I just gave the first real feeding today to the other 16.
Eventually I want to transition to a rooftop greenhouse, but at the moment I am inside (and I am appreciating the extra indoor warmth!).
I have a lot of work to do to the nursery room.
I need to hang a light bar soon.
In the meantime, the Imperial Walkers will have to hold the lamps up.

One question for all you experts would be, before I got my current lamps, I made a purchasing mistake, and got some funky multi-color lamps. Are they any good?
Or is it better to sell those, and order more of the regular white kind?
(Sorry for all the newbie questions! I am still a noob.)

(I was planning on reading more than posting, but you said to post...)
I am basically using the standard commercial 5g SIPs that @Buds Buddy is using. (He heard about them from @Krissi Carbone.)
The short version is I am using Subcool's supersoil mixed with an extra 15% worm castings, and then 50% rice hulls, for extra aeration.
(@Bill284 was talking layers of Perlite, and then @ReservoirDog said something about massively boosting aeration that clicked...so I added maybe 15% worm castings, and then mixed that 50-50 with rice hulls, and recooked.
So I have the 5g SIPs filled with it this 50-50 mix.
Then I dug out about a Solo Cup's worth of supersoil, and backfilled with a local organic soil mix, and sowed direct.
The seeds are all auto fems at this point.
The seeds came up 20 for 20, despite the fact that I messed up, and the room was way too cold!
@InTheShed advised putting everything on heat mats, and eventually I had to dig for five of them, but they all came up.
Six are still on daily hand sprayer bottle, but I just gave the first real feeding today to the other 16.
Eventually I want to transition to a rooftop greenhouse, but at the moment I am inside (and I am appreciating the extra indoor warmth!).
I have a lot of work to do to the nursery room.
I need to hang a light bar soon.
In the meantime, the Imperial Walkers will have to hold the lamps up.
One question for all you experts would be, before I got my current lamps, I made a purchasing mistake, and got some funky multi-color lamps. Are they any good?
Or is it better to sell those, and order more of the regular white kind?
(Sorry for all the newbie questions! I am still a noob.)
So here's my pots, the generic good ol ones lol
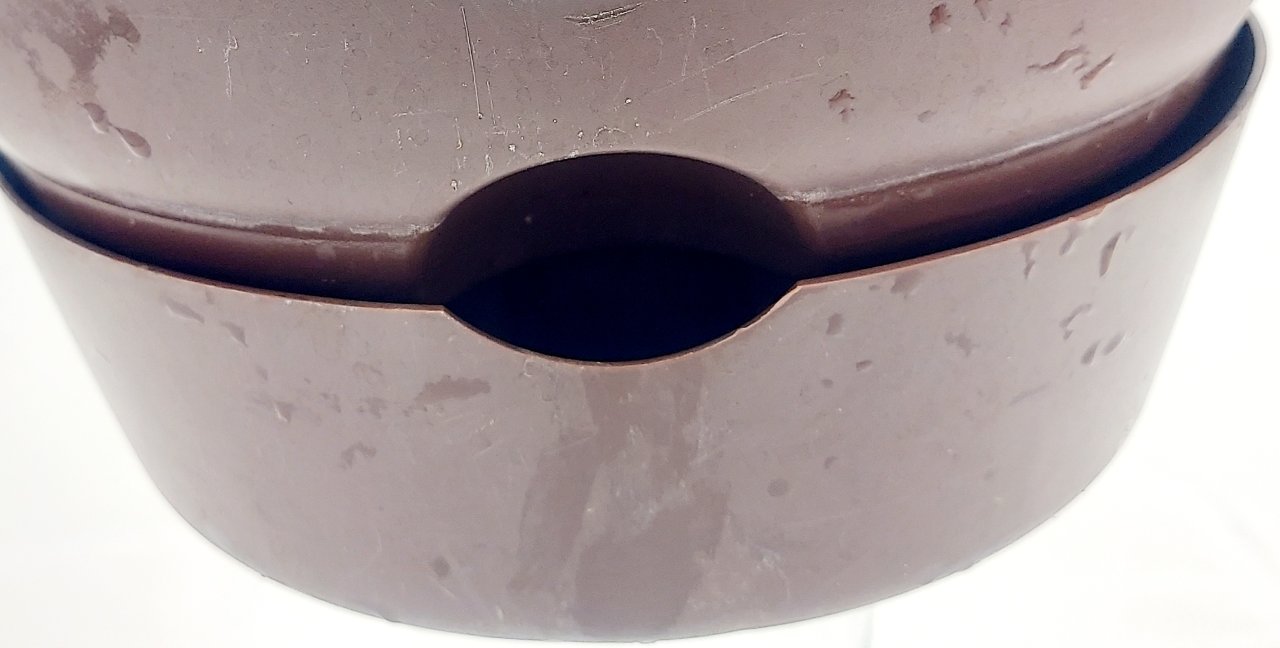
I don't start off in them, they begin in 5.5 inch pots with circular drainage at the bottom


They go from one to the other within 10 days or less.
**8 days of 'SIP' growth between these last 2 photos**

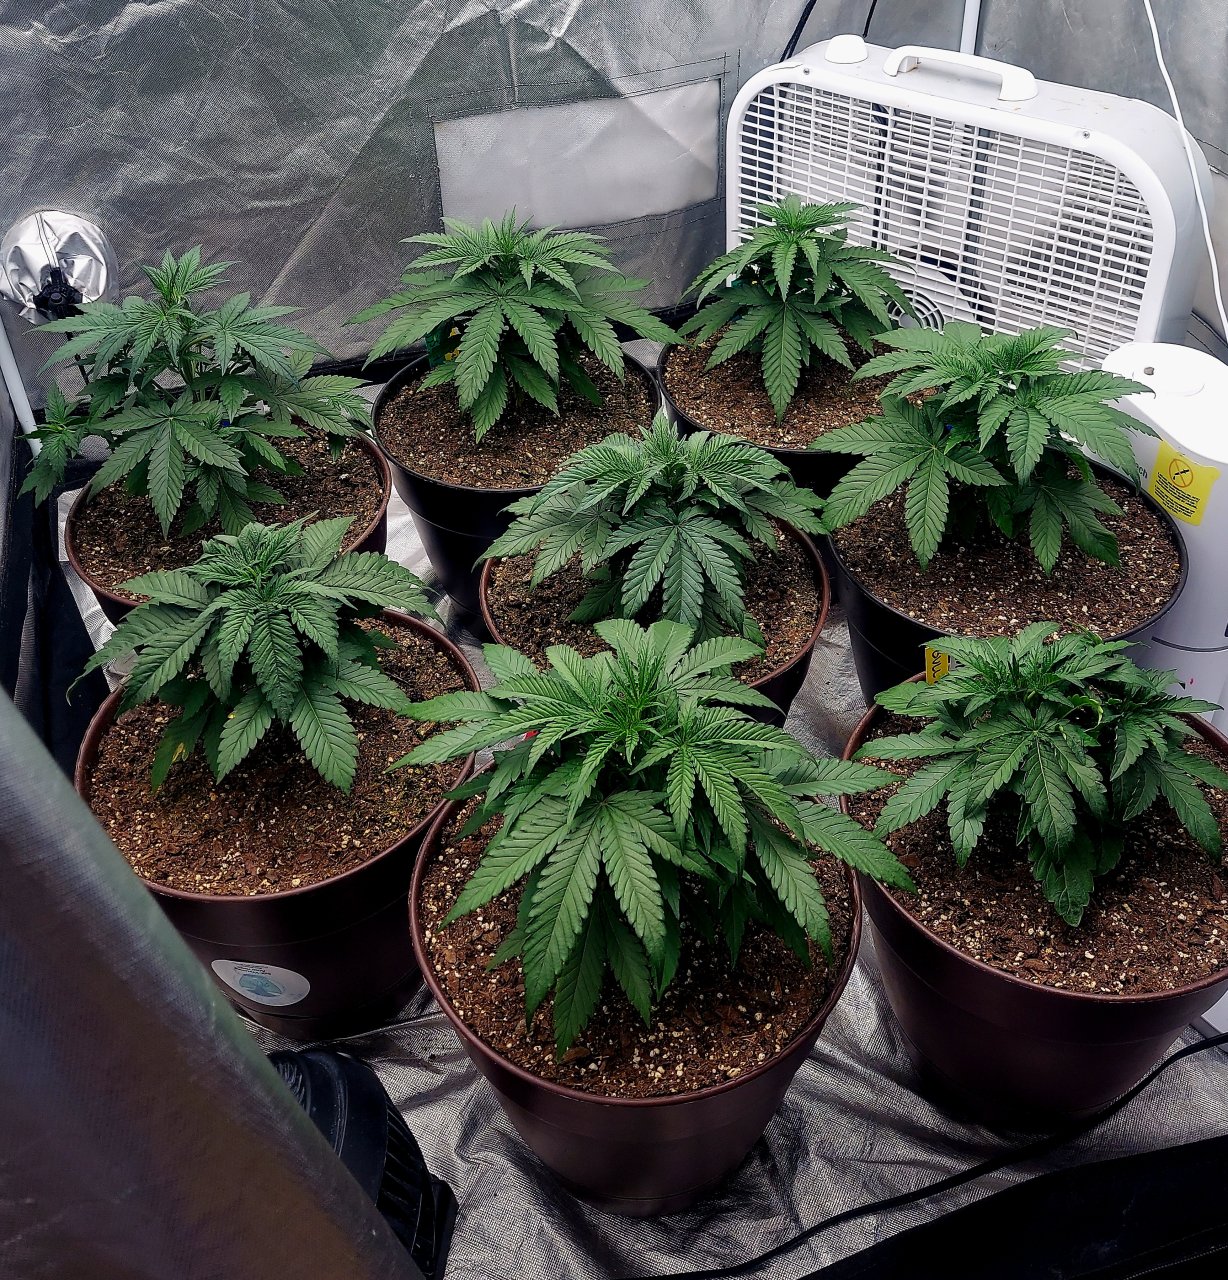
These are currently in 3gl but like I said a page ago, they're gonna move to the 5gl next week, which will be their final home.
I don't start off in them, they begin in 5.5 inch pots with circular drainage at the bottom
They go from one to the other within 10 days or less.
Cultiuana CT-720 Winter Grow 2022-2023
Second feed morning, Days 10/11
Last @Prescription Blend Seedling Feed
Last @Prescription Blend Seedling Feed
**8 days of 'SIP' growth between these last 2 photos**
Cultiuana CT-720 Grow Journals
Cultiuana CT-720 Winter Grows 22-23
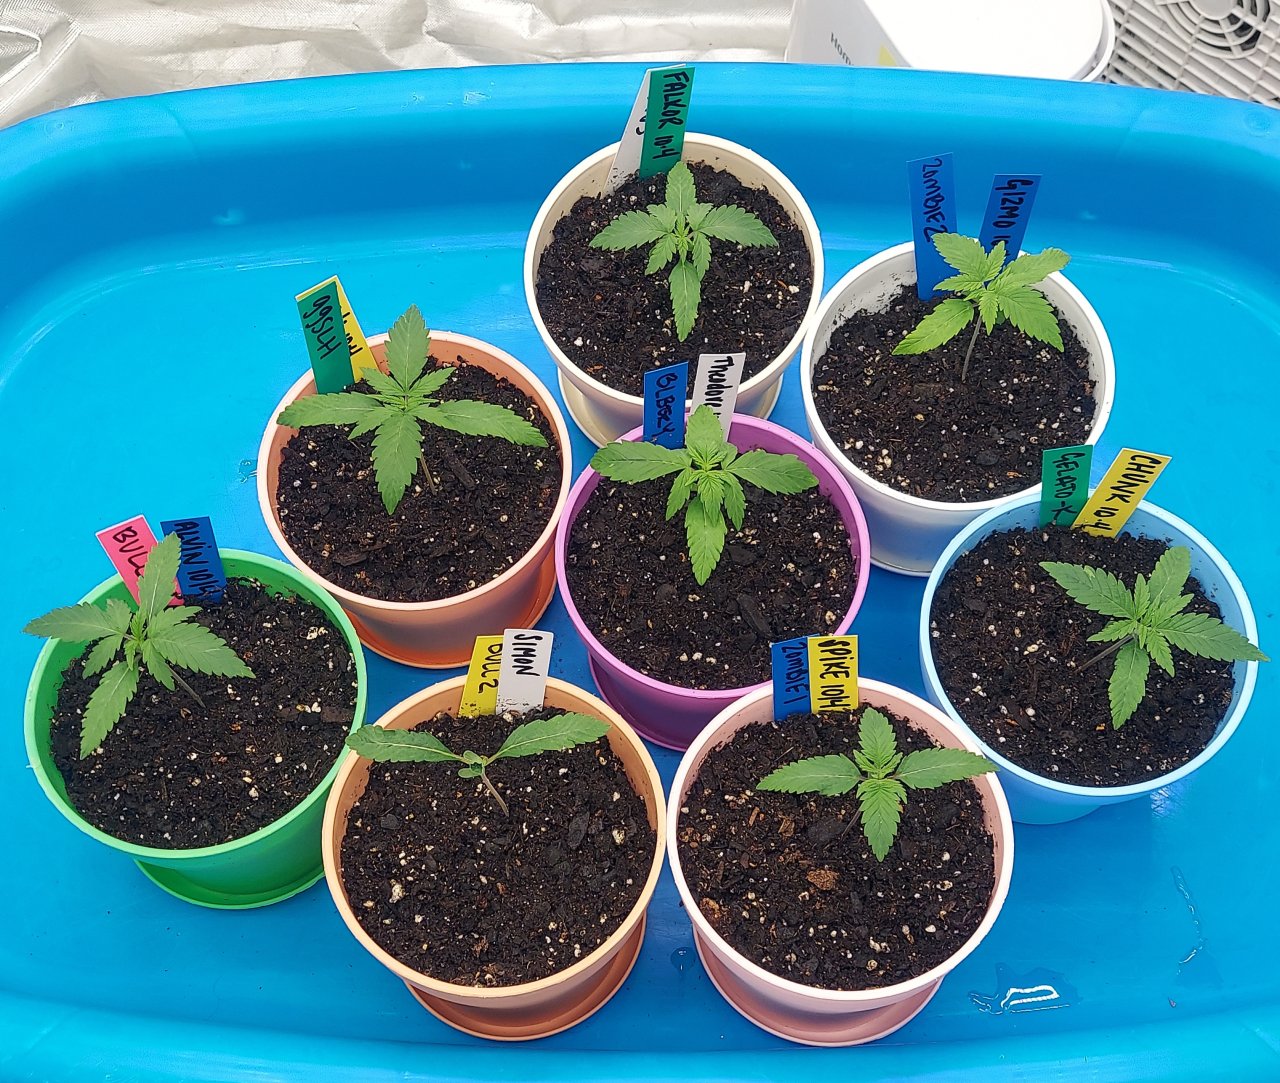
Assorted Seedlings, 2 days post uppot
Days 14/15
Assorted Seedlings, 2 days post uppot
Days 14/15
Cultiuana CT-720 Grow Journals
That's a Load of Bull Split Tent Grow
Alvin, Simon, Theodore +5
Big Bull Photos/Blueberry Auto...
Alvin, Simon, Theodore +5
Big Bull Photos/Blueberry Auto...
These are currently in 3gl but like I said a page ago, they're gonna move to the 5gl next week, which will be their final home.
- Thread starter
- #28
I'm not sure how Bill's layering method would work in a SIP. Water is said to not travel as well through homogeneous but different material layers. The Super Soil as a general mix should work great, though.The short version is I am using Subcool's supersoil mixed with an extra 15% worm castings, and then 50% rice hulls, for extra aeration.
(@Bill284 was talking layers of Perlite, and then @ReservoirDog said something about massively boosting aeration that clicked...so I added maybe 15% worm castings, and then mixed that 50-50 with rice hulls, and recooked.
Thanks, Krissi!So here's my pots, the generic good ol ones lol

I think it will be helpful for people to see exactly what you're talking about.
CBDMed
Well-Known Member
Yeah, sorry, I was trying to be brief, and I suppose clarity suffered.I'm not sure how Bill's layering method would work in a SIP. Water is said to not travel as well through homogeneous but different material layers.
Yeah, Bill uses layers.
When I was checking out Bills parfait and layering system, @ReservoirDog suggested just mixing I think 60/40 soil/perlite to boost aeration.
Then I checked my supersoil, and it sat there like a lump. (Complete fail on the Tilth Test.)
So the light bulb came on, and I thought, "I will add some worm castings, and then cut 50-50 with rice hulls."
I wasn't sure if everyone wanted all of those details, haha.
I am hoping! (It will be nice to have too much bud again!! Lol.)The Super Soil as a general mix should work great, though.
Yeah, those pots look good!Thanks, Krissi!
I think it will be helpful for people to see exactly what you're talking about.
I agree.I'm not sure how Bill's layering method would work in a SIP. Water is said to not travel as well through homogeneous but different material layers. The Super Soil as a general mix should work great, though.
No problem, been meaning to come over and post up here. I'll be showing the transplant and roots and all that jazz come next week.Thanks, Krissi!
I think it will be helpful for people to see exactly what you're talking about.
I think keep the castings to 20%. I love castings btw. Also seabird and bat guano and c/o @Bode, I think I'm going to be adding bonemeal to all transplant soil addendumsYeah, sorry, I was trying to be brief, and I suppose clarity suffered.
Yeah, Bill uses layers.
When I was checking out Bills parfait and layering system, @ReservoirDog suggested just mixing I think 60/40 soil/perlite to boost aeration.
You do lolThen I checked my supersoil, and it sat there like a lump. (Complete fail on the Tilth Test.)
So the light bulb came on, and I thought, "I will add some worm castings, and then cut 50-50 with rice hulls."
I wasn't sure if everyone wanted all of those details, haha.
They're great. I'm in love with them. Going to Home Depot tomorrow to grab 5 more 5glI am hoping! (It will be nice to have too much bud again!! Lol.)
Yeah, those pots look good!
Why did I just see this weird light's pic? That's weird. What else you got over there? I doubt that has any true wattage past 50 unfortunatelyHi Azi. I am not sure how much help I will be. I am still trying to learn the basics.
(I was planning on reading more than posting, but you said to post...)
I am basically using the standard commercial 5g SIPs that @Buds Buddy is using. (He heard about them from @Krissi Carbone.)
The short version is I am using Subcool's supersoil mixed with an extra 15% worm castings, and then 50% rice hulls, for extra aeration.
(@Bill284 was talking layers of Perlite, and then @ReservoirDog said something about massively boosting aeration that clicked...so I added maybe 15% worm castings, and then mixed that 50-50 with rice hulls, and recooked.
So I have the 5g SIPs filled with it this 50-50 mix.
Then I dug out about a Solo Cup's worth of supersoil, and backfilled with a local organic soil mix, and sowed direct.
The seeds are all auto fems at this point.
The seeds came up 20 for 20, despite the fact that I messed up, and the room was way too cold!
@InTheShed advised putting everything on heat mats, and eventually I had to dig for five of them, but they all came up.
Six are still on daily hand sprayer bottle, but I just gave the first real feeding today to the other 16.
Eventually I want to transition to a rooftop greenhouse, but at the moment I am inside (and I am appreciating the extra indoor warmth!).
I have a lot of work to do to the nursery room.
I need to hang a light bar soon.
In the meantime, the Imperial Walkers will have to hold the lamps up.
One question for all you experts would be, before I got my current lamps, I made a purchasing mistake, and got some funky multi-color lamps. Are they any good?
Or is it better to sell those, and order more of the regular white kind?
(Sorry for all the newbie questions! I am still a noob.)
CBDMed
Well-Known Member
Haha, hi Krissi!Why did I just see this weird light's pic? That's weird. What else you got over there? I doubt that has any true wattage past 50 unfortunately
I was trying to determine if this was a real grow light, or if I needed to replace.
Sounds like I might need to replace them.
I will try to keep the wc down (although I love the flavor!).
Thanks for all the help!
I mean I do too. I just don't know how super soil works and I don't want you toughening it up too much. Maybe start with 20% and then you can move up? You can always add some more and do toppings with them once a month like I do. I call them my kids booster shotsHaha, hi Krissi!
I was trying to determine if this was a real grow light, or if I needed to replace.
Sounds like I might need to replace them.
I will try to keep the wc down (although I love the flavor!).
Thanks for all the help!
Mind if I tag along @Azimuth
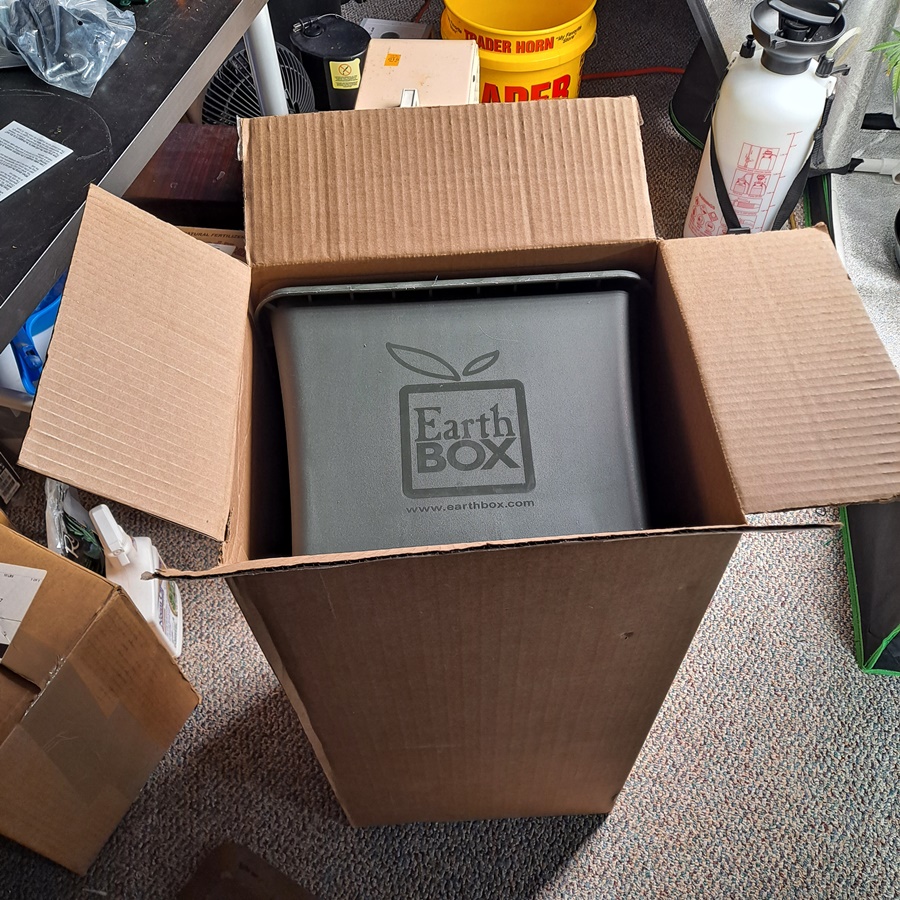
I won't be starting until March / April time frame, but I have an Earthbox I bought a couple years ago and still haven't used it. I had forgotten about it until read the intro's today. I was going to try growing soon tomatoes over the winter, but never got around to it.
The Earthbox I have is about 29" D x 13.5" W x 11" H and I believe I can get a sizable lady in it.
Stay safe, and grow well my friend,
Tok..
- Thread starter
- #35
Happy to have you. And an EarthBox! Oh yeah. That's a great option as well. Check out this video from BAS from last season where he grew a couple of plants in two of his...Mind if I tag along @Azimuth
I won't be starting until March / April time frame, but I have an Earthbox I bought a couple years ago and still haven't used it. I had forgotten about it until read the intro's today. I was going to try growing soon tomatoes over the winter, but never got around to it.
The Earthbox I have is about 29" D x 13.5" W x 11" H and I believe I can get a sizable lady in it.
Stay safe, and grow well my friend,
Tok..
- Thread starter
- #36
Maybe give a 17 gallon tub a try. With the 6" drainage pipe style described below, the reservoir won't be 17 gallons, probably half that but you could probably use ResDog's design with the false floor and 'footings' he describes to increase that even more. Hell, it would probably work fine using the entire 17 gallons as a reservoir, cutting a hole for the footing in the lid that would also support the pot/plant and another smaller 1" hole in a corner for the fill tube. Make an overflow hole an inch from the top and go to town.She's now on day# 50 and has almost filled her 32x32 tent. She is drinking 3+ liters every day, and I have to give her water twice a day to keep the res from going dry. Next time I'm going to look for a SIP with a bigger res")
I think ResDog says he gets several days to a week between waterings so maybe a full 16-17 gallons isn't really necessary but might be fun to find out.

17G/20L Plastic Tub
This design is a bit different from the buckets. The tubs I used for my outdoor vegetable garden are rectangular and I use perforated landscaping drainage pipe layed flat to make the reservoir/air gap. I used 3 sections of 4"/100mm pipe that fit perfectly laid side-by-side but 2 sections of 6"/150mm pipe would work just as well and give you a larger reservoir.
I capped the pipes off with the cover that came with my 1L containers to keep soil out of the pipes. I cut the cover slightly so it would snap between the ribs of the drainage pipe. Then I made my overflow hole about 1"/25mm below the top of the pipe.
Next I installed a 1"/25mm fill tube by cutting a hole in one of the pipe sections and then filled around the pipes with my soil mix being sure to pack it well around the pipes to ensure good wicking. The rest of the tub was filled with my mix firmed like I normally do.
-Or- If using cloth pots, you can simply lay them on the soil that covers the pipes. I'd probably put a good inch or two of soil over the pipes to account for any settling, although there shouldn't be much of that if you've packed it well.
ReservoirDog
Well-Known Member
EDIT: I try to underline direct questions and requests for assistance on my posts to make it easier for anyone willing to help. Had forgotten to do so.They're autos, so they should veg 4-5 weeks. If things go well, I have some space opening in tent #2 shortly where I can move 2 plants to.
Perhaps in January or February I'll see if I can fill an entire tent with 1 plant under a SCROG and a SIP. The Tropicana Cookies Purple Auto from @Expert Seedbank seems like a great candidate. She stretches like crazy and yields great too. It looks like they redid the write up on her. I am almost certain that when I bought it, the THC claims we're 20+. They've since decreased the projected THC, but all I can say is that it kicks like a mule. It's probably the hardest hitting strain I've grown in 8 years. If it's truly not the THC content that drives her, it's all about the terp profile.
I've always suspected, or at least wondered, whether the 'Entourage Effect' has a great deal to do with my inference of each plant and strain's 'kick'. I've had some very plain-looking, moderately rated cultivars come along and properly light me up now and then if my memory serves. Maybe it was the moment, maybe it was some sacred combo of terps and other treasures within. I cannot say. What I am is stoked you've found a real thoroughbred and hope she gives you many generations of wonderous, glistening jars. You deserve her.
My hope is that your experience, as is my hope for everyone's participation, will help reveal and develop best practices for growing in these SIPs, but also to further verify the major differences in growth we're observing. I've had too long a time off between growing by 'traditional methods' and now, picking up years later, I went straight to DIY SIPs. (though I did build out a DWC setup, but it is still to see a harvest) After spending considerable time doing some fascinating research on these SIP methods, including hours and hours of direct interviews with exp. users from all of the weed-grow forums, my curiosity was piqued and I dove right in. However, due to the time gap between using each method, I doubt I may make accurate comparisons beyond the basics.
It is clear we can either shorten veg times with this tech, increase harvests, or potentially even both. Costs too can be profitably impacted with SIPs as the apparent 'waste' of water and feed seem to disappear completely. It appears to be an extremely environmentally responsible method as a result, a method in which, if you care to use synthetic fertigation in the reservoir as I do, uses them extremely efficiently and responsibly. The sum total use of my base fertilizer, MC 2 part fertilizer (part A and B totals combined), I project I will have used to bring 4 plants from seedling to harvest will be well under 500 grams, and all in 100 days. Autos will be likely capable of reducing both figures by 10-30%, though with a commensurate reduction in yield. Nonetheless, SIPs appear Ideal for Autos as the size they can achieve in Veg dictates harvest potential, and growing monsters quickly in Veg is the SIP superpower. I'll have accurate feed and water totals of my grow available to share at harvest in a month or so, "Lord willin' and the creek don' rise".
Aaarg! I just split one of the Mother GG4s that was about to go into The Burn Unit to flower-out. So, I'm unsure how to move forward; could use a little advice. Tie her up to close the wound and transplant same day, or tie her - it's a split at base between major branches - and give her some time to convalesce, thus taking her out of the potential plants for this run. My intent is to flower in SIPs some already matured plants grown in normal containers as members of the genetic harem of mother plants I've kept.
To explain; After recently receiving my extended license (for personal medical use) to grow more than the legally allotted four plants, I decided to begin a cloning program.
I planted out some seeds of a few strains on hand so as to have diversity for my harem. So, instead of waiting until I found the perfect plants, I figured a lot of practice and systems development was in order so I just planted out the unknown commodities in my possession simply to move the game forward.
I'm some weeks down that path now; I've two GG4s, vegged out to decent if compact size from my pruning, sitting in regular 2-3 gallon pots. I've been practising my cloning with these plants, trying to develop a reliable system using their constantly forthcoming new shoots and now, having banked their genetics, I decided it's time to grow out these matrons and move on.
I have also developed a SIP system specific to my Mother plants.
Right now my Mother-Harem consists of two GG4s, three Zkittlez, each a distinct pheno, two God's Gift, two Banana Sundae, two Master Kush and a single plant of unknown heritage but that I believe to be Cherry
 Blossom, oh and three mystery sativas of interesting provenance. Details to come.
Have you ever tested the TDS of the res water? I wonder how it would compare to runoff from a regular pot.if you care to use synthetic fertigation in the reservoir as I do, uses them extremely efficiently and responsibly. The sum total use of my base fertilizer, MC 2 part fertilizer (part A and B totals combined)
If time is a factor I would do that.Tie her up to close the wound and transplant same day,
- Thread starter
- #39
She's going to divert some energy and resources to healing the split which she should quite quickly, but that and the stress of flipping to flower at the same time is a big load. I'd probably tie it back together with a splint and give it a week before flip, but given your new abundance maybe try it all together . You know, for science!Aaarg! I just split one of the Mother GG4s that was about to go into The Burn Unit to flower-out. So, I'm unsure how to move forward.could use a little advice. Tie her up to close the wound and transplant same day, or give her some time to heal, thus taking her out of the potentials for this run.
Then you can report back and we'll all be the wiser.
The past 3 Days in the Life of my girls in SIPS, from the time of watering, 12 hours post watering and 36 hours post watering.
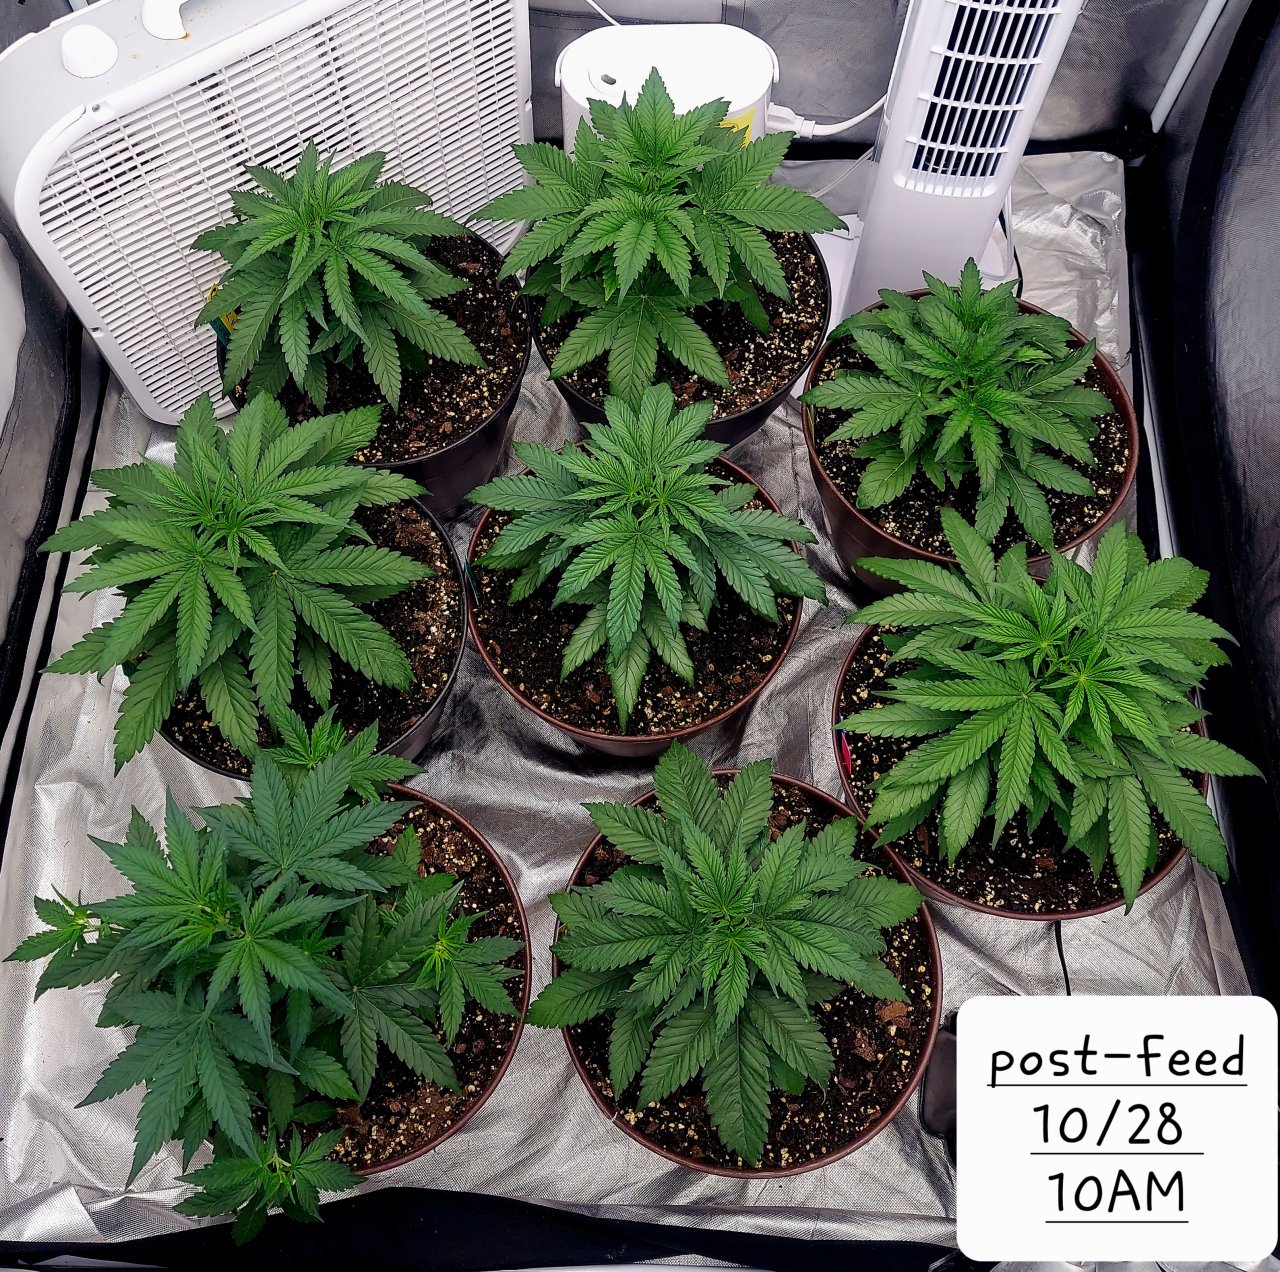
I'd say they like em friends....the growth rates are incredible in these babies
I'd say they like em friends....the growth rates are incredible in these babies
Similar threads
- Replies
- 666
- Views
- 36K
- Replies
- 399
- Views
- 50K
- Replies
- 63
- Views
- 3K
- Replies
- 95
- Views
- 3K